Instant Pot Seed Germination - A Seed Starting Shortcut!
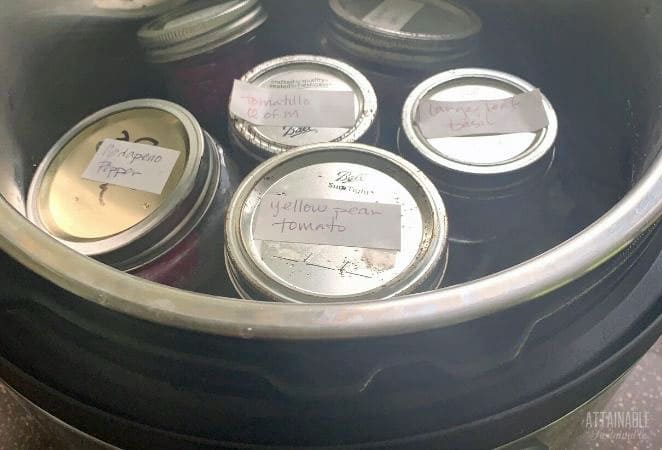
Some seeds just prefer a little more warmth than others to germinate well. Here's how to use an Instant Pot to achieve germination.
Print
Pin
Yield: 1 pot
Equipment
- Instant Pot
- Jars or upcycled portion cups
- Small thermometer
Ingredients
- Garden seeds
Instructions
Prepare the seeds:
- Start by soaking seeds in water for 1-2 hours to help rehydrate them.
- Place a rack or folded thick kitchen towel in the bottom of the Instant Pot reservoir to keep the seeds from sitting directly on the heat source. Pour about an inch of water into the reservoir.
- Cut small squares of felt or absorbent fabric to fit into the cups or jars. Soak fabric with water.
- Transfer soaked seeds to the cups and close with lid.
Instant Pot Seed Germination:
- Choose the low yogurt setting on the Instant Pot.
- Cover the Instant Pot reservoir with a lid -- not the sealing Instant Pot lid -- to help hold in the heat.
- Once fully warm, check the internal temperature. If it's higher than 91 degrees, adjust the lid to allow some heat to escape. You can also try covering the seeds with a kitchen towel.
- Once the temperature is right, set jars or portion cups with seeds onto the rack or towel.
- Choose an extended length of time for the yogurt setting to run. (Eight to 99 hours, depending on the model.) It can take 2-5 days for many seeds to sprout. Restart the timing as necessary to keep the Instant Pot warm.
- Check the jars by unrolling the fabric or peeking into the portion cups daily.
- When you see the seeds beginning to send out rootlets, carefully transfer them to seedling pots and water. You should see a seedling emerge from the soil in a few days.
- As seeds sprout that first rootlet, transfer them to individual seed starter pots or directly into the ground.
Notes
- Check your Instant Pot owner's manual for more information. If you're not sure what temperature your model reaches on the yogurt setting, it would be a good idea to place a small thermometer inside before adding seeds to the pot.
- With this method, you will NOT use the Instant Pot lid. Instead, set a regular pot lid in place to help retain heat. If you're concerned about the temperature getting too high, you could also leave the lid off entirely. The seeds will still benefit from the heat emanating from below.
Did you make this recipe?Mention @attainablesustainable or tag #attainablesustainable!