Now available from National Geographic:
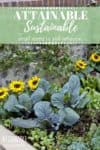
The food security sequel to the hit book, Attainable Sustainable!

Welcome to Attainable Sustainable!
 I’m Kris Bordessa, a long-time gardener, certified Master Food Preserver, and award-winning book author. I thrive on trying new things (but admit I don’t always finish them). I love good food, but rarely cook fancy. My mud room is actually muddy, I do most of my flower arranging in the garden, and the windows I’m most likely to wash are those on my greenhouse. I am a hot mess with strong opinions about our food system, plastic waste, and GMOs. If you’re ready to have some fun and learn some new skills, pull up a chair. I’ll put on a pot of chili!
Use the buttons below to access the main sections of the site or perform a search.