Canning pears is a delicious way to preserve the harvest for the pantry! Serve them straight out of the jar, or use them in baked goods and smoothies.
Preserving pears for the pantry is an easy canning recipe, one good for beginners. Why? Because they can be processed in a water bath. Pears do not need to be pressure canned. (In fact, they’d turn to mush if they were!)
The process for home canned pears isn’t difficult, but you will need to have some special canning equipment and a basic understanding of the water bath canning process. I cover the equipment in depth here, but here’s a quick overview of what you’ll need:
- Canner or large stock pot with a rack
- Jar lifter
- Canning jars (quarts or pints, wide mouth)
- Lids and rings
- Canning funnel
- Non-metal knife for removing bubbles
- Clean cloth for wiping jar rims
- Kitchen towel to line counter for processed jars

Ingredients
See recipe card below for exact measurements.
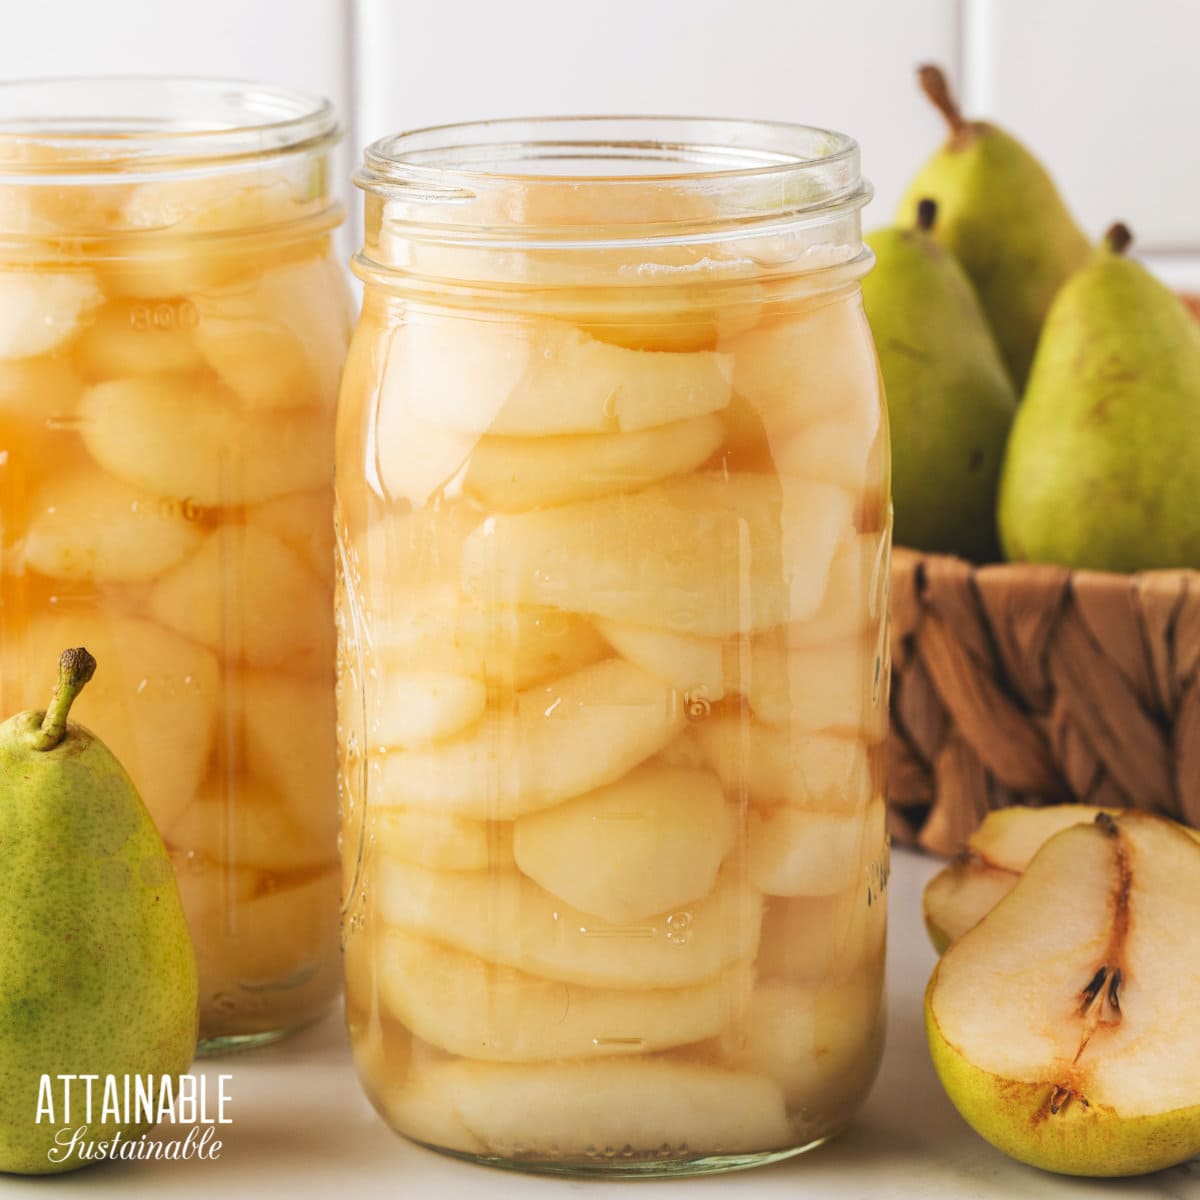
Pears – Bosc, Bartlett, or D’Anjou are good choices here. Do not use Asian pears; they are not as acidic as the other varieties and are not considered safe for water bath canning.
Get a Quick Start Guide to Safe Canning!
Want to learn how to preserve the harvest? Dive in for a look at various canning techniques and methods! Grab my FREE 6-part guide to getting started.
Sweetener – Granulated sugar (I prefer organic) helps preserve the color and texture of the fruit. If you’d prefer, you can use honey, but you’ll only need to use half as much as the recipe calls for, as it’s sweeter.
🍅 Safety First!
Canning is an excellent way to preserve food for the pantry, but there are some important safety considerations to keep in mind. The recipes on this site have been made following safe canning procedures by a certified Master Food Preserver.
- Know the difference between water bath canning and pressure canning. Low acid items must be pressure canned for safety.
- Altering ingredients may change the recipe’s pH, posing a safety issue.
- Use the proper jars and lids. Never reuse lids, with the exception of the Tattler or Harvest Right hard plastic lids that are intended for such a purpose.
- For more on canning equipment, please go here.
- Want to learn more? The National Center for Home Food Preservation is the go-to resource for safe canning information.
How to Can Pears
Canning pears at home allows you to adjust the sweetness of the end product. I’ve used a very light syrup in the recipe, but if you prefer a sweeter syrup, you can adjust to suit your palate.
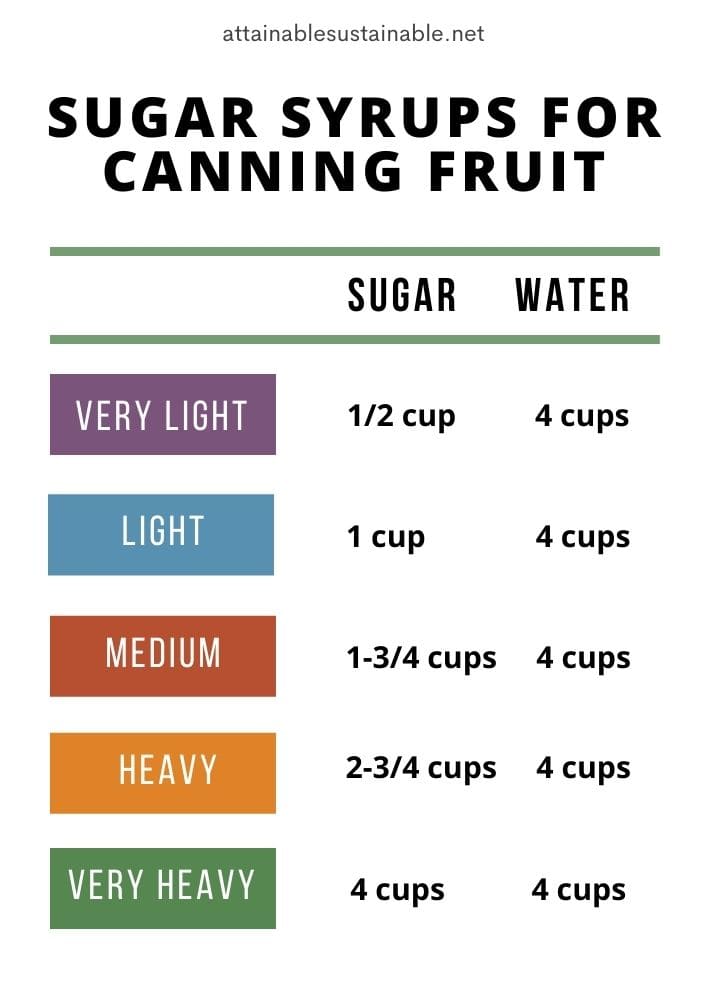
The liquid used in this recipe is a simple combination of sugar and water, heated to dissolve the sugar and make a sugar syrup. The syrup can be very light or very heavy or somewhere in between. Click here to download a copy of the sugar syrup cheat sheet above, so you’ll know what measurements to use for a variety of sweetnesses.
Canning pears in light syrup: I tend to try to use as little sweetener as possible, so I almost always use a very light syrup. This allows the flavor of the pears to shine through.
Canning pears in heavy syrup: A heavier syrup is often used when you’re dealing with less ripe fruit that can benefit from a flavor boost.
Canning pears with no sugar: Using a sugar syrup in canning can help the fruit retain its shape, color, and flavor, but if you’re really restricting sugar, canning pears in plain water is perfectly safe.
Canning pears in honey: You can substitute honey for the sugar in this recipe. Honey tends to be sweeter than sugar, so use 1/2 to 2/3 cup of honey for every cup of sugar.
Canning pears in fruit juice: Another alternative for canning pears is to use apple or white grape juice in place of the sugar syrup. You must heat the juice just as you would the sugar syrup.
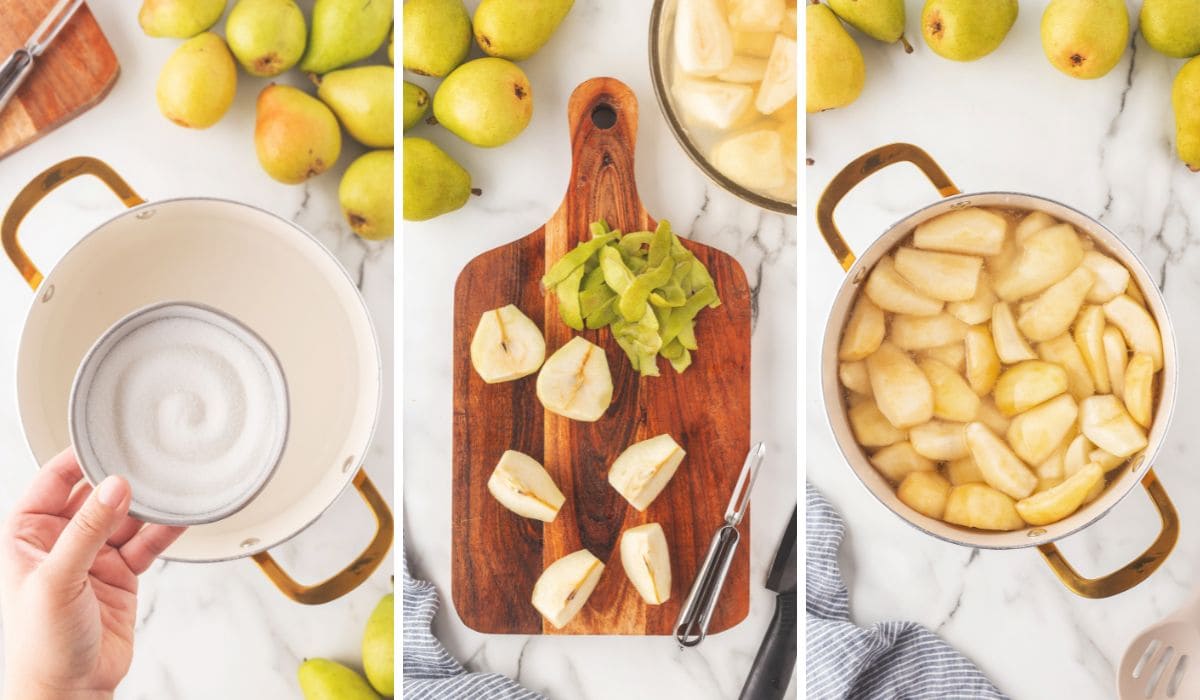
Combine the sugar and water in a saucepan and heat until the sugar is dissolved; stir occasionally.
Prepare the Canning Pot
Fill a large canner with water. Just how much water to use depends on the size of jar you’ll be processing. You’ll want the water level to sit at least an inch above the full jars during processing.
Do this before you begin filling the jars, since it can take awhile for the water to boil. Turn the heat to high and set the lid on the pot; this helps heat the water faster.
Prepare the Jars
Choose a jar size based on your family’s needs. It’s safe to make these in quart, pint, or half-pint jars. If you’re a small household and wish to make half-pints of canned pears, it’s probably best to chunk the fruit so you’ll fit more in. Process these jars for the same amount of time you’d use for pints.
Wash the canning jars and check the rims for nicks that could interfere with sealing. Wide mouth jars are recommended here, simply because it’s easier to pack the pears.

Hot Pack for Canning Pears
Once the pears are peeled and cut, you’ll add them to the hot sugar syrup and heat them briefly. Use a slotted spoon to transfer pear pieces to jars, then top off with syrup.
Leave a 1/2″ headspace.
Once packed, pour the hot canning liquid over the fruit to a 1/2″ headspace. Slide a non-metal tool down inside the jar edge to release any bubbles. Double check the level of liquid and top each jar off, maintaining a 1/2″ headspace.
Use a damp cloth to wipe the rim of each jar; a little bit of food on the jar rim can prevent the lids from sealing properly.

Set the lids in place and screw the bands on firmly tight. Use a jar lifter to transfer jars into the gently boiling water. The water in the pot should cover the jars by at least an inch or two. If necessary add more water to the canner.
Canning Process
Cover the pot with a lid, return the water in the canner to a full boil, and process jars for the recommended time in a boiling water bath canner. (See below.)
When time is up, use the jar lifter to transfer the jars to a flat surface that’s padded with a kitchen towel. Allow jars to cool completely. As they cool, you’ll begin to hear a canner’s favorite sound: That lovely little tink! that indicates a successful seal. Note that you don’t have to hear that sound for the jars to have sealed properly. Sometimes you do, sometimes you don’t.

Once jars are thoroughly cooled, check the seal on all of the jars. The lid should be concave and feel solid. If it flexes at all, it’s not sealed. (Place any jars that didn’t seal in the refrigerator and use them first. They are not shelf stable.)
Remove bands from cooled jars and rinse the jars. Store jars without the bands.
 Ready to DIY your pantry with more wholesome ingredients? Check out my new book from National Geographic! Attainable Sustainable Pantry is filled with delicious recipes for some of your favorite condiments, snacks, and toppings, along with an entire section on safe home food preservation. It’s the guide you need to start skipping packaged products and embrace homemade.
Note that if you live at an altitude above 1,000′ elevation, you may need to adjust the process times. See processing times in the recipe card below. Check with your local cooperative extension office or visit the National Center for Home Food Preservation for more information.

Canning Pears - Halves or Quarters
Equipment
- 7 quart jars adjust quantity for pint jars
- 7 canning lids and rings
- canning funnel
- water bath canner with lid or deep pot
- jar tongs
- canning bubble popper/measurer optional but handy
Ingredients
- 1¼ cups sugar
- 10½ cups water
- 18 pounds pears
Instructions
This recipe yields 7 quarts
Prepare for Canning
- Fill a canning pot with water, set the lid in place, and heat on high heat until boiling. It can take awhile for the water to come to a boil, so get it started before you begin.
- Gather the jars you'll use, making sure each is clean and free of nicks in the rim, which could impede sealing. Wash jars and place empty jars into the canning pot. This keeps the jars warm and helps avoid temperature shock when pouring hot ingredients into the glass jars.
- Bring a small pot of water to a simmer and turn off the heat. Drop the rings and flat lids into the water and leave them there until you're ready to screw them onto the filled jars.
Canning the Pears
- Combine sugar and water in a large stockpot and bring to a boil.
- Meanwhile, peel, core, and cut pears into halves, quarters, or chunks. To prevent darkening, put cut pears into a bowl of water with 1 teaspoon ascorbic acid or 6 crushed vitamin C tablets (500 mg) per gallon of water.
- When sugar water boils, drain pears and add to the pot of hot syrup; simmer for 5 minutes.
- Use a slotted spoon to transfer hot pears into quart sized jars, leaving 1/2" head space. A canning funnel makes this easy. Add syrup to cover, maintaining that ½” headspace.
- Run a de-bubbling tool, plastic knife, or chopstick between the jar and the fruit to release trapped air. Re-check headspace and add more syrup if necessary.
- Wipe jar rims to remove any syrup that may have spilled. A clean rim is essential to a good seal.
- Place lids centered on the jar rim. Screw bands on finger tight.
- Use a jar grabber to gently submerge jars into hot water in the canning pot. Water should cover the top of the jars by an inch or two. The water will cool somewhat in reaction to the addition of the jars. Return the water to a boil and then set the timer for appropriate process time.
- Process pints for 20 minutes, quarts for 25 minutes 0-1,000 feet altitude; 25/30 minutes 1,001-3000 feet; 30/35 minutes 3,001-6000 feet; 35/40 minutes above 6,000 feet.
- Remove jars from water using the jar lifter and transfer to a solid, towel-covered surface. Listen for the popping sound of the lids sealing (a canner's favorite sound!). Check seals after an hour or so. Lids should be solid and pulled down tight. (If they flex and pop, the jar didn’t seal; put unsealed jars in the refrigerator and use those first). Allow sealed jars to cool for 24 hours.
- Remove rings and wash outsides of jars. Store in a cool dark place.


