
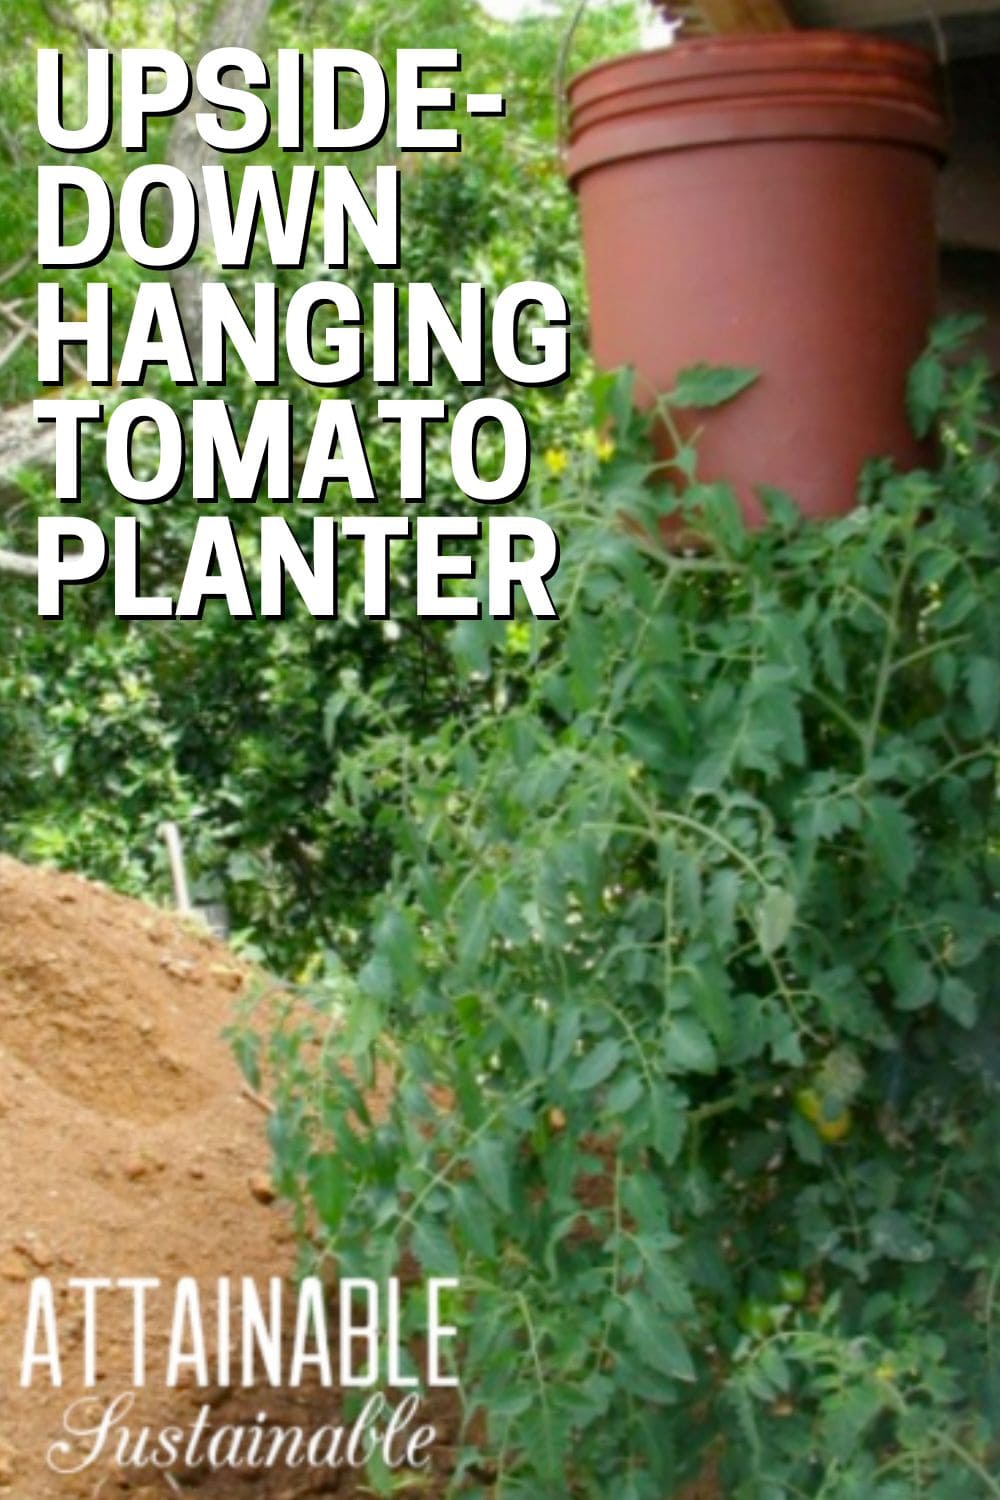
You’ve seen those Topsy Turvy tomato planters, right? Here’s how you can make one of your own with a 5-gallon bucket. It will take you less than half an hour to put together, and growing tomatoes upside down is a good way to get the most out of your space.
Originally published in February 2012; this post has been updated. This hanging tomato plant project is featured in my book on page 186.
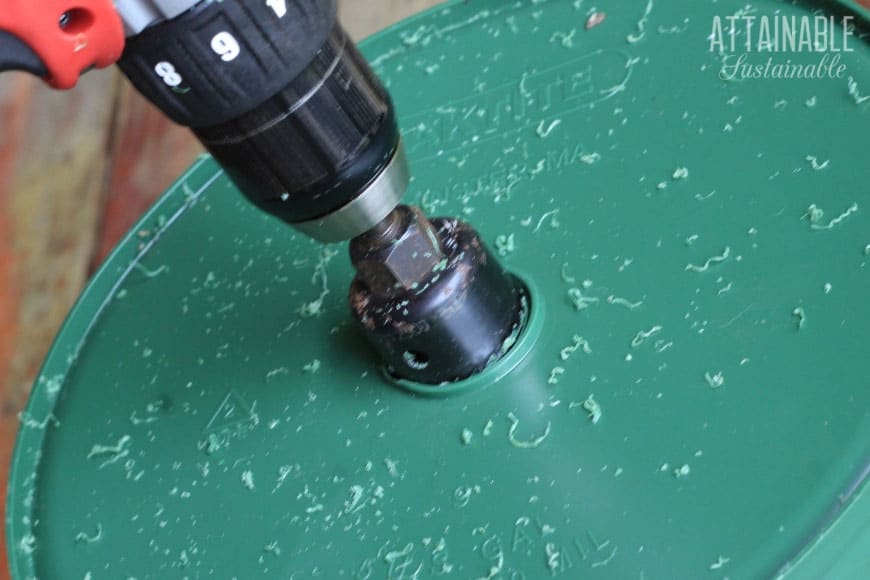
This is really an easy project, though you’ll need one specialized piece of equipment to make it: A hole saw that attaches to a drill. If you’ve got a woodworker friend, maybe you can borrow one.
JUMP TO:
Growing Tomatoes in an Upside-Down Planter
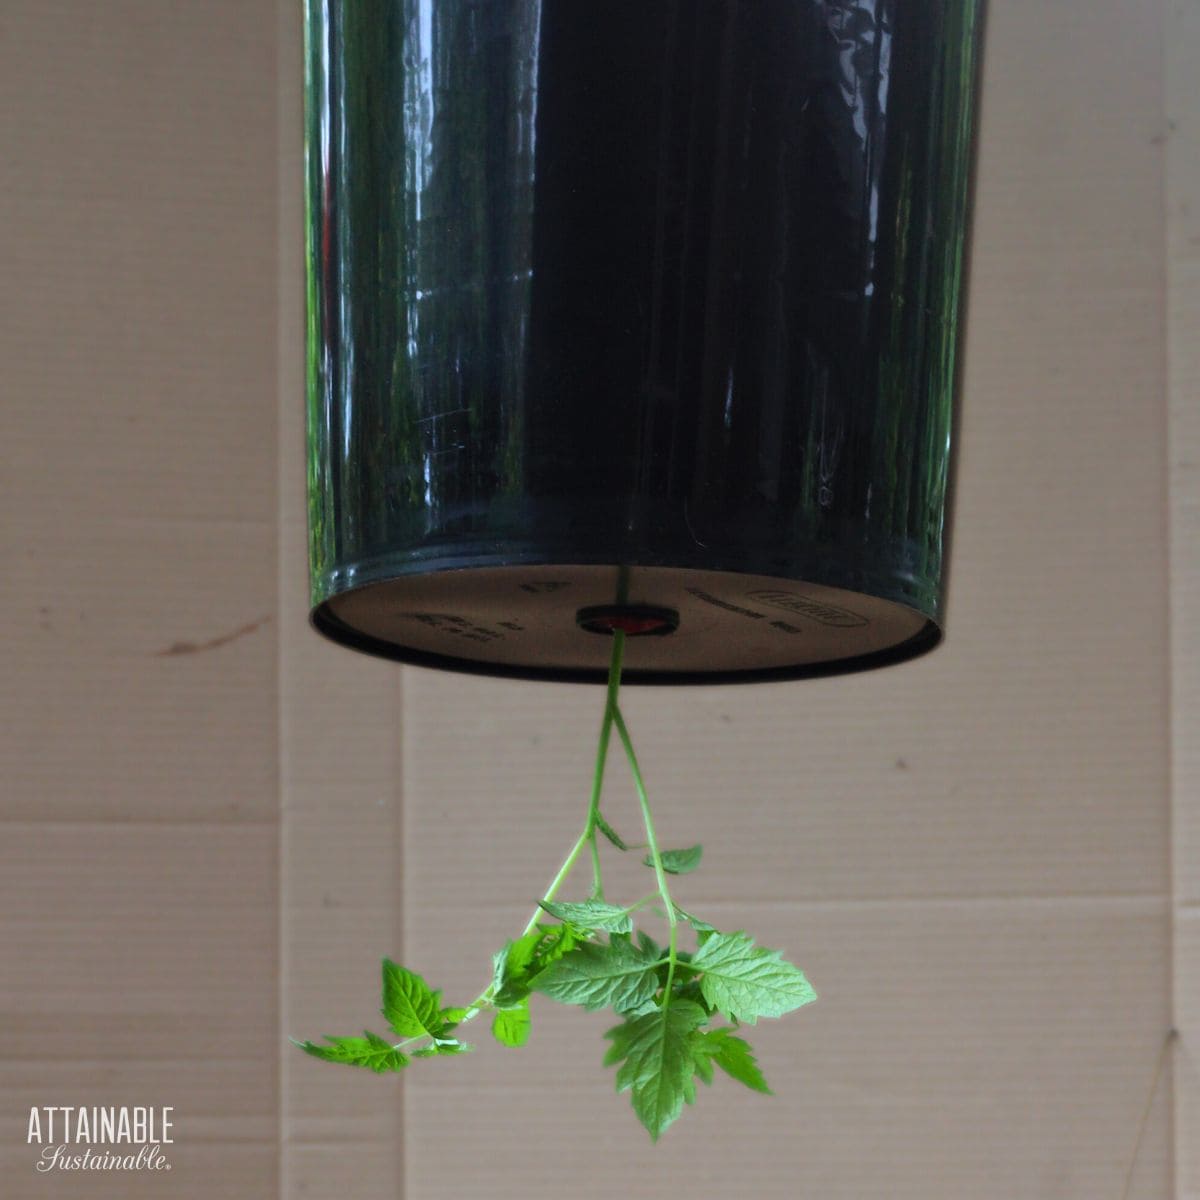
Growing tomatoes as hanging plants allows you to grow some food in unused space. It’s great for apartment dwellers and backyard gardeners who have limited space. But planting a tomato plant – right side up – in traditional hanging baskets means that the stems will bend and break as gravity and the weight of fruit pulls the tomato vines downward.
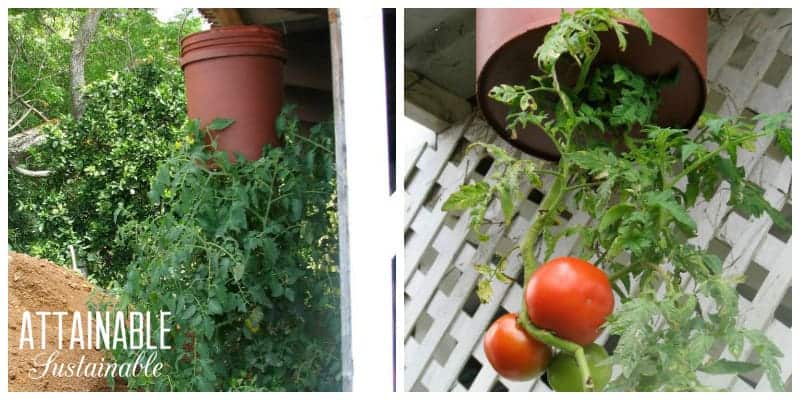
By situating the tomato plant to hang from the bottom of the pot, the stems will still hang down, but they’ll do so without bending and breaking.
Grow Some Greens!
Ready to grow fresh greens, no matter WHERE you live? Sign up for my
FREE quick-start guide and start growing some of your own food!
Making the Upside-Down Container
Step 1: Drill a hole in the bottom of a 5 gallon bucket. This will be the planting hole for the tomato and will double as a drainage hole to allow excess water to exit the bucket.
Step 2: Cut a piece of scrap fabric roughly the size of the base of the bucket.
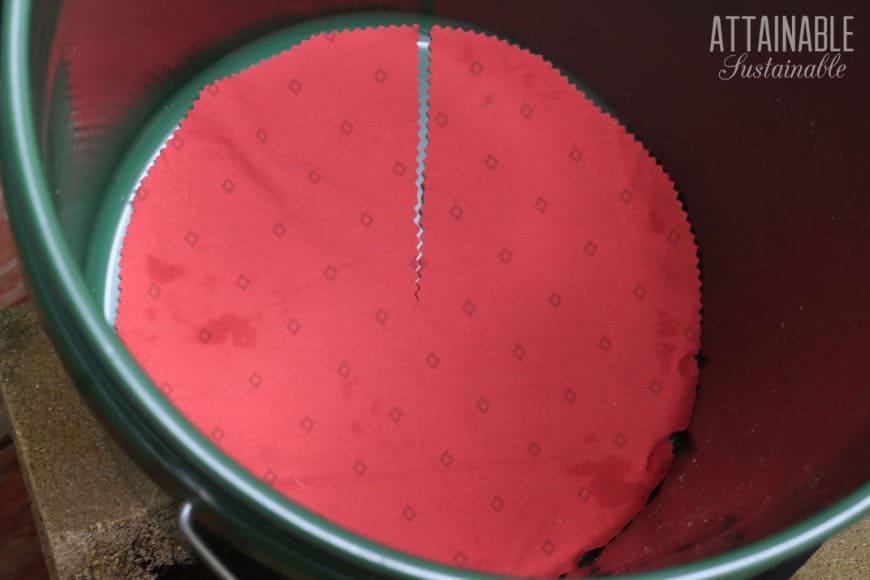
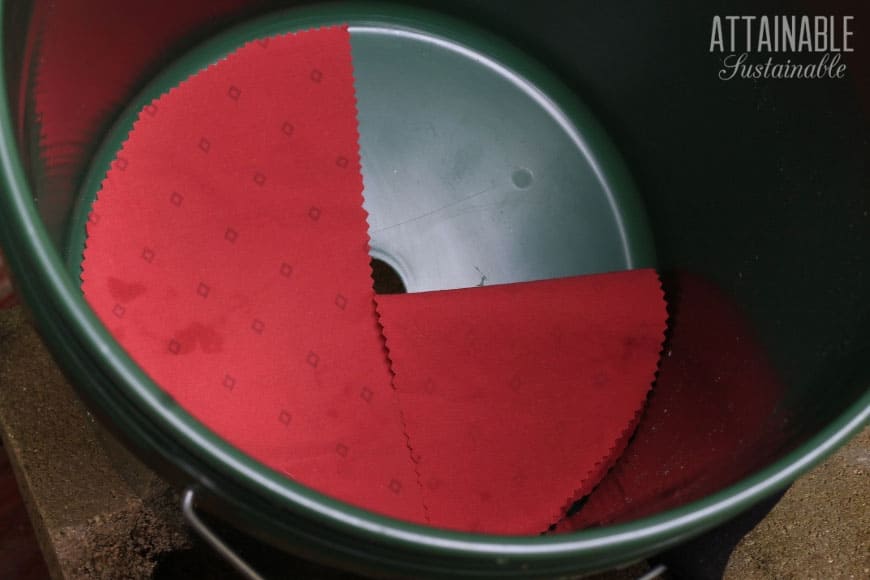
Step 3: Cut a slit to the center of the fabric and place it in the bottom of the bucket. This will help hold the soil and tomato seedling in place until the tomato plant gets rooted in.
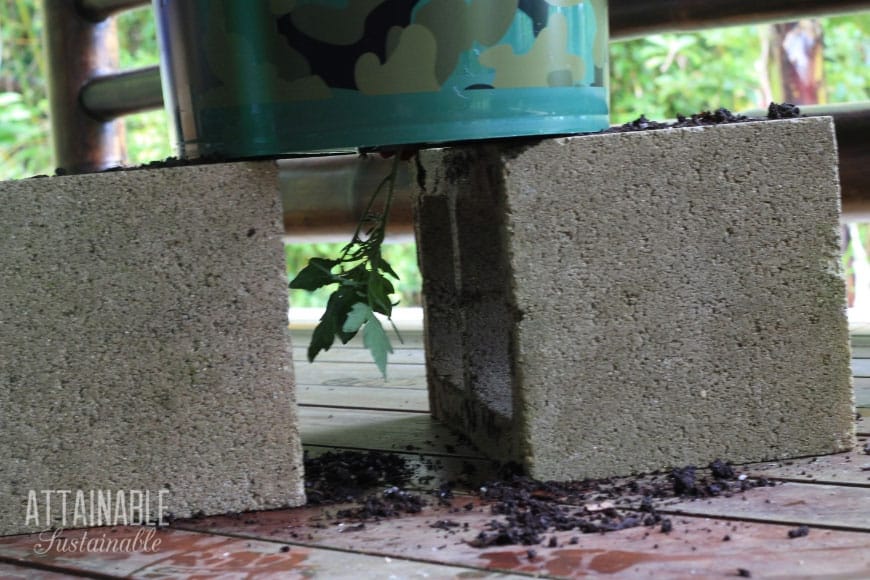
Step 4: Set the bucket up on blocks of some sort. This will allow you to place the tomato seedling into the hanging planter without smashing it.
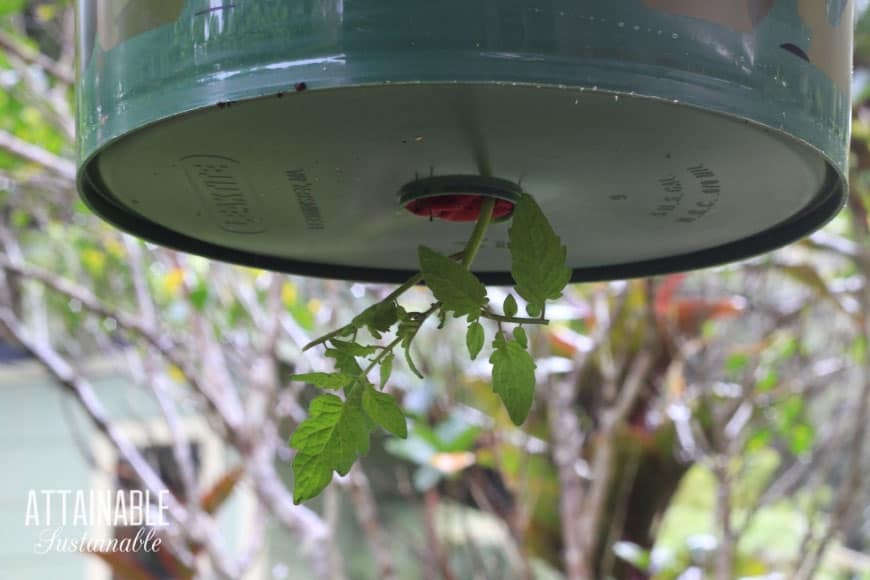
Step 5: Place the tomato seedling in the hole, with the greens hanging below the bucket. Pull the edges of the fabric slit together, snug around the stem.
Step 6: Gently add soil around tomato roots and continue adding soil until the bucket is nearly full. Use a mixture of roughly two parts potting soil, two parts peat moss, and one part perlite for a lighter mix, since it will be hanging. You don’t want the upside-down tomato planter to be so heavy that it breaks!
Planting Mix
Hanging 5 gallons of heavy potting mix will stress the handle of the bucket. To create a lighter mix, combine roughly two parts good quality potting mix, two parts coconut coir, and one part perlite in a large container or wheelbarrow and blend thoroughly.
Much like growing tomatoes in containers on the ground, you’ll need to make sure that the soil in this hanging tomato planter remains moist (but not wet). Fertilize every couple of weeks with a diluted compost or manure tea.
Choosing Tomatoes
This upside-down tomato planter works with both determinate and indeterminate tomato plants. Because the amount of space for root systems is limited for container plants, opting for a dwarf variety of tomato is a good idea. These plants produce tomatoes as usual, but on a much more compact plant.
Avoid really large tomatoes as the weight of the fruit can damage the branches of the plant. Instead, opt for medium sized or cherry tomatoes. Roma tomatoes are a good option, too.
The right tomato plant will thrive with this upside-down method.
Situating the Planter
You’ll need to find a sturdy location to hang the tomato plant. A porch roof or overhang can work, as can a sturdy arbor, as long as the light requirements can be met. Be sure to use a strong hook, too!
All tomatoes love full sun and, in optimal conditions, should receive eight hours of direct sunlight each day. This is true for growing tomato plants in hanging containers as well, so find a sunny spot where they will have enough light to thrive.
Provide excellent air circulation to prevent the tomato from succumbing to powdery mildew.
Watering
How often you water this container will depend on the weather conditions. In hotter weather, it will likely need to be watered daily. Maintain moist soil in the container without overwatering.
Growing Tomatoes Upside Down in Hanging Planters
Equipment
- Drill
- 1.5" hole saw
Ingredients
- 1 5-gallon bucket
- Potting soil
- Perlite
- Coconut coir
Instructions
- Combine two parts potting soil, two parts peat moss, and one part perlite for a lighter potting mix.
- Drill a hole in the bottom of a 5 gallon bucket using a 1.5″ hole saw.
- Cut a piece of scrap fabric roughly the size of the base of the bucket.
- Cut a slit to the center of the fabric and place it in the bottom of the container. This will help hold the soil and tomato seedling in place until the tomato plant gets rooted in.
- Set the bucket up on blocks of some sort. This will allow you to place the tomato seedling into the hanging planter without smashing it.
- Place the tomato seedling in the hole, with the leaves hanging below the bucket. Pull the edges of the fabric slit together, snug around the tomato stem.
- Gently add soil around tomato roots and continue adding soil until the bucket is nearly full.
- Hang the planter in a spot where the plant will get full sun for (optimally) 8 hours a day.
Notes
- Because the amount of space for root systems is limited for container plants, opting for a dwarf tomato variety is a good idea. (See full post for link to some good options.) These plants produce tomatoes as usual, but on a much more compact plant.


this is very nice and I am definitely going to try it out
I have done upside-down tomato plants twice now, but I have been plagued with tomato worms. Do you have any suggestions on how to avoid this?
When you fertilize them, are you spraying an organic topical? Or fertilizing the roots in the bucket? what are you fertilizing with and how often?
I like to use compost at the soil level and foliar kelp spray.
This is so cool! I just moved into my own home, and I am so excited to grow veggies!
Peace & Sunshine
Sammi at Sammi Sunshine- a food blog
My back porch is facing a busy highway that has a redlight not far from where I live. I get noxious gas fumes on a daily basis. My question is…is it SAFE to eat the tomatoes that will be exposed to gas and diesel engines exhausts? Thank you.
Brilliant!! I also have wanted to do the TV version, but refused to dish out that much $$ for something I’m sure cost $3.00 at best to create..I knew there had to be a DIY version….YOU ARE GENIUS and provided great instructions. Thank you in advance.
Erika, I’m the queen of figuring out how to do something with what I have on hand! LOL It doesn’t *always turn out, but sometimes it does. I’m glad you think this will work for you!
Love this idea. We have very little room for growing anything. And this step-by-step makes it easy to follow. Having fresh tomatoes would be delightful
We have problems with our growing space as well. I’ve made my own upside down tomato pots for the past two years and they’ve done better than the ones on in the deck pots!
I want to try this too. It’s too cold here right now for tomatoes but I’d love grow fresh tomatoes this summer.
My sister did this last summer and her “upside down” tomatoes outproduced her others by quite a lot! I’m determined to try it myself, although I haven’t figured out a good place to do it yet. Thanks for the inspiration!
I might have to try this come spring. Great how-to post.
These always look so cute – and practical. Thanks for the primer.
This was really interesting to see how you put it all together!
This was really interesting to see how you put it all together!
I can’t wait for you to try it, either!
Clever idea! Although it’s too cold here right now, I look forward to being able to grow some nice juicy tomatoes when the warm weather returns. Keep us posted on your success!
Great idea! I haven’t bought one of these but have always wanted to try it!
You are brilliant! My kid has been wanting me to get a topsy turvy, mostly because she likes to buy things off TV. The pro for me is that I need to keep plants close to the house to dissuade deer from doing them in. I CAN’T WAIT TO TRY THIS.
You are brilliant! My kid has been wanting me to get a topsy turvy, mostly because she likes to buy things off TV. The pro for me is that I need to keep plants close to the house to dissuade deer from doing them in. I CAN’T WAIT TO TRY THIS.
Fun! I have two cloth-in-a-wire-frame hangars from Gardener’s Supply and I’ve used them over and over again. Hopefully you have enough soil in the bucket to handle the lack of moisture compared to right-side-up planters and just using the ground. You will need to keep an eagle eye on the moisture — as you know, tomatoes require a LOT of water during fruiting.
I was very successful with them in NebrasAlso, those in colder climates can consider painting their buckets flat black to keep them warmer. Yes, dark colors will indeed make a difference. There’s even this particular shade of red that a university (Cornell, I think?) determined is of the proper wavelength to help out tomato (and related plant) growth.
@vollmerdp Good to know you were successful with them! I dislike growing in containers because keeping them moist can be so difficult, but we’re so limited on growing space, I figure it’s worth a try. We’ve got pretty high humidity, so maybe that will make it slightly less forgiving??
This is great. A couple of years ago our gardening space was limited so we hung a similar version (osh buckets) along the patio wall…we did tomatoes and zucchinis… and drilled a hole in the top and a hole on each side…it actually worked out really well…I’ll post a picture if I can find one…!
My father has been doing the Topsy Turvy in buckets for year now. He used a styrofoam circle, with a slit cut in it, in the bottom of the bucket to help hold the tomatoe plants in and keep the soil from washing out. You dont want to use a foam that soaks up too much water or it can rot the plants off. Last year I also planted some with holes/plants in the side, seemed to work well and its nice not having to tie up the plants!
I like the idea of painting it too… looking forward to hearing more about this project.