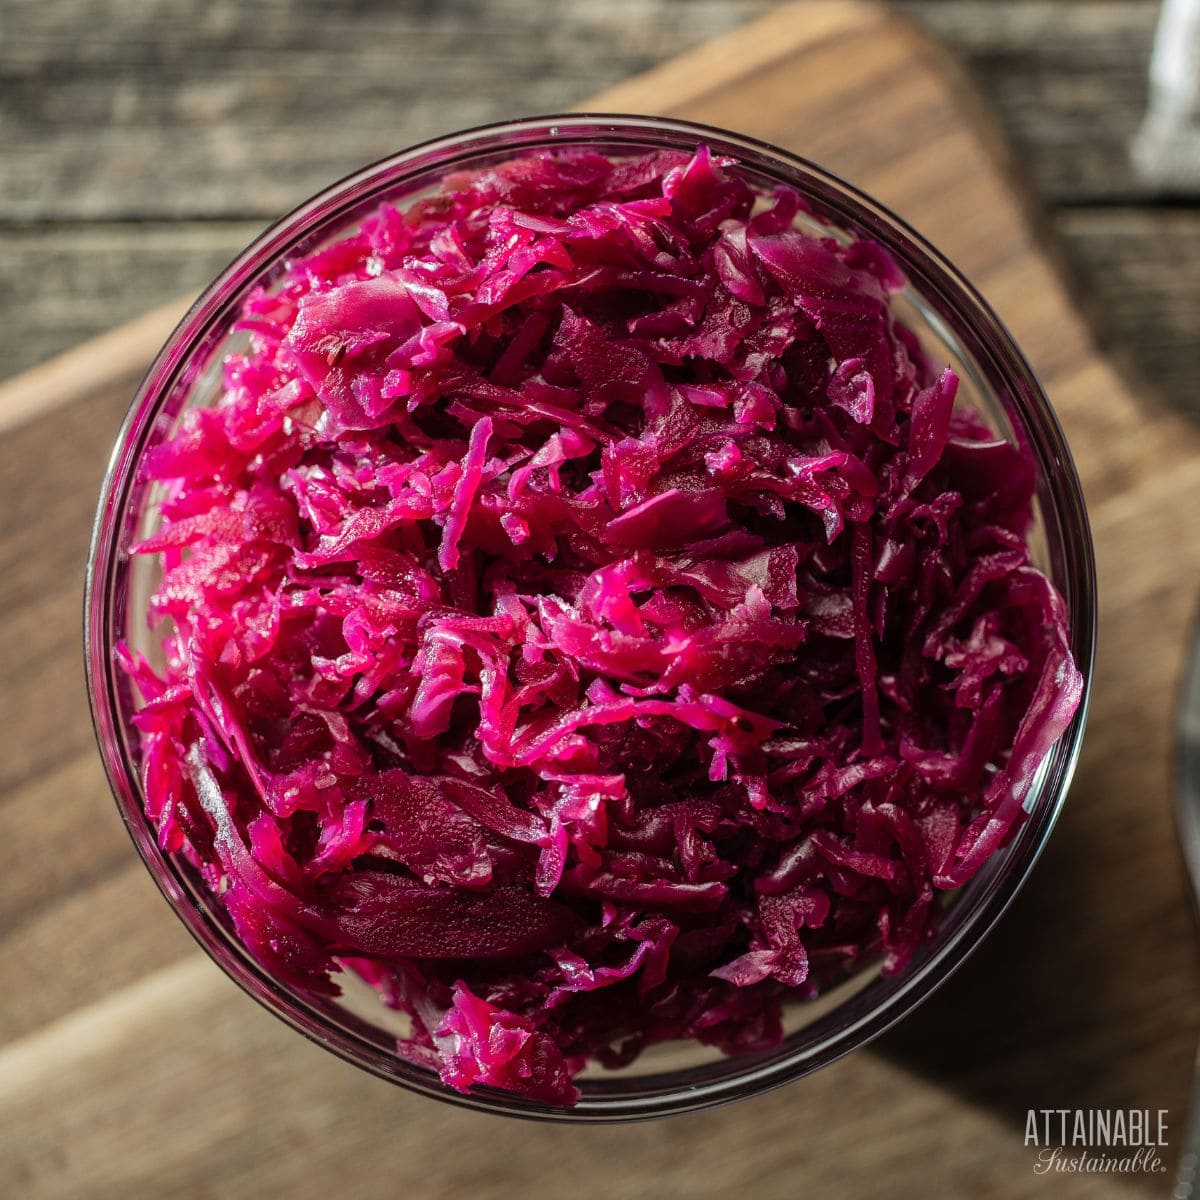
Sauerkraut is one of the easiest ferments to get started with, and the results are delicious and packed with boatloads of health benefits. This green or red cabbage sauerkraut recipe is a delicious addition to sandwiches or an easy side dish.
Plus, this homemade sauerkraut recipe is far superior in taste to store bought brands.
Originally published in 2017; this post has been completely updated and revised.
New to fermenting foods? Be sure to read this compilation of frequently asked questions before you get started!
There’s a lot of information about fermenting cabbage here, but the too long, didn’t read version would look something like: Shred cabbage, toss with salt, pack into jars. Now, I’m not suggesting that you skip all of the information below — it’s valuable and you do need to get the salt and cabbage quantities right — but I’m pointing out that this really is a quick sauerkraut recipe.
 Ready to DIY your pantry with more wholesome ingredients? Check out my new book from National Geographic! Attainable Sustainable Pantry is filled with delicious recipes for some of your favorite condiments, snacks, and toppings, along with an entire section on safe home food preservation. It’s the guide you need to start skipping packaged products and embrace homemade.
Lacto-Fermentation
If you’re new to fermenting, it’s all about the lactic acid. Lactic acid is a natural preservative that keeps food from spoiling. It’s the byproduct of naturally occurring bacteria, which consume the starches and sugars in fruits and vegetables.
Naturally fermented sauerkraut can help promote the growth of beneficial bacteria throughout the intestine. Food that has been lacto-fermented is easier to digest and has increased levels of vitamins and beneficial enzymes.
Get a Quick Start Guide to Safe Canning!
Want to learn how to preserve the harvest? Dive in for a look at various canning techniques and methods! Grab my FREE 6-part guide to getting started.
The lacto-fermentation process needs an anaerobic (or oxygen-free) environment in order to thrive and ferments best at 60-70 degrees F.

For this homemade sauerkraut recipe, you’ll wash and cut up the veggies, mix them with salt, and pound them to release their juices. The salt inhibits the growth of bad bacteria until enough lactic-acid is produced to naturally preserve the food.
Once fermentation has taken place, it’s halted by storing the ferment in cold storage or the refrigerator at an ideal temperature of 40 degrees F.
Ingredients and Supplies
Cabbage — You can use either green or red cabbage for this sauerkraut recipe, or even Napa cabbage.
Salt — Use a high quality salt, such as pink himalayan or Celtic sea salt when making this quick sauerkraut recipe. Avoid plain table salt.

How to Make Quick Sauerkraut
I highly recommend using a scale to determine the salt to cabbage ratio. The weight of a single head of cabbage can vary drastically, altering the ratio.
Core and shred the cabbage and add to a very large bowl. For every 3 pounds of shredded, prepared cabbage, add 1 ounce of salt.
Use clean hands to squeeze and press the cabbage and distribute the salt. You’ll notice that the cabbage will start to release liquid. This is what you want.
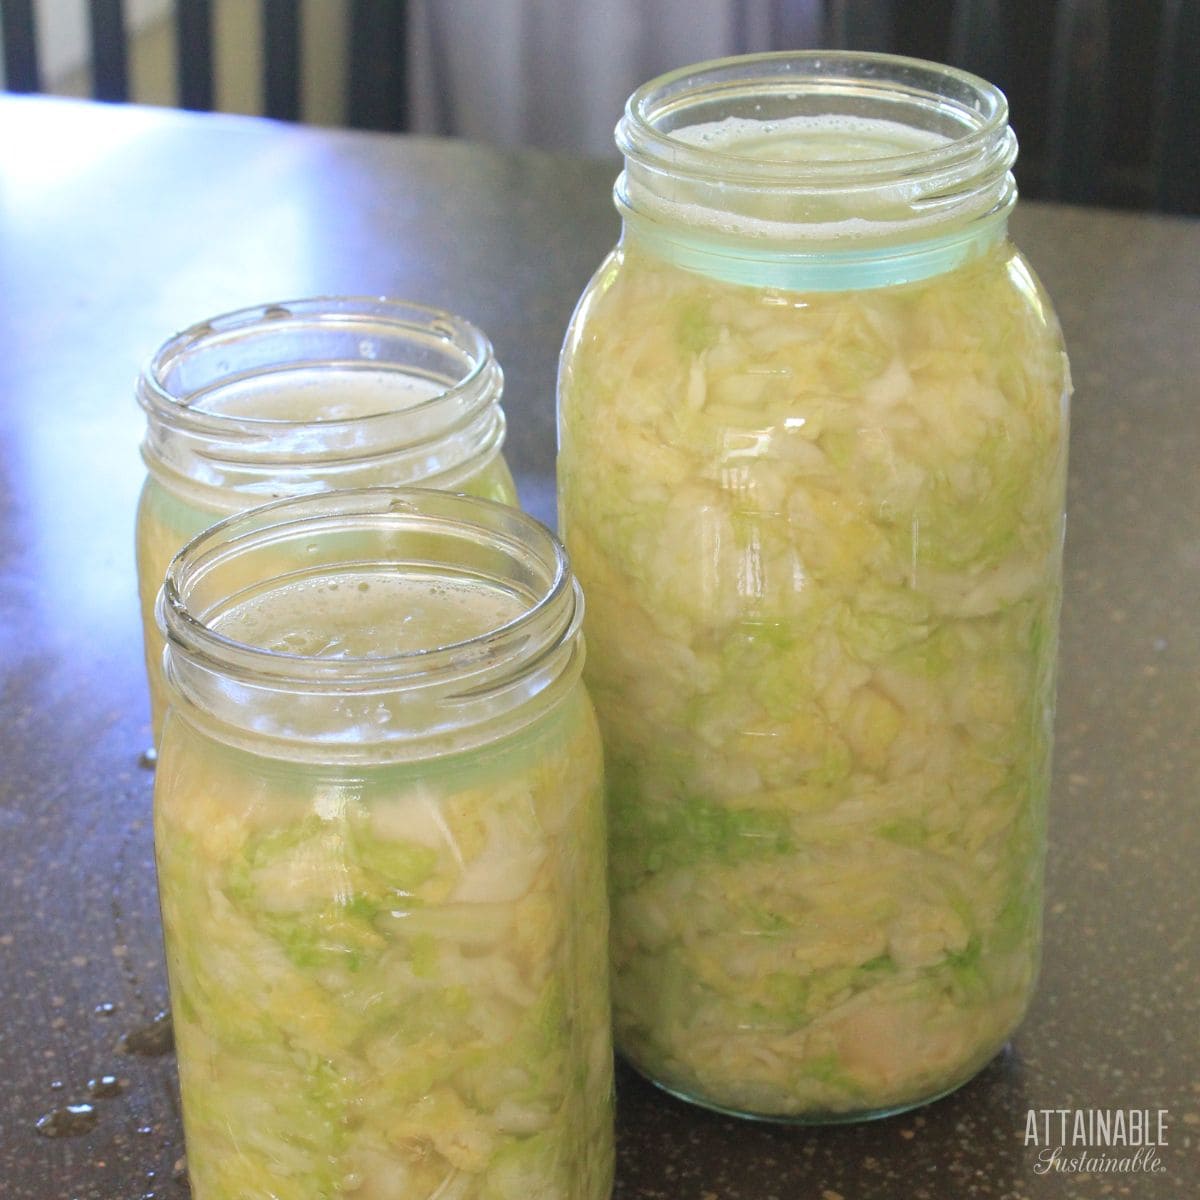
Add the massaged cabbage to jars, pressing it firmly into the container and ensuring the liquid covers the cabbage. You can use an upcycled glass jar or Mason jars.

Leave headspace and add weights if using, then cover.
Fermenting Temps
Keep at room temperature (out of direct sunlight) for about a week. The time required to transform the cabbage into sauerkraut will vary a bit depending on the temperature of the kitchen. If it’s warmer, the process will happen faster.
If it gets too hot, it will ferment too quickly, resulting in a mushy final product. If the temperature is too cold, it may take weeks on end before it’s ready for cold storage.
You’ll begin to see bubbling, and the liquid in the jar may overflow. If it does, be sure to press the cabbage down so that it remains under the liquid. If necessary, add a bit of brine to cover the veggies.
Fermenting at Home
- Use the freshest cabbage you can get your hands on. The fresher your veggies, the more crisp your final results will be.
- If you don’t have any fermenting weights, you can save an outer leaf of the cabbage and use that to hold the shredded cabbage under the liquid. Be sure it stays completely submerged during the fermentation period. Once fermentation is complete, you can remove the leaf and move jar to cold storage.
- Set your fermenting vessel on a plate or tray. Sometimes, as fermentation occurs, bubbles will cause the brine to spill out over the top of the jar. This makes a big mess unless you’re prepared for it.
- Check your ferment daily during the fermentation process to make sure all cabbage is submerged. If any pieces rise above the brine, push them back down and weight them under the brine.

- If you see a white film accumulate on the top of the brine, it’s likely it’s kham yeast. Kham yeast is normal and not dangerous, but you will want to get rid of it. Simply take a clean paper towel and blot it off the surface. Then, take another clean paper towel, dip it into the brine and wipe around the inside edges of the jar. If the kahm yeast reappears, repeat this step as necessary.
- As you’re checking your fermenting sauerkraut, keep a close eye out for any fuzzy mold (either white, green or brown). If all cabbage remains submerged and the inside of the jar is clean you should have no problems with mold. But if any appears, you’ll need to discard the batch and start again.
Enjoying your Homemade Sauerkraut Recipe
You can serve sauerkraut hot or cold, but heating the kraut will kill the probiotics. Raw sauerkraut is excellent served alongside most meat dishes, added to sandwiches, and of course, for topping hot dogs. Go here for more ideas on what to eat with sauerkraut.
★ Did you make this homemade sauerkraut recipe? Don’t forget to give it a star rating below! ★
Homemade Sauerkraut Recipe
Equipment
- 1 half gallon mason jar or 2 quart-sized wide-mouth jars
Ingredients
- 2 medium cabbage red cabbage, purple cabbage, or green cabbage
- 3-4 tablespoons sea salt or kosher salt
Instructions
- If you have a kitchen scale, use 1 ounce of salt per 3 pounds of prepared cabbage. If you do not have a kitchen scale, use the measurements listed above.
- Remove outer leaves of cabbage, core and shred cabbage, and place into a large bowl.2 medium cabbage
- Add salt. Massage cabbage with clean hands for five to ten minutes until juices are released.3-4 tablespoons sea salt
- Put cabbage into wide mouth jars and, using clean hands or a utensil, press cabbage down until juices cover the top of the cabbage.
- Leave 1-2 inch head-space at the top of the jar.
- Add weights to hold the shredded cabbage under the brine.
- Store at room temperature for about a week, monitoring the liquid level to be sure the solids remain submerged. The number of days required will vary depending on the temperature. If you like it more sour, allow it to ferment a little longer.
- Sauerkraut can be eaten immediately, or continued to age for even better flavor.
- Store fermented cabbage in the refrigerator with a jar lid in place.
Notes
- When making homemade sauerkraut (or any ferment) be sure all equipment and supplies are very clean. Even if they were clean and in your cupboards, give the jars and equipment a rinse in very hot water.
- It's crucial that the cabbage remain covered by liquid as it ferments, to avoid mold. Check your ferment daily to make sure all cabbage is submerged. If any pieces rise above the brine, push them back down and weight them under the brine.
- Setting the jars on a plate or tray is a good idea; fermenting sauerkraut can overflow when it's in its most active stage.
- Serve your homemade sauerkraut alongside any meal, or use it in some of these recipes.
- When you finish eating a jar of this yummy quick sauerkraut recipe, retain the leftover brine. This can be added to your next batch to speed the fermentation process.
Nutrition
Originally contributed by Kelsey Steffen; this post has been thoroughly revised and updated.


Can you use canning/ pickling salt as a substitute?
Yes.
Already know how to make really good sauerkraut, fermentation wise
What I need to know is, how do you preserve it after it is fermented
I am very keen on canning, a crippled old man that has been canning for
years ! I am new to this fermentation stuff. (3 years under my belt)
I believe the ladies name is Holly and her website is makingsauerkraut.com, I think
I have been learning fermentation through her website.
But everyone says it is only good for two months after you take the fermented cabbage out of the crock.
I live out in the woods and that makes it hard for working family to come and get my sauerkraut, and I end up throwing away about half of what I ferment
Somewheres I read to where I can get it above 180° and pasteurize it and can it just like you would can anything else.
Is this correct ?
I would appreciate any help you can give me ! For I am on disability and cannot afford to throw away any precious food !!!!!
Sincerely Dude
You can freeze it or can it for longer storage, if you don’t want to just refrigerate it. Here are some safe guidelines from University of Minnesota: https://extension.umn.edu/preserving-and-preparing/how-make-your-own-sauerkraut
Made this and had leaf on top. Forgot about it after I made it for a week or so, had it weighted down with a smaller jar that left room for it to ferment and not let it over flow. It has fermenting bubbles and the liquid looks brown about to 1 1/2” down, it still good?
If the solids remain covered with liquid, it *should be fine. Next step is to give it a sniff – it should smell sour, but not bad.
Is it possible to use a vessel that is hard BPA free plastic?
I personally wouldn’t, but it might be ok in general. It’s best to use a glass jar.
When I put this in mason jars after fermentation so I need to drain liquid or leave it? thanks
No you don’t need to drain the liquid. It’s good to save the brine after you’re done eating the kraut and add it to your next batch to speed the fermentation process.
Por favor, en la receta de chucrut casero; en instrucciones dice:
“2. Agregue sal y suero/salmuera opcional.”
El suero, a que se refiere? Como lo obtengo?
Gracias,
You can use whey to “jump start” the ferment. The liquid that surfaces in yogurt is an easy way to get it.
Can use brine from store bought kraut as your starter?
If it’s *fermented kraut and not pickled kraut, yes.
Once the bubbles form it can go into cold storage? Do you still use the airlock or put a solid lid on? Mi e is definitely ready for that stage and do t want to ruin it.
Yep, once you see bubbling, you can move your sauerkraut to cold storage. You can put a regular lid on it.
Where does one get the glass weights? Would like to make this recipe but don’t have the weights or the silicone lids.
You can find them on Etsy or other sources online. A small glass jar (like a baby food jar) filled with water would work in place of a weight, or a small ramekin or dish plate works if you’re fermenting in a crock or larger container.
So I made this, and I’m nervous to try. How do I know it’s fermented and not going to make me sick? Is it like a mind over matter thing.
Give it a try, you’ll love it! Trust the process 🙂
I saw that you can put water in a ziplock bag and place over plastic on top of cabbage to help keep it submerged. I used the glass weight and put the bag over the top of the weight as well. Will be ready to try mine in a few more days.
That’s a good idea, enjoy!
May be a silly/dumb question but how do you get a place that is 60-70 degrees? My husband is very cold natured so our house NEVER gets that cool. . I sure wish it did
If you don’t have a cooler area of your house, it will just ferment faster so keep your eye on it.
I’m totally new to this is in need for better gut health. Going to try this weekend but if I can’t find a weight to keep it down what do I use?
If you don’t have any fermenting weights, you can save an outer leaf of the cabbage and use that to hold the shredded cabbage under the liquid. Be sure it stays completely submerged during the fermentation period. Once fermentation is complete, you can remove the leaf and move the jar to cold storage.
I don’t understand where the liquid comes from. Is there enough juice in the cabbage to form the liquid to cover it? Or do you add water?
If you aren’t using brine from another ferment, the extra salt will draw the liquid out of the cabbage and make brine.
During fermentation, is it necessary to store in a dark location? My ideal spot (temperature & out of the way but easy to access to check on) is at a north window. We keep our house about 65-69°.
It doesn’t have to be completely dark, but normally I wouldn’t place a ferment near a window. A north window is better than a south if that’s your only option. You could use a crock instead of a jar too, that might help!
I have
all of my Gramma Mackey’s pickling crocks, can this recipe be made in one of them? I haven’t yet Ben able to use any of them yet. Thank you, Mary
As long as you’re sure they’re safe (lead-free), sure!
After becoming a Kombucha and Kimchi expert, I decided to try your recipe! I have made it 2x now and I am so happy that it was so easy (and good for me!). The flavor was delish!
I’m so happy to hear you love this recipe too!
I used a leaf to keep mine submerged. There was a bit of mold on that leaf, but it was entirely out of the liquid. Does the whole batch need tossed?
You *should be able to remove the leaf and find good sauerkraut below. The best method is to first sniff the kraut, then take a small bite. If it smells/tastes okay, it will be fine.
You mention using non-chlorinated water, but the recipe does not call for additional water. Did I miss something?
No. Sometimes it’s necessary to add a bit of liquid to keep the cabbage completely submerged. If necessary, use non-chlorinated water.
I made some kraut and my jar was a little over half full. I didn’t have more cabbage, what should I have done? Add more liquid?
Also if adding more liquid and I don’t have any brine from previous batch, should I use salt and water dissolved?
As long as the cabbage is submerged, that is what matters. If the jar is only half full that’s fine, or you could use a smaller jar.
I would like to make several gallons at one time. How long will this stay on my shelf without spoiling. I’m new at fermenting but I love kraut and other fermented vegetables I have bought at the store. I just want to make my own.
Traditionally, sauerkraut was made as a way to store cabbage for the winter, and it was kept in a large crock in the cool cellar. (Pre-refrigeration, you know.)
Do you water bath this?
No. The fermentation preserves it!
Great recipe. Will make again!
I was looking up images of unsafe fermented cabbage as my last batch did NOT have all the juice as previous batches. There are dry spots throughout the kraut in the mason jars. I wondered if I should throw it out (I hate to waste but I hate food poisoning even more!). Your very interesting and informative recipe/directions have answered my question. I’ll start over w/glass weights. What, exactly, are the silicone lids for? Thank you!
The lids allow gas to escape as needed while preventing air in. There are a number of options for this — this is just one. (You can also “burp” your jars daily, if you’re good at remembering stuff like this.)
Do u use the mason silicone inserts with a regular band?
Did I miss something in the recipe about silicone lids or burping your jars, I read it in the comments
I don’t use silicone lids. If you use an airlock, you won’t need to burp the jars. If you use a regular lid, like I do, you’ll need to do that.
aweome! So you drink the water? or do you strain it?
The liquid in the ferment is edible (drinkable) and good for you.