

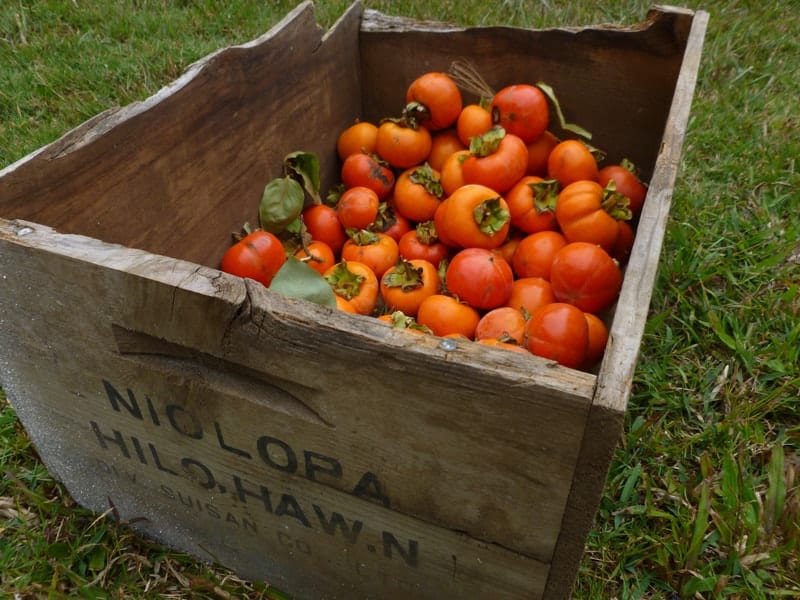
If you’re lucky enough to have (or know someone who has) a persimmon tree, transform that pretty orange fruit into a delicious persimmon jam while the fruit is in season.
Be sure to check out this giant list of easy jam and jelly canning recipes for more delicious ideas.
Persimmon trees dripping in little orange orbs are a beautiful fall sight, but what if you don’t have a access to a tree? They’re not uncommon in grocery stores during the fall months, and farmers markets are another great option for this fruit.
Easy Persimmon Jam
This easy recipe allows you to tuck some jars of persimmon jam in the pantry to enjoy the rich flavors of fall during the cold months of winter.
Ingredients
Persimmon Fruit — There are a couple of different varieties to choose from. Either will work, but you’ll prepare the ripe fruit a little differently, depending on which you have. Use the instructions in the recipe card notes to make persimmon puree from the fruit you have.
5 Easy Steps to Transform Your Pantry!
Ready to switch from store bought to homemade? Let me help you make some changes! Grab my FREE five-part guide to getting started.
Sugar — Use your favorite brand of granulated cane sugar. White sugar is fine, but for a richer flavor, don’t hesitate to use brown sugar.
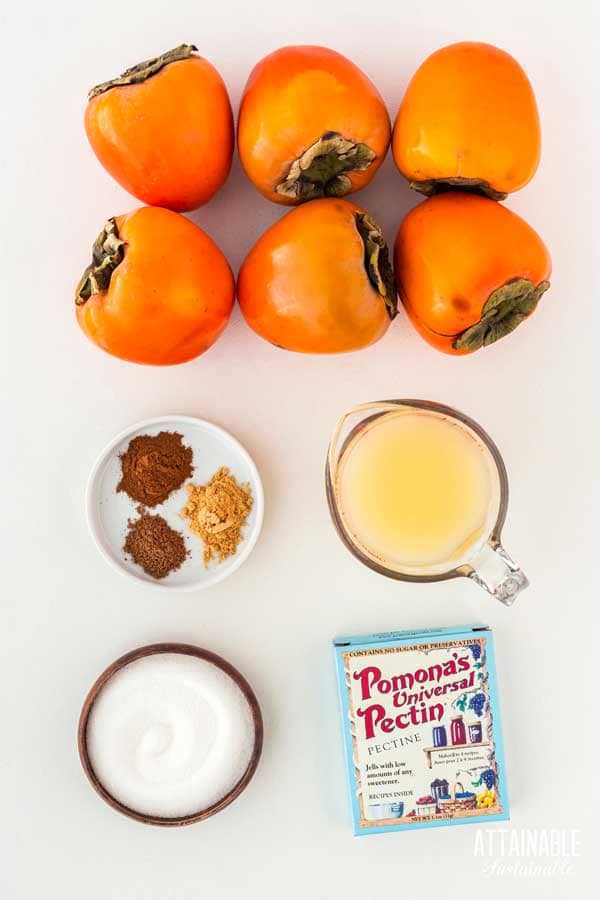
Lemon juice: USDA preserving recipes all call for using bottled lemon juice, not fresh lemon juice. This assures that the acidity level in recipes is safe for canning.
Pectin – This recipe is made using Pomona’s Universal Pectin. This is the only pectin I use anymore as it allows me to use much less sweetener. The standard pectin brands use an obscene amount of sugar in my opinion, often requiring equal amounts of sugar and fruit! (This recipe only calls for one and a half cups of sugar for eight cups of pulp.) This product uses a low methoxyl method and calls for using two different ingredients, which are included in the box: pectin (the large packet) and calcium powder (the small packet). The dry pectin is mixed with the sweetener before being added to the fruit. The calcium water is added directly to the fruit.
Making the Jam
Wash and dry the persimmons. They’ll require slightly different preparation, based on the variety you use.
Hachiya persimmons are soft when ripe. Remove the calyx (stem) from the top of each fruit and scoop out the soft, pudding-like pulp. Remove seeds. Mash coarsely with a potato masher or in a food processor, or just use clean hands to squish it into a pulp. Once pulpy, use clean hands to pick out the seeds. You can also process the pulp in a food mill to remove the seeds from the pulp.
Fuyu persimmons are firmer when ripe and you can leave the skin on or not, as you like. Chop ripe fruit into smallish pieces and mash persimmons or puree them in a food processor. For really firm Fuyu persimmons, place chopped fruit in a pot with about a cup of water and simmer until softened.
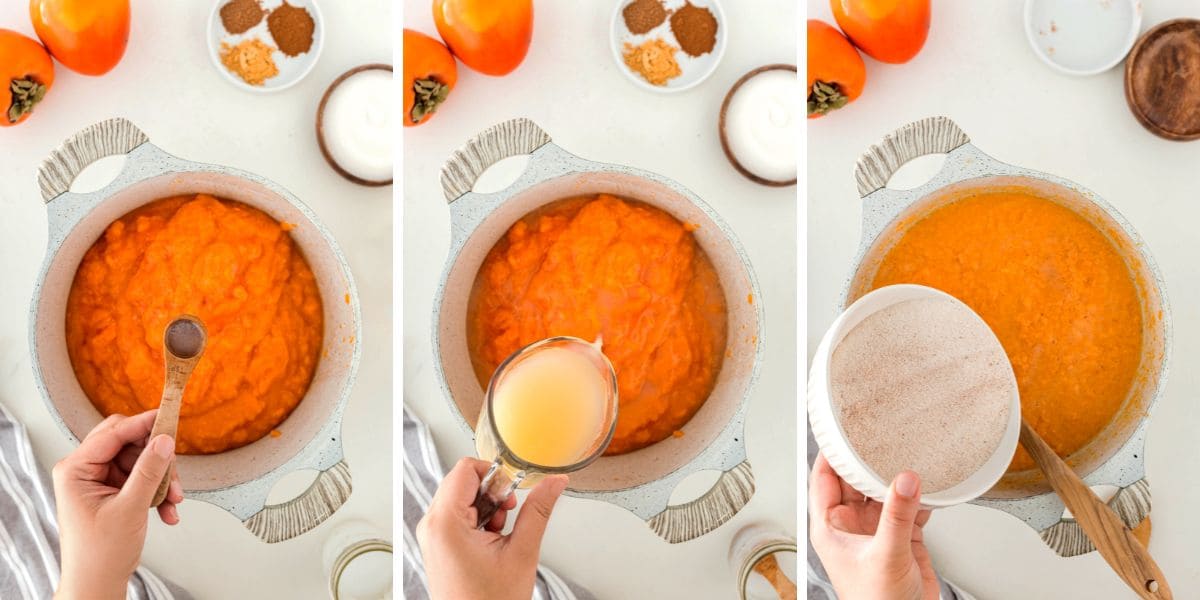
Measure 8 cups of the persimmon puree into a large stockpot along with the lemon juice and calcium water.
Combine the pectin with the sugar in a small bowl, making sure it’s thoroughly combined.
When the persimmon mixture reaches a full rolling boil, add the sweetener to the hot mixture, stirring vigorously for a minute or two to assure that the pectin is well distributed.
Return to a boil and remove from heat.
🍅 Safety First!
Canning is an excellent way to preserve food for the pantry, but there are some important safety considerations to keep in mind. The recipes on this site have been made following safe canning procedures by a certified Master Food Preserver.
- Know the difference between water bath canning and pressure canning. Low acid items must be pressure canned for safety.
- Altering ingredients may change the recipe’s pH, posing a safety issue. I highly recommend investing in pH paper to test your products for acidity level when canning. Note: For safe water bath canning, the Hawaii Master Food Preservers suggest a pH of 4.2 or lower in the tropics. In other regions, the recommended pH is 4.6 or lower.
- Use the proper jars and lids. Never reuse lids, with the exception of the Tattler or Harvest Right hard plastic lids that are intended for such a purpose.
- For more on canning equipment, please go here.
- Want to learn more? The National Center for Home Food Preservation is the go-to resource for safe canning information.
Water Bath Canning the Jam
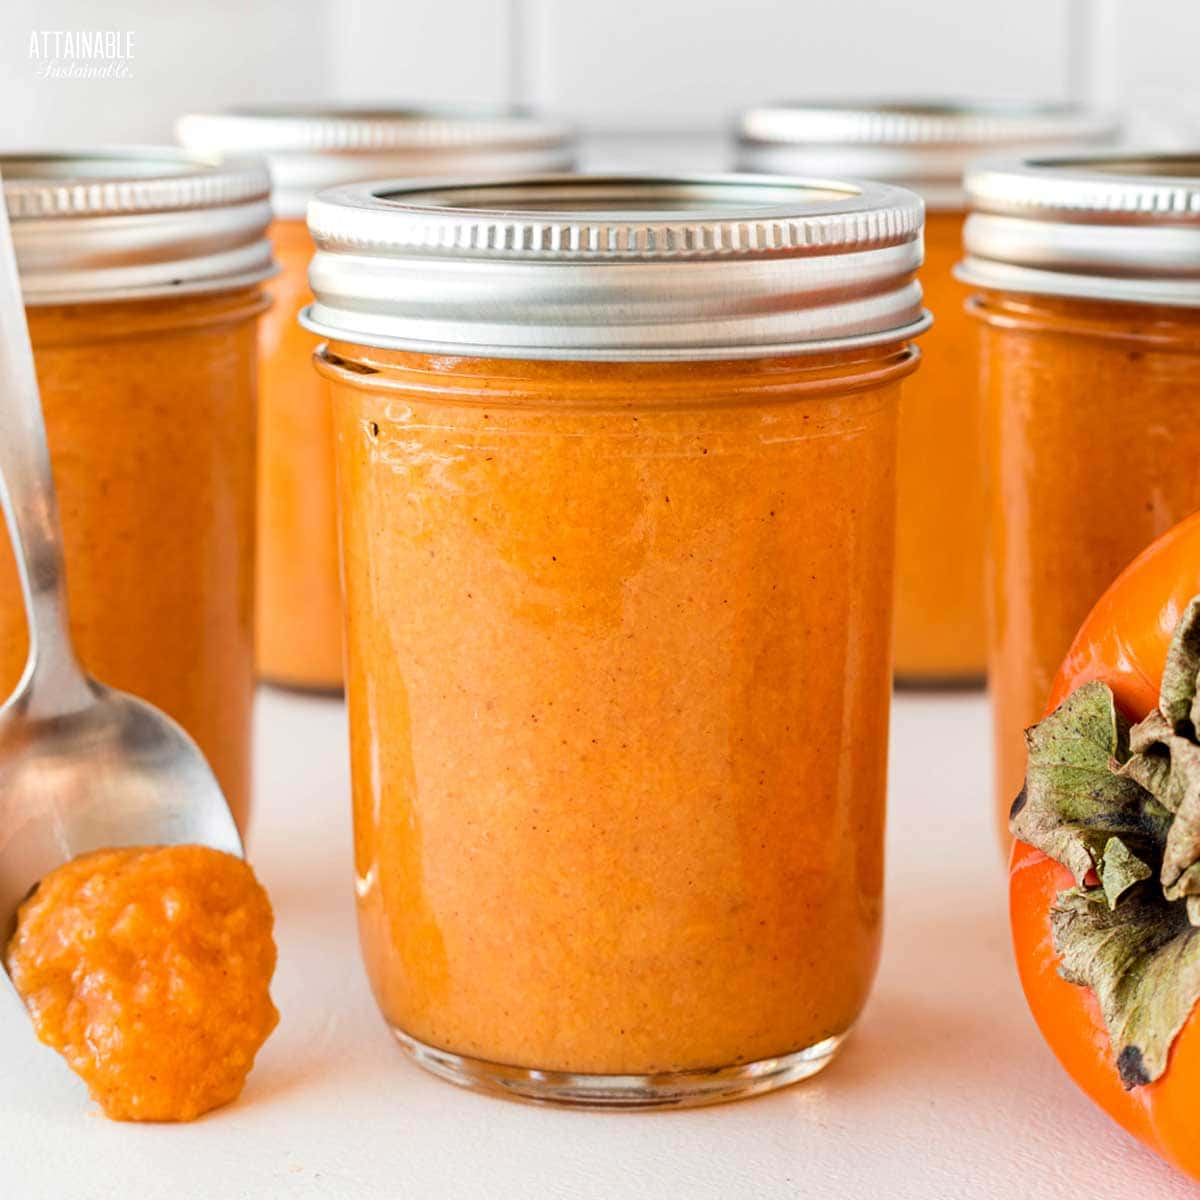
You’ll need special glass jars made for canning, flat lids, and rings to make this a shelf-stable product, but the process isn’t difficult. This jam can be made in pint or half-pint jars. (Quarter pint jars are fine, too, and great for gift giving.)
To prepare, wash jars in warm water. I like to place jars in the water bath canner as it heats to keep them warm. This lessens the risk of breakage when transferring the hot jam into the jars.
Fill the empty jars with jam, leaving a quarter-inch headspace. Wipe the rims of the jars, removing any residue. Place the lids on and process them in a water bath canner. What this means is you’ll put the filled and sealed jars of jam into boiling water and heat them for ten minutes. This assures that the jars will seal well and kills off any potential bacteria in the jam mixture itself.
Use a jar lifter to remove the hot jars from the canner and place on a towel-covered countertop; allow to cool fully. As they cool, you’ll hear the little “tink” sound of the jars sealing. Store any unsealed jars in the fridge and use those first. (This is unusual, but it does happen once in awhile.)
Storing the Jam
Remove the ring from each sealed jar of peach preserves, rinse to remove any jam residue, and store (without the ring) at room temperature in a dark place such as the pantry. Opened jars should be kept refrigerated; they’ll last in the fridge for several weeks.

Using this Jam
This homemade persimmon jam is delicious on toast, but don’t stop there! Spread it on waffles and pancakes, spoon it over ice cream, or stir some into yogurt. Or use it as a dip for fresh apple slices.
More Persimmon Recipes to Try
Take advantage of persimmon season to try some new recipes featuring this bright orange fruit.
★ Did you love this recipe? Be sure to give it a star rating below! ★

Persimmon Jam
This easy jam recipe turns persimmons into a delicious spiced spread with the flavors of fall. This lower sugar recipe means the flavor of the fruit will shine through!
Ingredients
- 8 cups persimmon pulp (8-9 pounds)
- 8 teaspoons calcium water (from Pomona's Pectin package)
- 1 cup lemon juice (bottled)
- 1 teaspoon ground ginger
- 1/2 teaspoon ground nutmeg
- 1 teaspoon ground cinnamon
- 1-1/2 cup sugar
- 4 teaspoons pectin powder (from Pomona's Pectin package)
Instructions
Prepare for Canning
- Prepare the calcium water: Combine ½ teaspoon calcium powder (from the small packet in the box of Pomona’s pectin) with ½ cup water in a small jar. Screw on a lit and shake until well-combined. You'll have more than you need for this recipe. Store the excess in the refrigerator for use in making additional jam or jelly recipes.
- Wash the jars you'll use, making sure each is clean and free of nicks in the rim, which could impede sealing.
- Wash the lids and rings in hot soapy water. (If you're using non-Ball brand lids, prepare as suggested by manufacturer.)
- Place empty jars in a canning pot or large stock pot with enough water to cover by an inch or two, cover pot, and set on high heat. It can take awhile for the water to heat, so get it started before you begin making the recipe.
Make the jam
- Prepare persimmons (see notes); measure 8 cups of pulp into a large pot. Add the prepared calcium water and lemon juice; stir to combine well.
- In a separate bowl, combine the sugar with the pectin powder (the large envelope) until thoroughly combined. Stir in spices.
- Bring mashed persimmons to a full boil. Add sugar mixture, stirring vigorously for a couple of minutes to dissolve the pectin. Return to a full boil and remove from heat.
Canning persimmon jam
- Remove the empty jars from the canner, draining the water back into the pot.
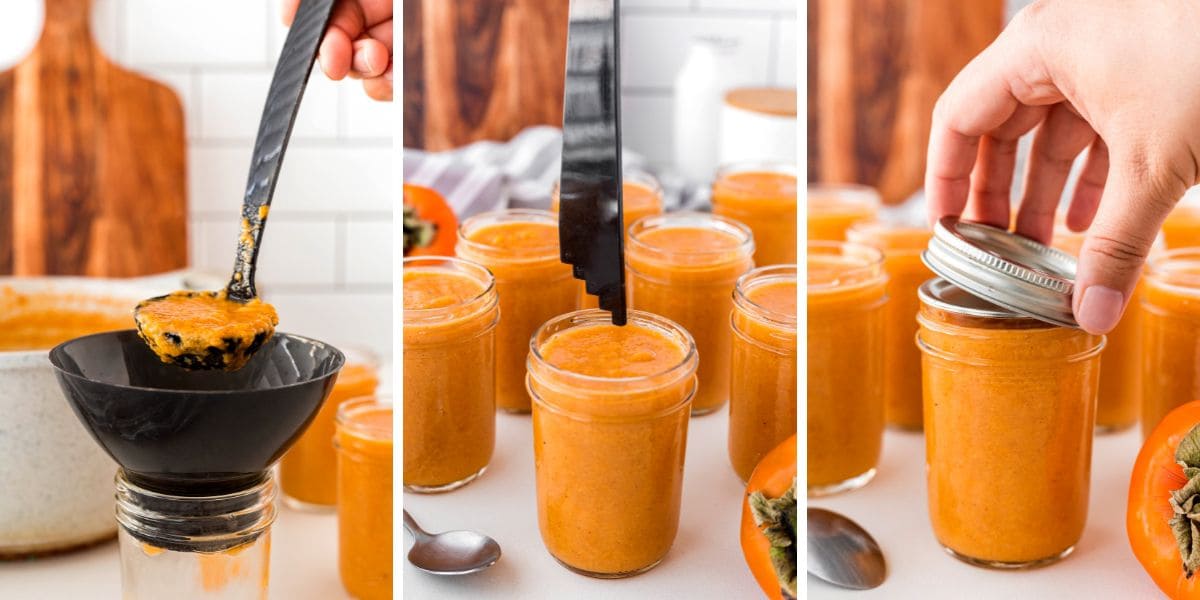
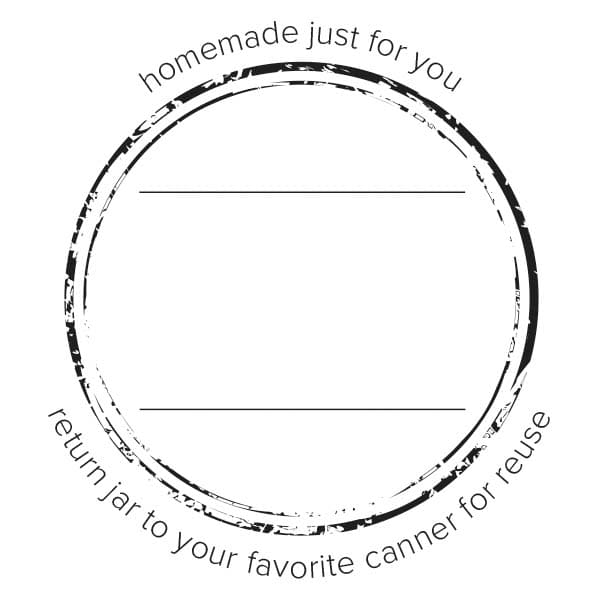
- Ladle hot jam into half-pint or pint jars to within a quarter inch of the rim. A canning funnel makes this easy. or pint
- Wipe jar rims to remove any jam that may have spilled. A clean rim is essential to a good seal.
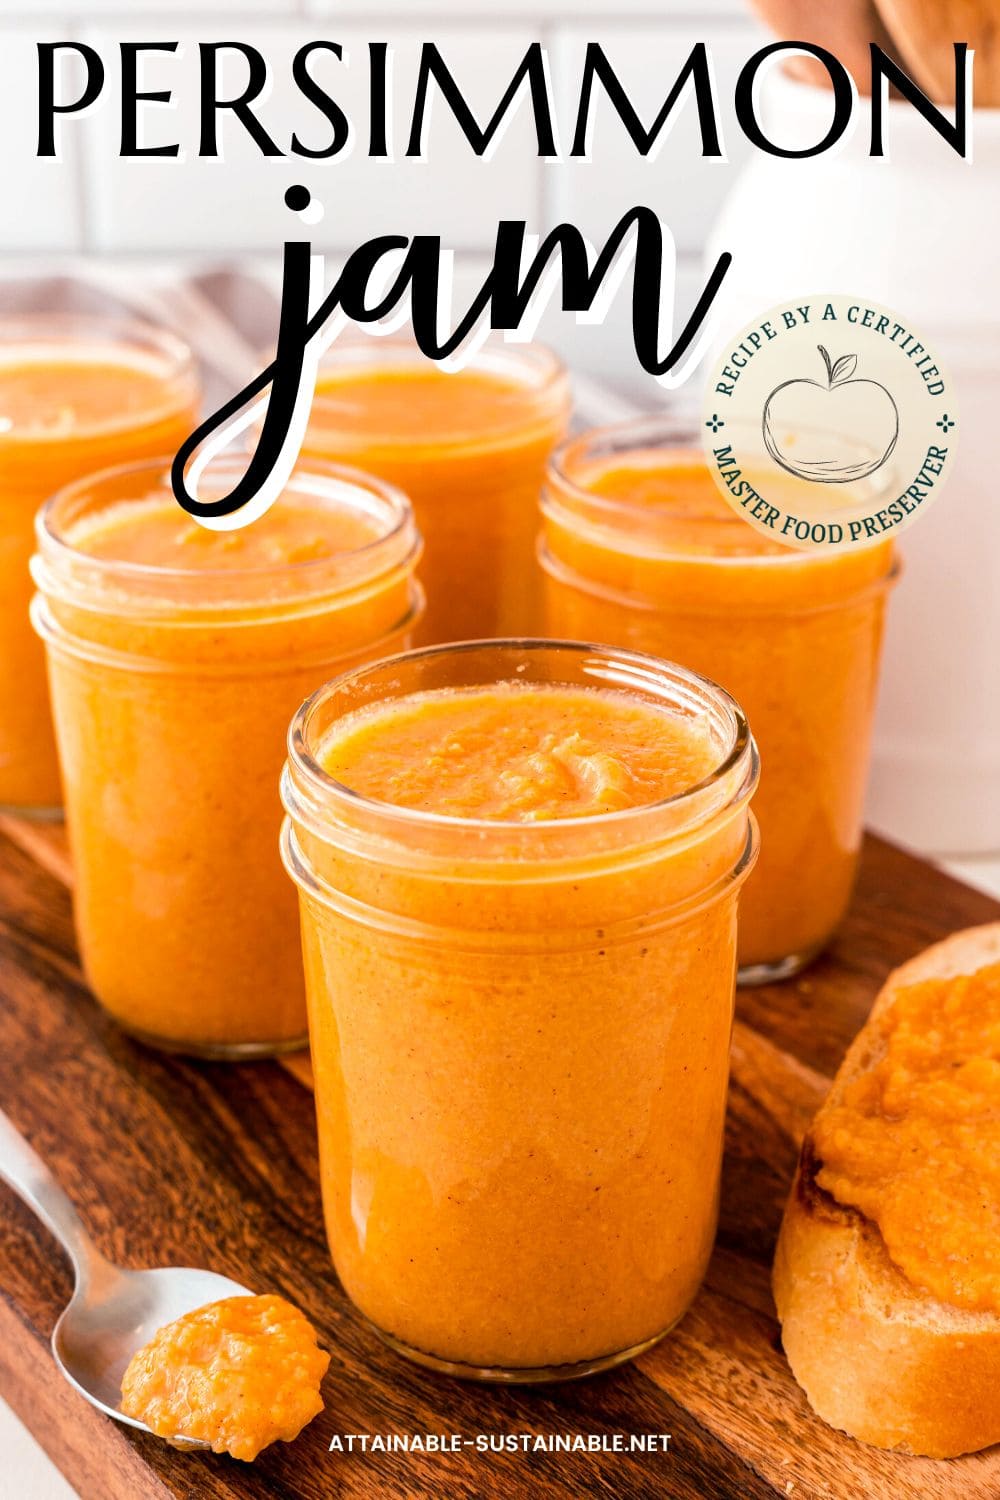
- Set jar lids in place. Screw bands on finger tight.
- Use a jar lifter to gently submerge jars into the hot water bath. Be sure to place a wire rack in the bottom of the pot to prevent the jars from sitting directly on the bottom. Water should cover the top of the jars by an inch or two. The water will cool somewhat in reaction to the addition of the jars. Return the water to a low boil and then set the timer.
- Process in a boiling water bath for 10 minutes. For higher altitudes, add a minute to the boiling time for every 1,000' above sea level.
- Check seals. Lids should be solid and pulled down tight. (if they flex and pop, the jar didn’t seal; put unsealed jars in the refrigerator and use those first).
- Remove rings and wash outsides of jars. Store in a cool, dry place.
Notes
This recipe is made using Pomona’s Universal Pectin. This is the only pectin I use anymore as it allows me to use much less sweetener. The standard pectin brands use an obscene amount of sugar in my opinion, often requiring equal amounts of sugar and fruit! This product uses a low methoxyl method and calls for using two different ingredients, which are included in the box: pectin (the large packet) and calcium powder (the small packet).
Hachiya persimmons are soft when ripe. Remove the calyx (stem) from the top of each fruit and scoop out the soft pulp. Remove seeds. Mash coarsely with a potato masher or in a food processor, or just use clean hands to squish it into a pulp.
Fuyu persimmons are firmer when ripe and you can leave the skin on or not, as you like. Chop into smallish pieces and mash persimmons or puree in a food processor. For really firm Fuyu persimmons, place chopped fruit in a pot with about a cup of water and simmer until soft.
This recipe tests at a pH of 3.0, making it safe for water bath canning.
Boiling lids or heating above 180°F as once recommended can damage the sealing compound.
SOURCE: Adapted from Pomona's Universal Pectin.
Nutrition Information:
Yield: 160 Serving Size: 1 tablespoonAmount Per Serving: Calories: 18Total Fat: 0gSaturated Fat: 0gTrans Fat: 0gUnsaturated Fat: 0gCholesterol: 0mgSodium: 1mgCarbohydrates: 5gFiber: 0gSugar: 4gProtein: 0g


Hi Ms. Kris, thank you for your well written instructions. I know you only use Pomona now but I have a new jar of the low sugar Ball Realfruit brand. Can you explain how I use it to make this persimmon jam recipe? This is my first time about to make jam. Thanks for your advice.
I’m sorry, I haven’t experimented with this product.