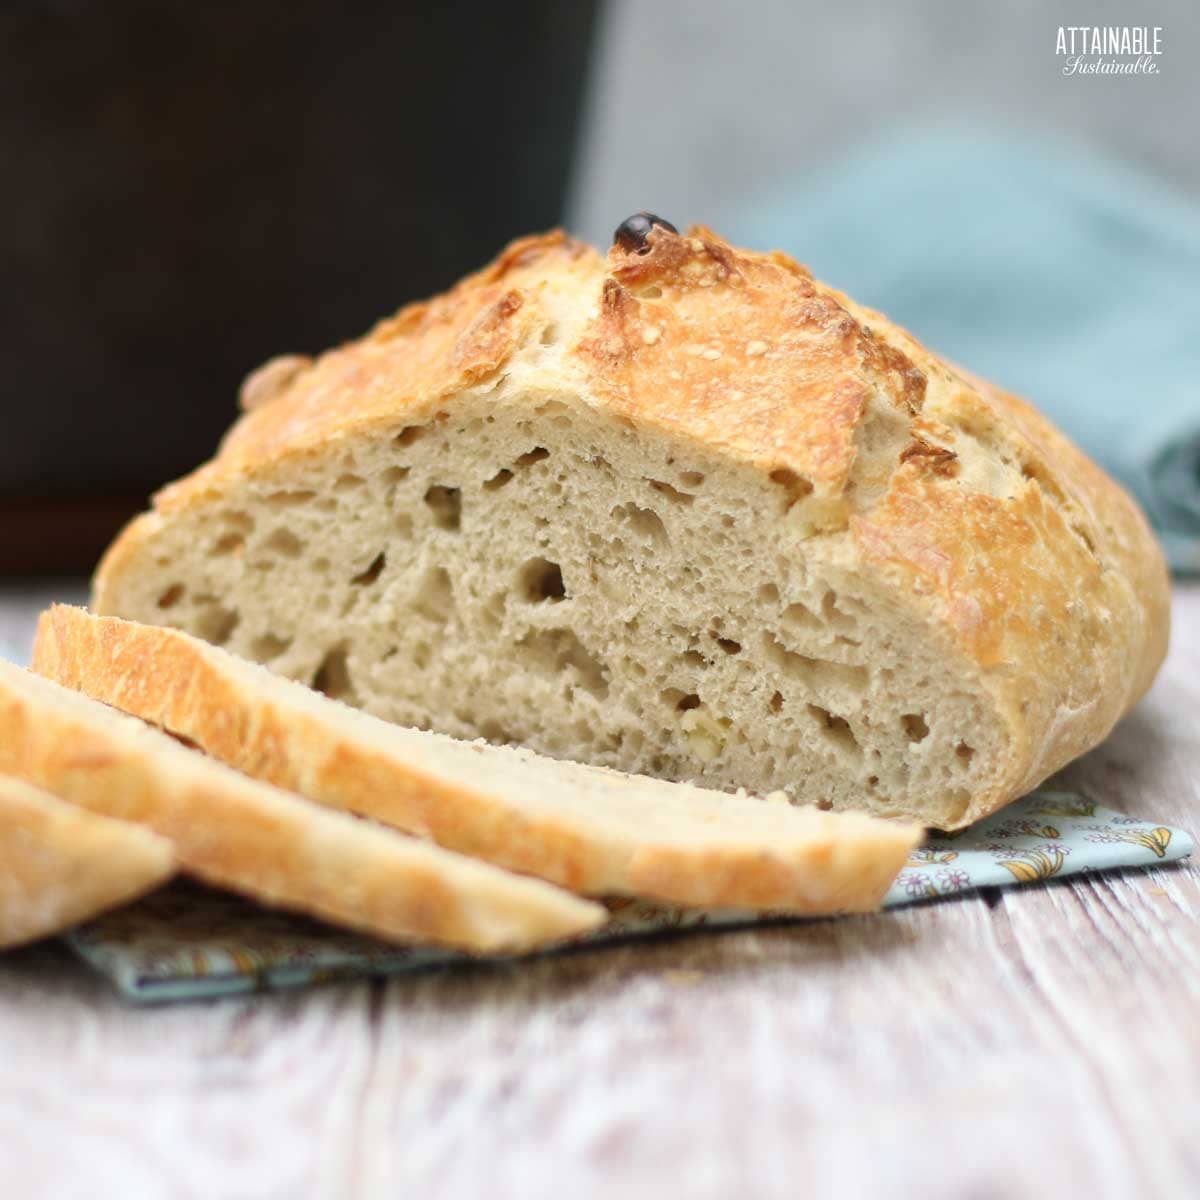
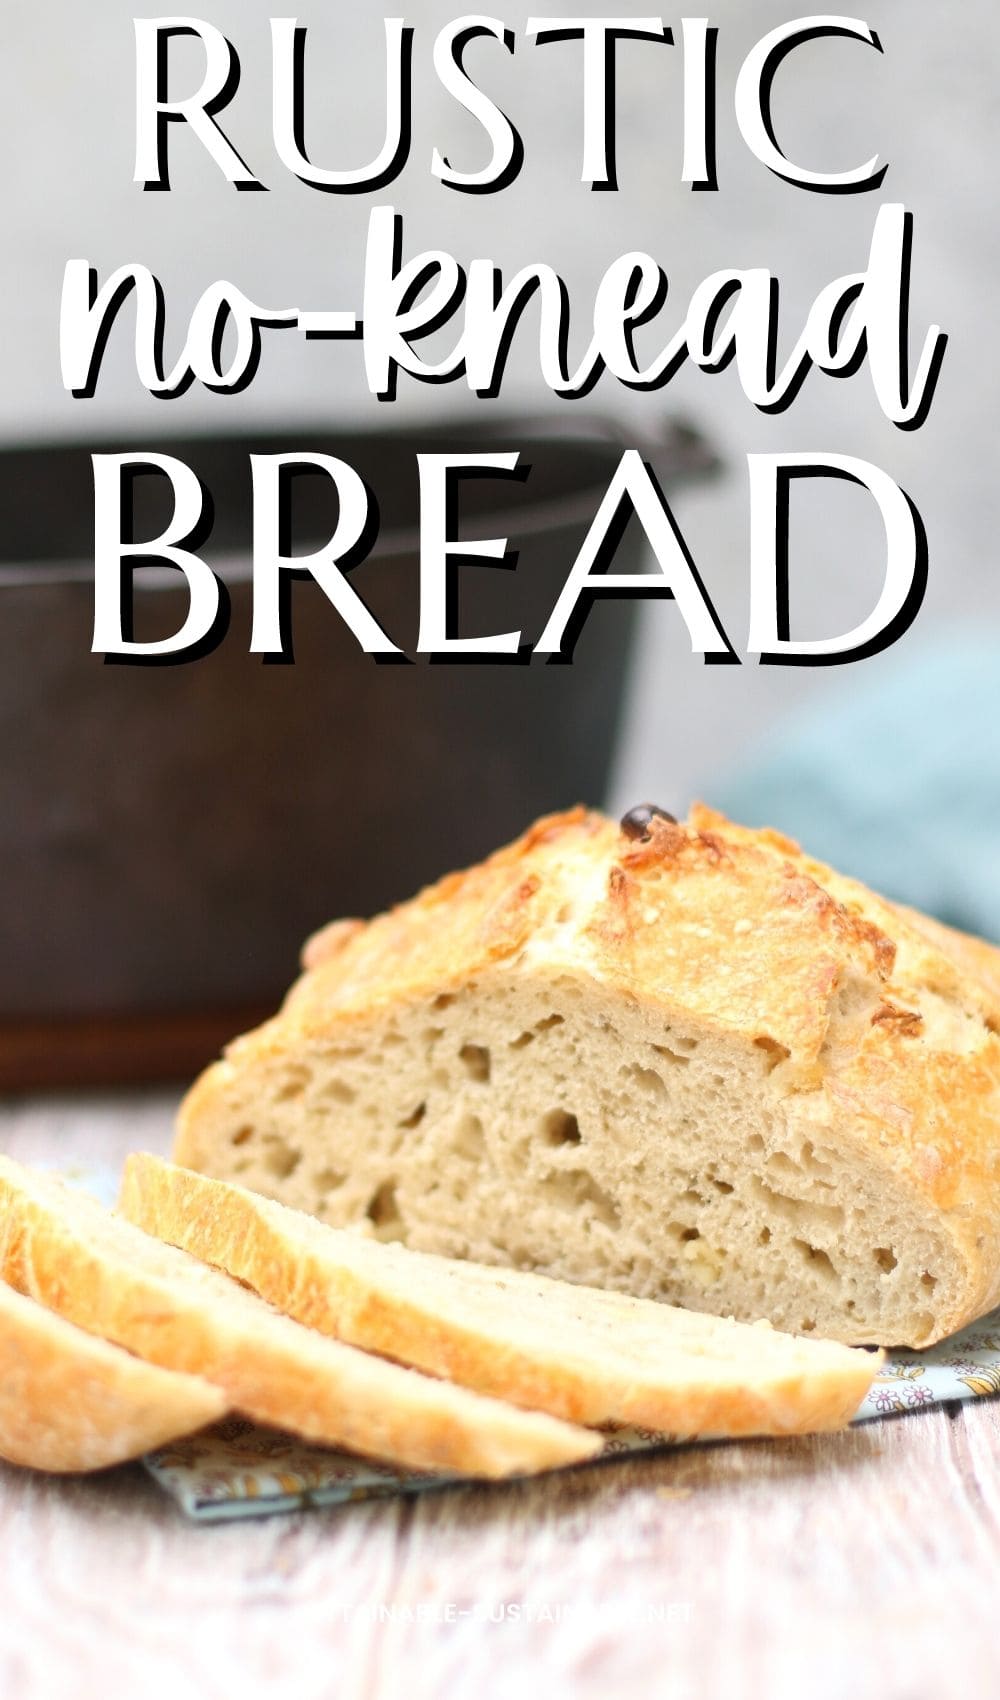
There’s nothing like a fresh loaf of bread, right out of the oven. This is the best no knead rustic bread recipe and it requires just a little mixing, followed by a long rise time.
This bread would be delicious with some of this caramelized onion jam!
Easy Dutch Oven No-Knead Bread Recipe
While most yeast breads require a certain amount of kneading, this recipe does not. It’s a great starter recipe for people who are hesitant to try their hand at making homemade bread. If this is your first time making bread with yeast, it couldn’t get any easier!
My husband has been making this no-knead bread on a regular basis. He mixes up the dough the night before, lets it sit overnight, then bakes it in the morning. Oh, the house smells so wonderful!
This savory Dutch oven bread recipe incorporates chunks of fresh garlic and rosemary for a rustic bread that’s perfect served with soup. Or simply spread with butter.
If you’d prefer to omit the rosemary and garlic, you certainly can; the bread will be just as good and a contender for use in this blueberry French toast casserole.
5 Easy Steps to Transform Your Pantry!
Ready to switch from store bought to homemade? Let me help you make some changes! Grab my FREE five-part guide to getting started.
Ingredients
Flour — When I bake with all-purpose flour I opt for the unbleached option. Bleached flour is very white, but it’s also treated with bleaching agents that I don’t really need in my food.
Active Dry Yeast — This is the ingredient that gives the bread loft. Read more about using yeast here.
Salt — Use your favorite table salt or sea salt.
Garlic — Whole cloves of garlic adds that spicy zing we all love so much. Chop the garlic coarsely. Can you use powdered? You could, but…
Rosemary — Pull fragrant needles from the stems of a rosemary plant to give this bread a delicious flavor, or use dried rosemary.
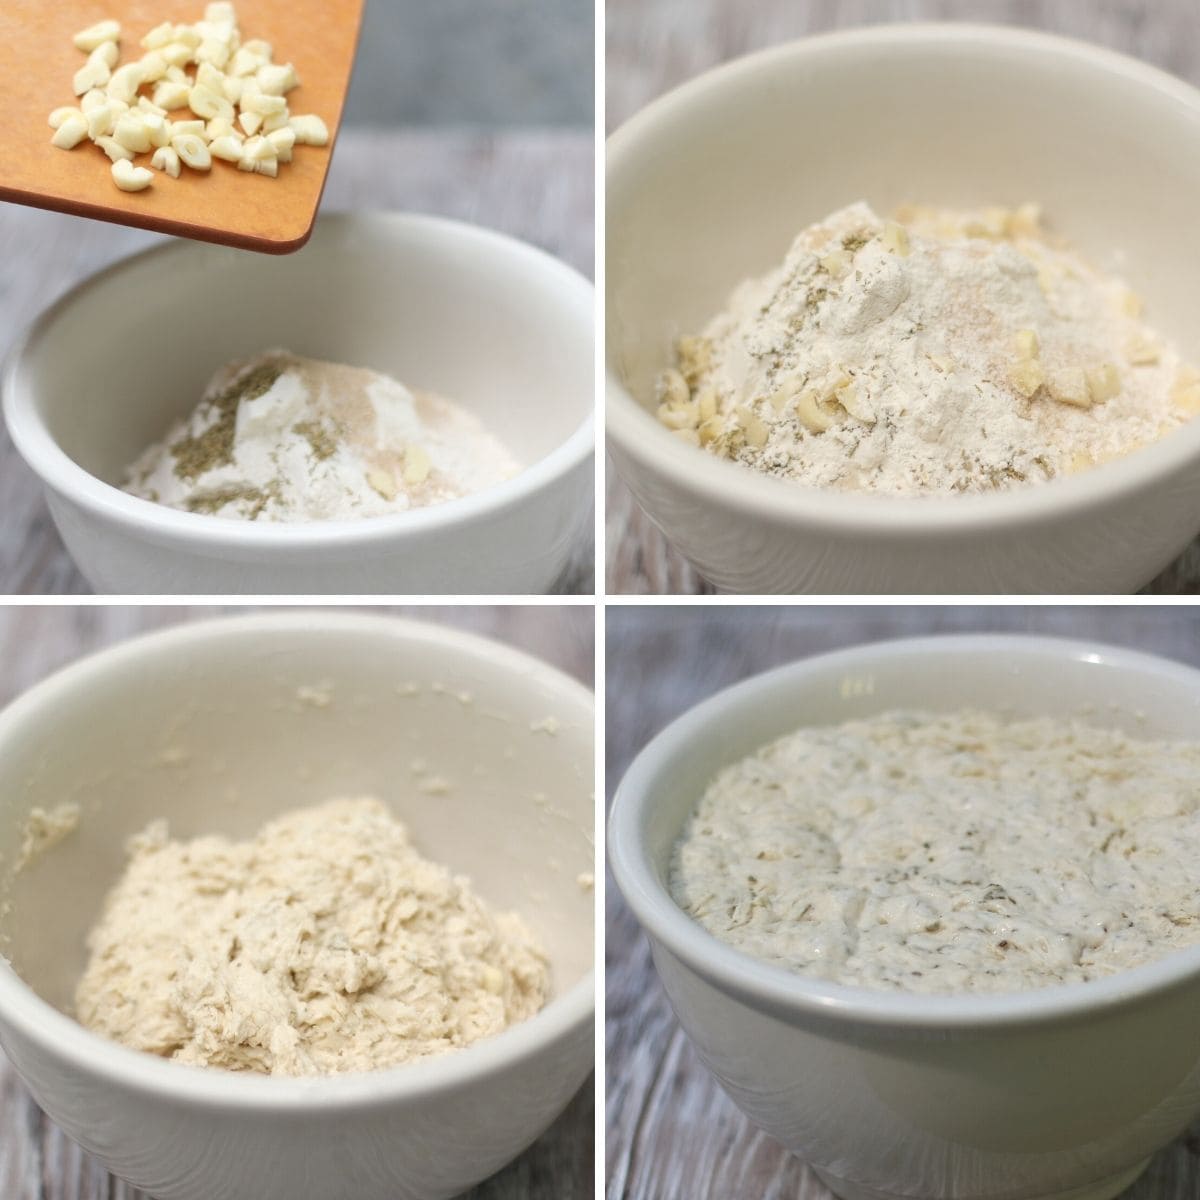
Mixing the Dough
It takes just 5 minutes to stir the ingredients together in a large bowl. Combine the dry ingredients in a small mixing bowl, then stir in the garlic and rosemary. Add water and mix just until combined into a shaggy dough.
If you’ve made bread before, it may seem a bit wet to you, but not to worry! Despite the sticky dough, it will bake into a lovely artisan bread loaf!
Once that’s done, let the dough rest. You’ll want to let it rest for at least 8 hours, or up to 24 hours. While it rests at room temperature, the dough will rise some and become bubbly.

Forming the Loaf
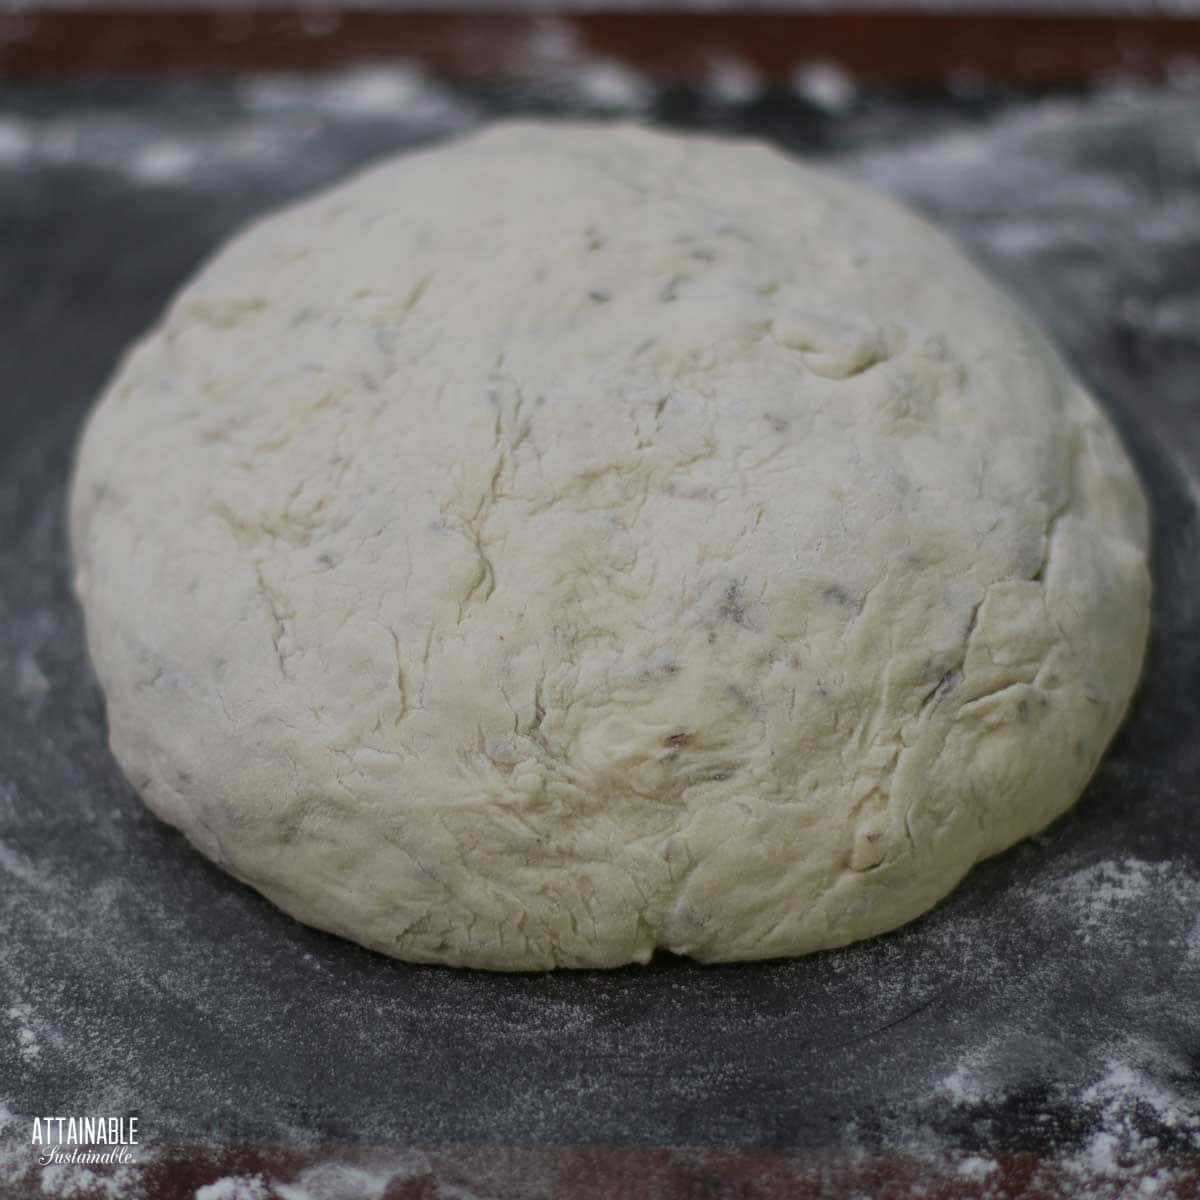
Transfer the dough to a floured surface. Again, it will seem a bit wet and sticky and soft. This is exactly how it should look!
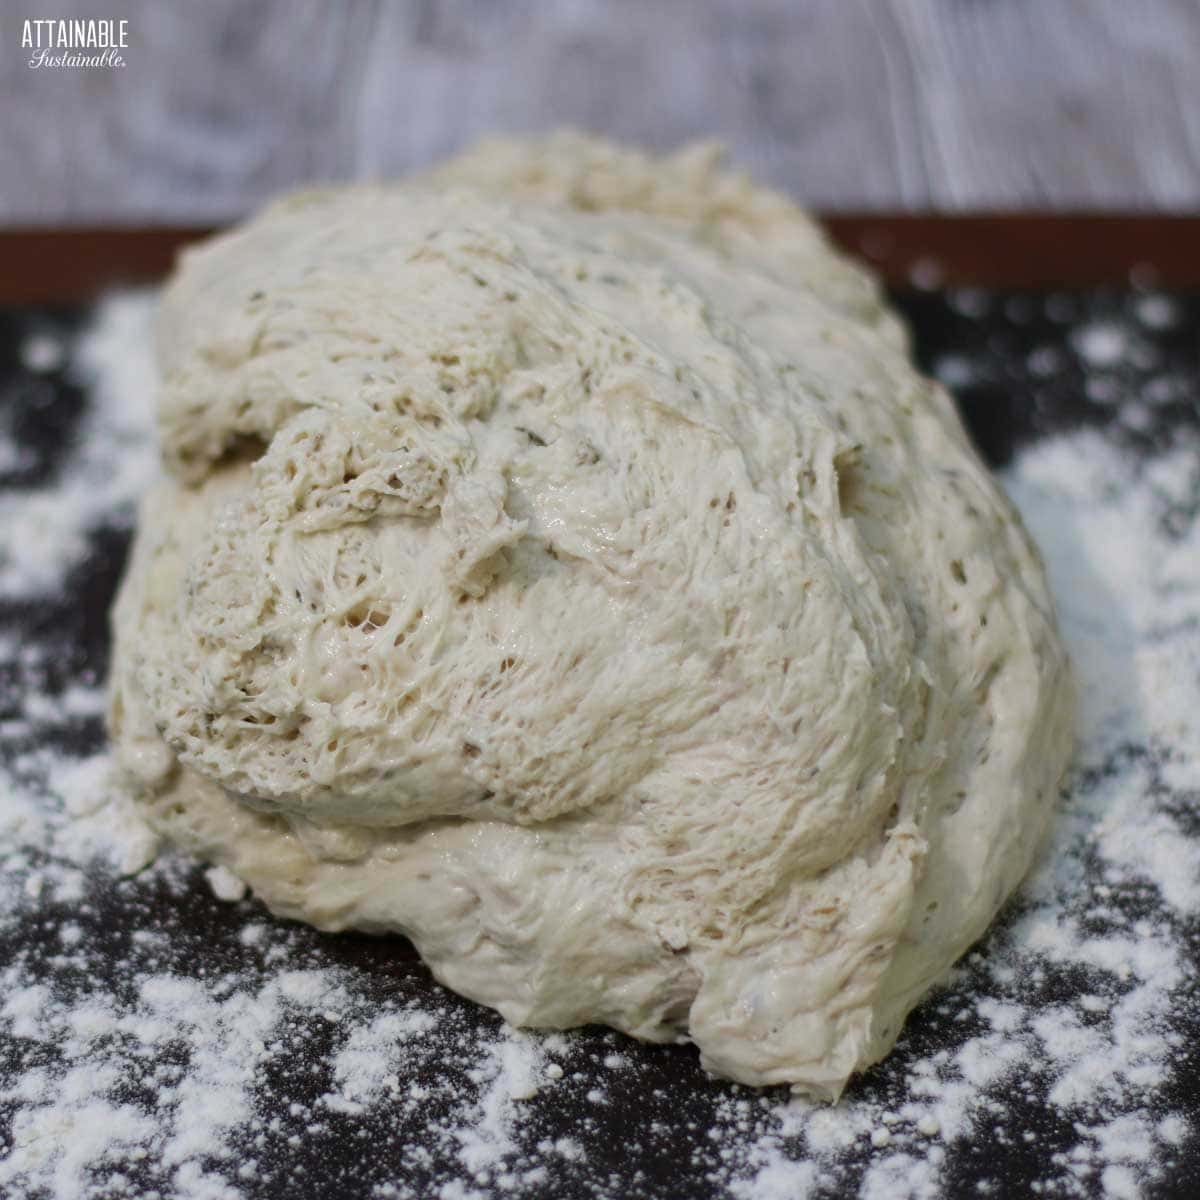
Use your hands to form the dough into a loose ball, then roll the dough on the surface, using the rolling action to help create a smoother round loaf.
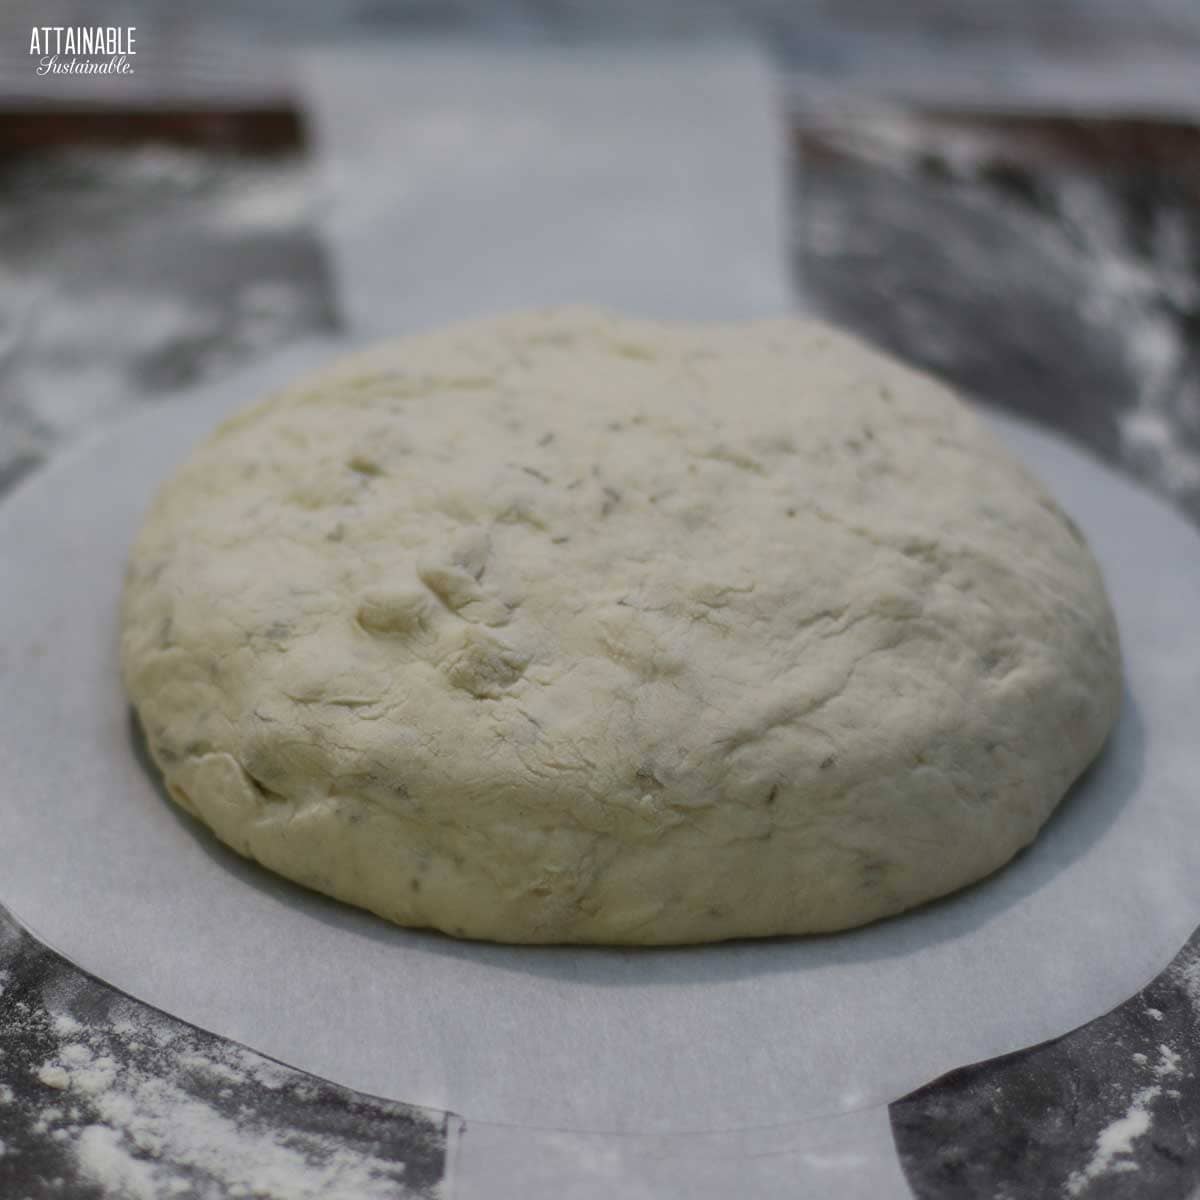
Gently slide the dough onto a sheet of parchment paper and lift it into the hot Dutch oven. Cutting the parchment paper to fit the bottom of your pan and leaving “handles” makes it even easier. I saw this trick somewhere on the internet, I can’t recall where, but it’s much easier than trying to fit a square piece of parchment into a round pan!
Can you make this without the parchment paper?
Absolutely! The parchment paper is a trick to make transferring the bread dough to the hot dish much easier, but it’s not absolutely necessary. You can, instead, use your hands to lift the dough gently – and carefully! – into the hot pan.
Why Dutch Oven Bread??
Using a pre-heated Dutch oven creates the crispy, crunchy crust that we all love our bread to have. We use a cast iron Dutch oven that came from a garage sale decades ago. (These things last!) It’s not marked as to size, but I’d guess it’s a 6-quart Dutch oven. Mine is uncoated, but if you have an enameled Dutch oven, that will work great.
If you don’t have a cast iron Dutch oven, use a nice sturdy — deep — casserole dish with a lid. A stoneware dish is a good choice, as it will easily withstand the heat of the oven.

Bake for 30 minutes, covered, then remove the lid and continue baking for another 15 minutes or so, until the bread is a lovely golden brown.
Storage
Allow the bread to cool completely before transferring to a storage bag. We often just wrap ours in a clean towel, especially since it’s devoured pretty quickly. (It is truly the best no knead rustic bread recipe and you are going to be making it regularly!)
Serve it up with a bowl of this roasted tomato soup for a perfect meal.
★ Did you make this no-knead bread recipe? Don’t forget to give it a star rating below! ★
The Best No-Knead Dutch Oven Bread
Ingredients
- 3 ¼ cups all purpose flour (plus extra for dusting)
- 1 ½ teaspoons salt
- ½ teaspoon active dry yeast
- 1 ½ cups warm water 110ºF
- 6 - 8 cloves garlic roughly chopped
- 1 tablespoon dried rosemary or several sprigs of fresh
Instructions
- Combine flour, salt, yeast, garlic, and rosemary in a mixing bowl. Stir in water.3 1/4 cups all purpose flour, 1 1/2 teaspoons salt, 1/2 teaspoon active dry yeast, 6 - 8 cloves garlic, 1 tablespoon dried rosemary or several sprigs of fresh, 1 1/2 cups warm water
- Cover with a damp kitchen towel and allow to sit at room temperature for 8-24 hours. It will become bubbly.
- Dust your working surface with flour. Turn dough out onto floured surface and form a ball by tucking the loose "edges" of the dough under and rolling the dough on the surface. Transfer to parchment paper and allow to rest for 30 minutes.
- While dough is resting, place a cast iron Dutch oven in the oven and preheat to 450ºF.
- Use a sharp knife to make an "X" in the top of the loaf.
- Lift bread to the Dutch oven and cover.
- Bake for 30 minutes. Uncover and bake for 15 more minutes, until the bread is nicely browned.
- Remove from oven and cool before slicing.
Notes
- You can also use instant yeast in this no knead bread recipe.
- If you do not have a Dutch oven or enameled cast iron pan, a heavy duty stoneware casserole dish will work.
- Cutting the parchment paper to fit the bottom of your pan and leaving "handles" makes it even easier to move the bread into the Dutch oven.
- Inspired by It's Always Autumn.


I made this last night and baked this evening, roughly 20 hours of rise time. I used an old Corning ware casserole dish with glass lid and it worked great. Thank you.
Can you use self raising flour instead of yeast as I don’t have any but would like to make this bread NOW. It sounds delicious from all the comments
No, self-rising flour has different leaveners.
What other flavors have others tried? Cheese? Oregano? Others? (Not a big fan of rosemary)
So many variations are possible. You can also just leave the rosemary out.
How do I keep the bottom of the loaf from getting too hard? I am using a dutch oven with parchment. Should I place a round rack inside?
It’s hard for me to know for sure what’s happening, but I’d say start by checking the placement of your oven rack and make sure it’s not too low. Raise it up if you can!
Made it and it came out perfect! Thank you for the recipe. I actually only let it rise for 4 hours (I’m impatient) and had temp at 415 due to plastic like Dutch oven lid handle max temp. Still came out just right. For those with issues, ensure water you put in is warm enough to get yeast going.
Patience is a virtue I’m still working on. 🙂
I loved making this. I baked mine in a stone pampered chef loaf pan and covered it with a metal loaf pan, worked perfectly. The bread was a big hit. Have you tried warm milk instead of water?
No, but something to experiment with!
Did you leave it on the parchment paper when putting it into the dutch oven?
Yes.
My husband has been making a similar whole wheat artisan bread. He turns the oven light on in a cold oven, prepares & covers the dough with a clean tea towel. When he removes the bowl after three hours & the bowl is warm & the temperature has been consistent. We got this tip from a baker who has been making kneaded bread for a long time.
I am a long time bread maker but your receipt intrigued me . Today I shall give it a try. Excited.
Can I use fresh rosemary, right off the plant, chopped?
Thanks!
Of course!
Would a gluten free cup 4 cup type blend work for no knead breads like this one?
My husband actually tried this the other day. It made a very dense loaf, but it did work.
I made this and had the same problem as some of the others, just a very wet mess. Like there’s not nearly enough flour. I added another cup just to get it together enough to throw in the oven to see how it comes out so I don’t have to just totally trash the ingredients I used. But this is definitely not a room temperature or yeast issue. Fresh yeast, warm house. Could there maybe be a mistake in the amount of flour or water as written in this recipe?
Thank you for being so gentle in your comment. People are making it with success, I’ve had friends messaging me that they’re making it regularly and love it, so the instructions here are clearly working for *some people. It IS a wet recipe. The dough does not feel like a traditional bread dough. I hope once it’s baked you find that it turned into a nice loaf.
It was delicious and had a nice texture once I got it baked. Not sure what, if anything I did wrong. It just didn’t match up with your pictures. But the finished product was still very good
This is interesting as my results regarding the dough “wetness” has not been consistent either. The first time was closer to your pictures but every time after has been wetter and almost impossible to handle. The final baked result has been good all around and I’ve changed up the herbs I put in it which has been fun. While I’ve used AP flour for all the times I’ve made this recipe, the brands have not been consistent. Maybe that’s the reason? What is the brand of AP flour you use?
Hi! I’ve been making no knead bread for years, and my standard recipe is 3 cups flour and a cup and a half warm water. I don’t do anything exact, because I know what the consistency should be, and sometimes I use a few more tablespoons water, sometimes a few less. I have noticed, though, that different types and brands of flour produce different results (maybe because they are slightly different grinds?) so the best thing to do is to learn what the proper consistency of the shaggy dough should be by watching YouTube videos, and then go for that rather than exact measurements. I hope that makes sense? The first few weeks of making no knead bread for me were a total disaster…. but eventually, you’ll get perfection every time, and it is so very much worth it! Good luck!
It is great. I had been looking for an easier no-knead, slow fermentation recipe. This is it!
Thanks.
We just finished making your bread, it is delicious my husband and I are enjoying the flavours. So easy to make your instructions are perfect and easy to understand. Thank you so much for sharing, will be making again and again. The one thing I did a little different is after baking, I melted a very little butter and brushed the bread while warm.
Well, how can one go wrong with butter?? 😉 glad you liked it!
can this be made with a sourdough starter? I’ve just made mine first time ever and looking for a good (and easy) recipe.
It’s on my list to experiment with this! If you search my site for “sourdough” you’ll pull up several recipes to try.
I tried this and it really didn’t turn out. I followed exactly, and baked after about 23 hrs. I am wondering – what type of yeast do you use? I used active dry, perhaps I need to add sugar? Not sure how that would affect the final product.
We use active dry yeast, so that’s not likely the problem. (Unless the yeast wasn’t *fresh – it loses potency as it ages.) How’s the temperature in your kitchen?
The yeast was new, so it must be the room temperature, I’ll have to find a better place for it to sit. Thanks!
what sort of modifications (if any) would you use for high altitude? I’m at 7300 ft above sea level.
I’m sorry, I am NO help with this. I’ve always lived/cooked not far above sea level. 🙁
Hi Kris,
I love reading your great newsletters here in Australia. Can I use a bread tin and foil for cooking the bread in.
Louise
Thank you! I have not *tried this, but if I didn’t have a suitable pan, I would!
What if you don’t have Dutch oven or casserole loaded dish can you substitute with something else. Just have bread pans.
I need to experiment with this. Do you have something to contrive a lid over the bread pan?
Kris, I have baked it with no lid and comes out same, crusty top.
Good to know, thank you! 🙂
Hi … I’ve been wanting to make my own bread for some time, my mother ‘always’ did but I have been a bit reluctant. Decided to try this recipe as a starter, much like you suggested. It turned out fabulous, even though my yeast had just about reached expiry. Not sure how a person could go wrong. This is a real winner!!! Can’t wait to impress my guests, when we can once again have guests that is, but in the meantime my husband and I will pack on the calories munching on this lovely fresh and crunchy bread, ourselves! Thank you soooooo much! (Love your book, you are a superwoman and a real inspiration!)
Oh, honey. FAR from Superwoman. But thank you. And yay, bread!!
I always keep my yeast in the freezer (for yrs even) and I have never had a failure with it (yet, knock on wood).
Made this bread today. Came out great. Baked at a lower degree (420). Was a bit chewy but guess because it’s a rustic bread. Thanks for sharing.
Hi Kris! Can you make this recipe using whole wheat flour?
You *could. It will be much more dense. I know we’re all working with limited access, but if you have some AP flour, I usually have good luck replacing about 1/2 the AP with whole wheat. Good luck!
this was complete failure. followed recipe exactly. would not make again. big puddle of wet dough. yeast was brand new pkg.
This is so odd. We’ve been making it weekly with no trouble. Sorry you had a failure.
Wonder if the house temperature wasn’t warm enough? I know most of my recipes for ‘rustic’ or sourdough need the house to be at least 70 degrees or it takes a lot longer for the dough to rise. Just a thought.
Did you have your water too warm & “kill” the yeast?