
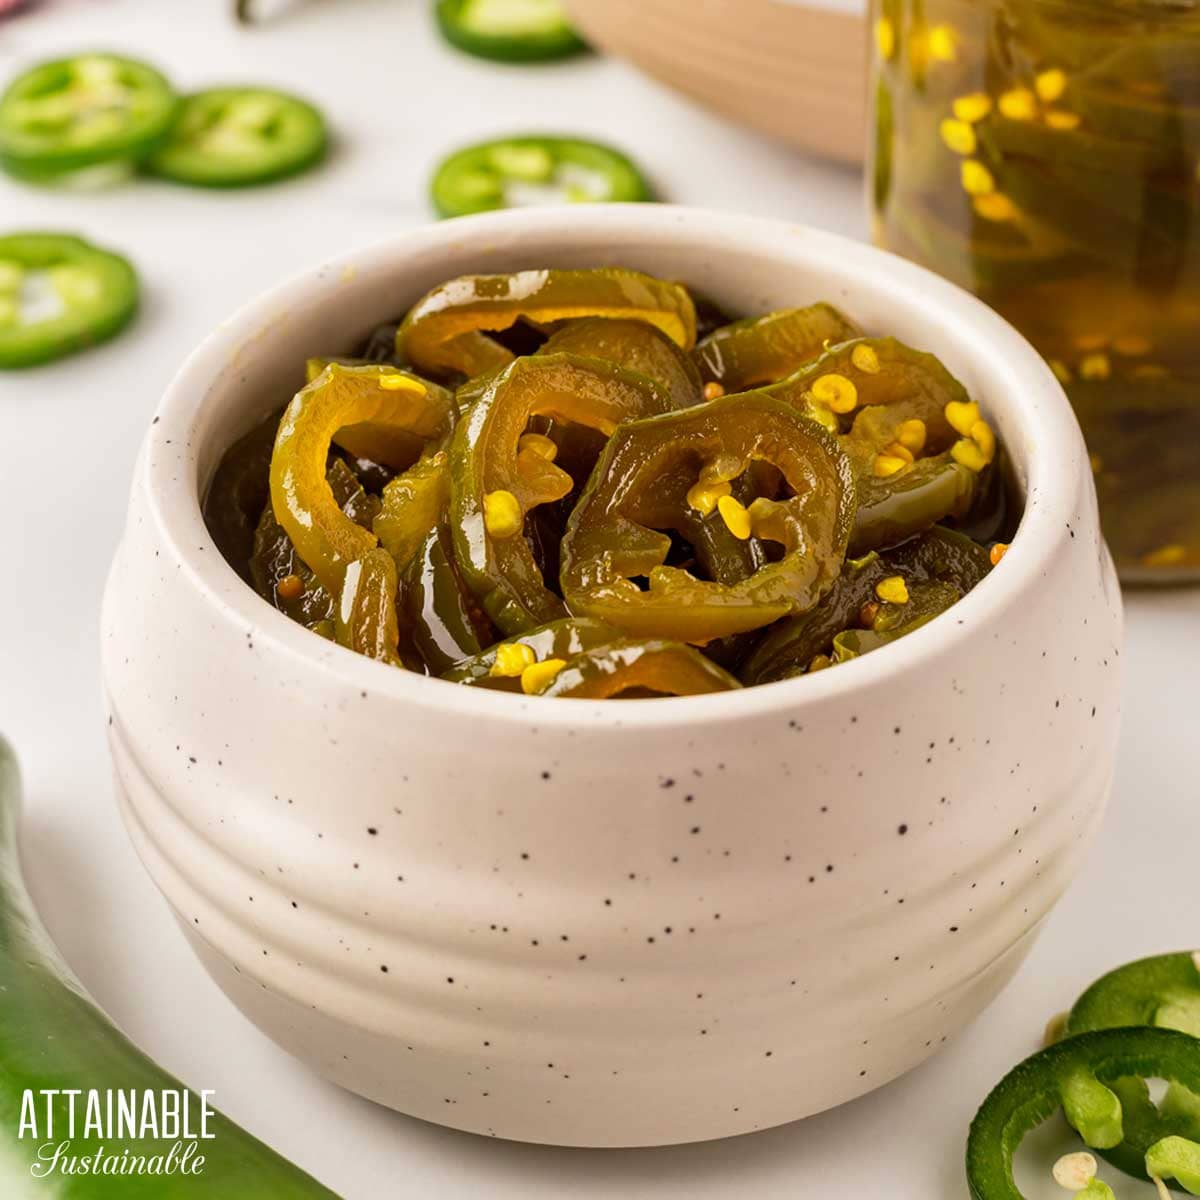
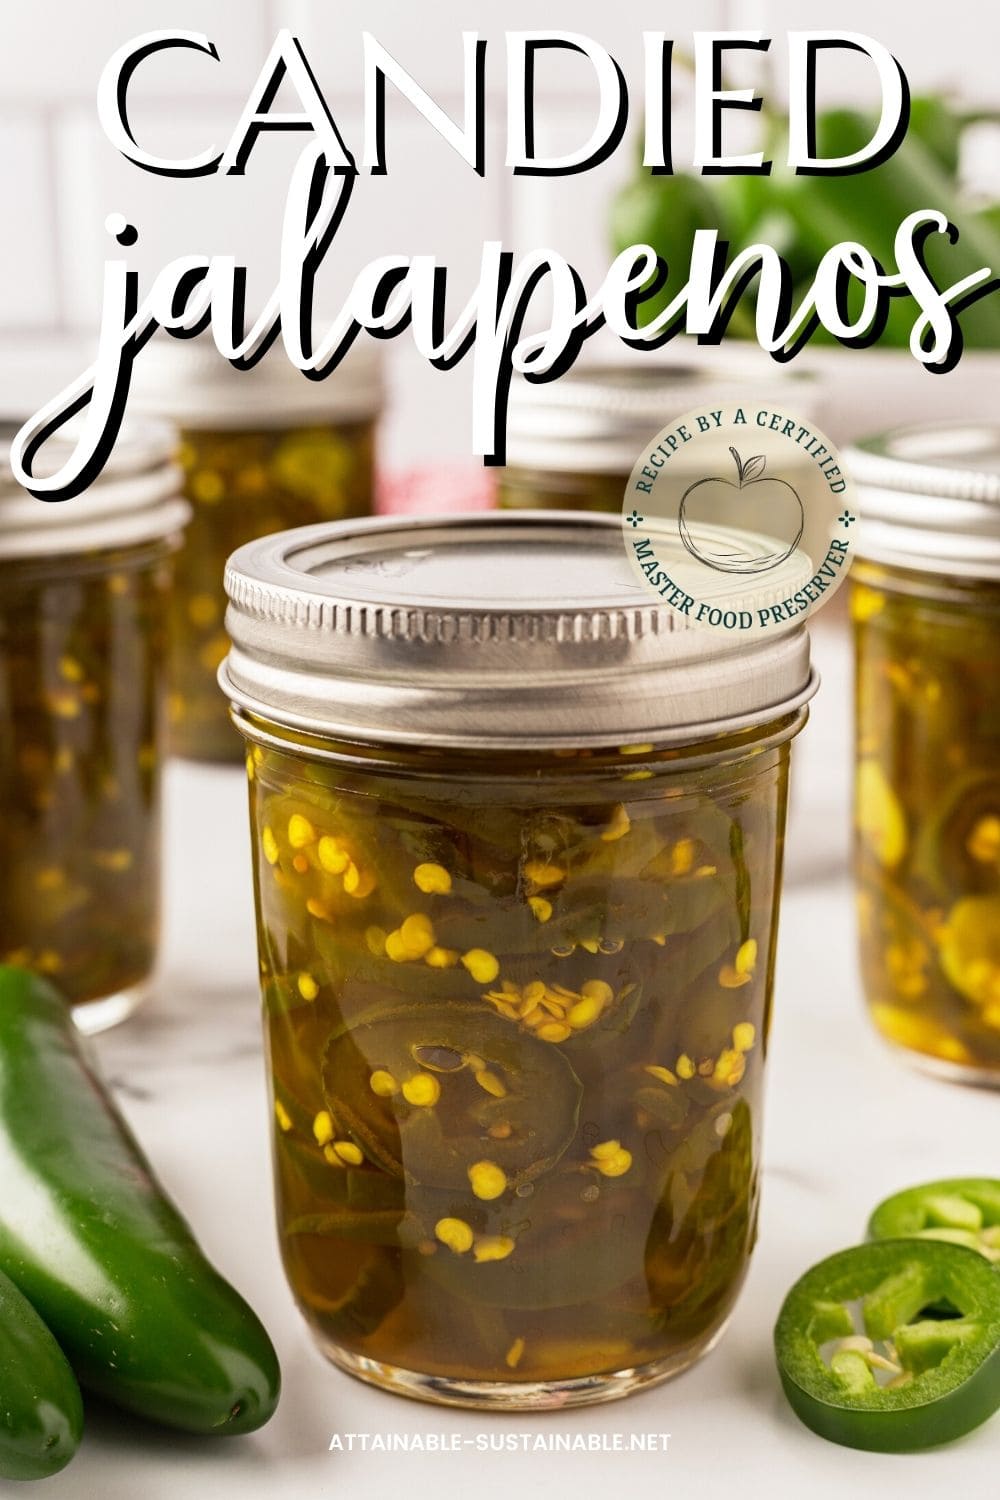
Candied jalapeño peppers — sometimes referred to as “cowboy candy” — make a great pantry staple for adding flavor to a variety of recipes. This easy canning recipe calls for the water bath method, making it perfect for beginning canners.
Be sure to try these pickled sweet peppers for another delicious addition to the pantry!

Sweet and Spicy Candied Jalapeño Peppers
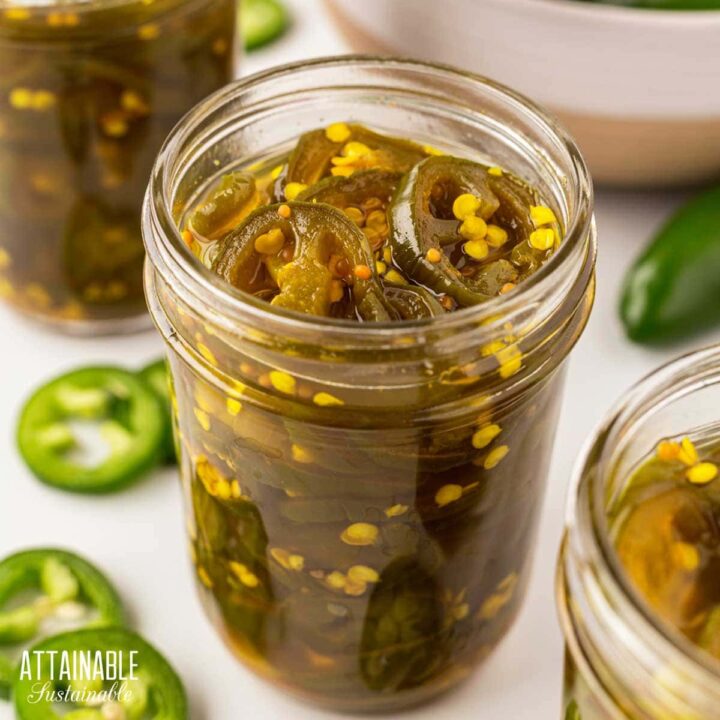
Combining sliced jalapenos with sugar helps to tone down the spicy flavor of the peppers, creating a condiment that can be used in numerous ways. Plus, it’s a great way to preserve some of the garden harvest, if you’re growing your own hot peppers.
- Chop some of these pepper slices into smaller pieces and add to potato salad, pasta or macaroni salads, or egg salad.
- Spoon some onto hamburgers, hot dogs, or your favorite sub sandwich.
- Serve with cream cheese and crackers for an easy last-minute appetizer.
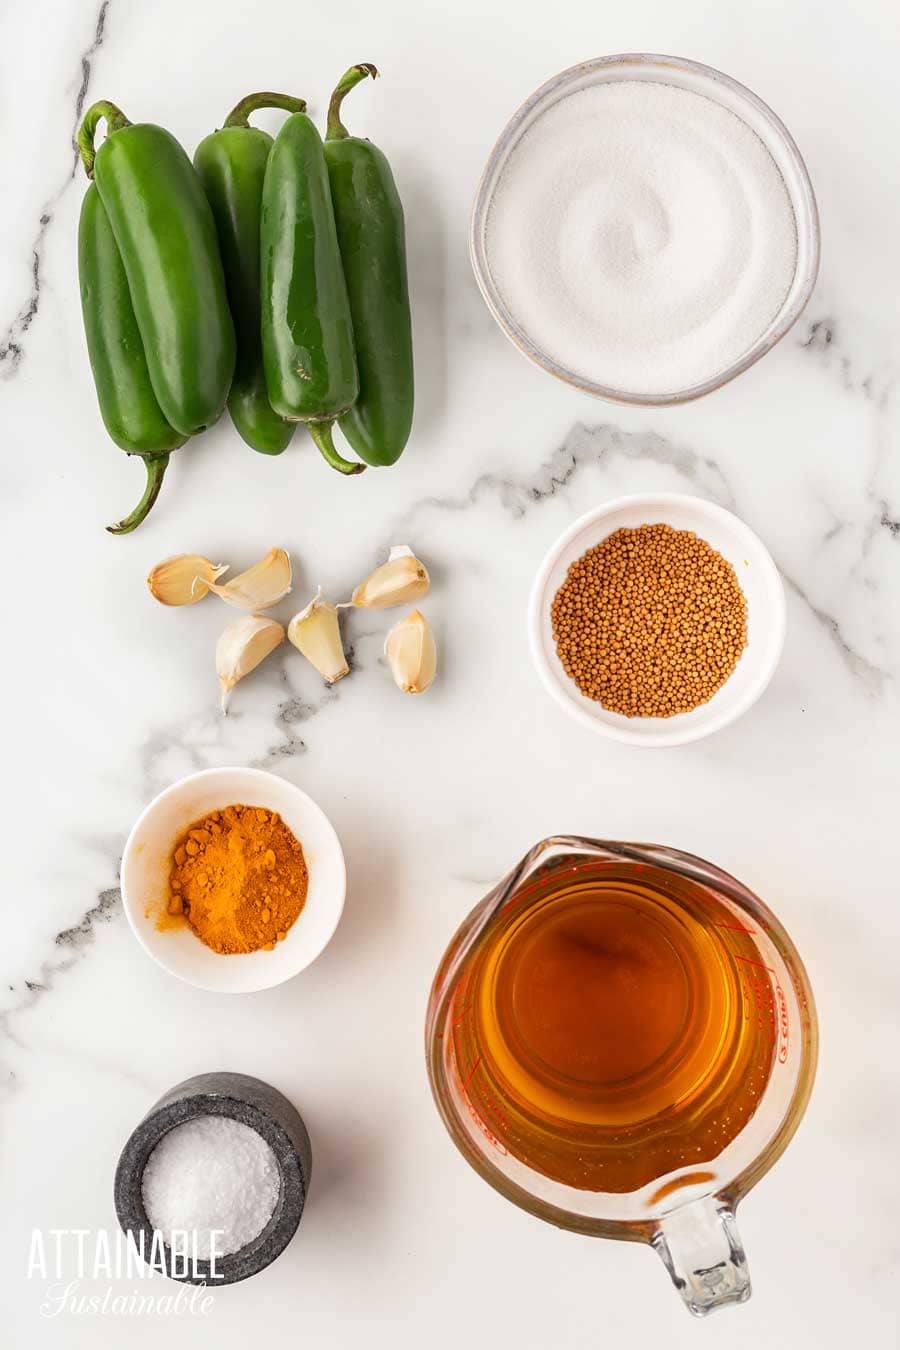
Ingredients
Jalapeno peppers — Choose mature fresh jalapenos for this recipe. Green jalapeños are likely more readily available, but there’s no reason you can’t add a few red jalapeno slices to the mix.
Vinegar — Use white vinegar or apple cider vinegar, either one is fine. Be mindful of this little tidbit when buying apple cider vinegar.
5 Easy Steps to Transform Your Pantry!
Ready to switch from store bought to homemade? Let me help you make some changes! Grab my FREE five-part guide to getting started.
Sugar — Use your favorite brand of granulated white sugar. I prefer organic.
Salt — Pickling salt is a fine grain salt without any additives (no anti caking agents) that will easily and fully dissolve into the water. You can also use plain white sea salt or kosher salt, so long as they are free of anti-caking agents, which can make the brine cloudy.
Seasonings — Fresh garlic cloves, turmeric powder, and mustard seeds round out the recipe.
The Handcrafted Pantry

Ready to DIY your pantry with more wholesome ingredients? Check out my ebook, The Handcrafted Pantry! Filled with delicious recipes for some of your favorite condiments, snacks, and toppings, it’s the guide you need to start skipping packaged products and embrace homemade.
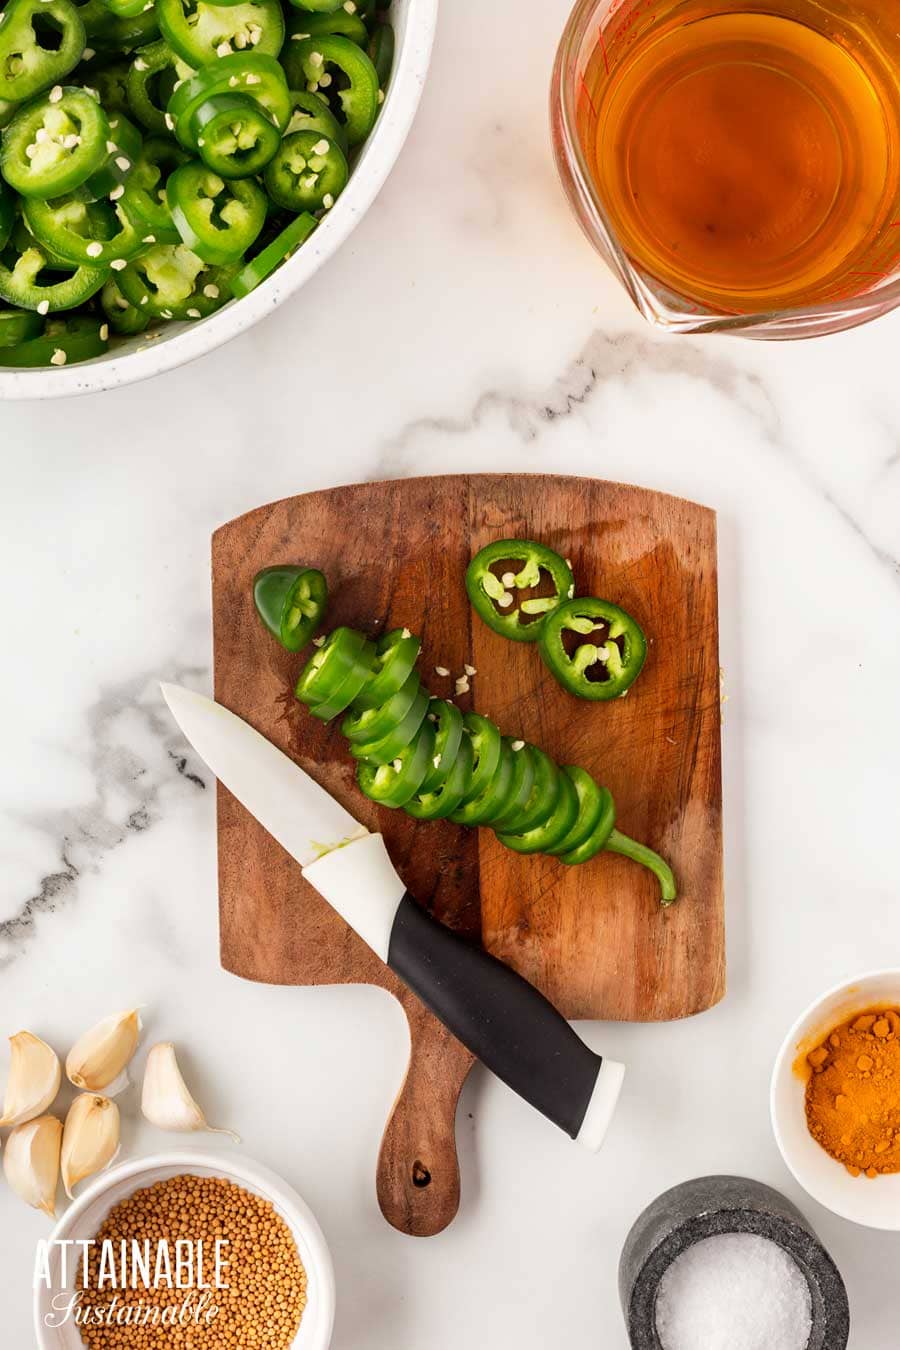
Prepare the Peppers
Wash the peppers well. Holding the pepper by the stem, use a sharp knife to slice them into 1/4-inch rounds. Don’t worry about removing the seeds; those can go right into the recipe.
As much as I dislike single use plastic, this is one recipe where you might want to wear gloves. Processing a large number of hot peppers can burn your hands, and if you touch your face, you’ll be even worse off.
Can you use a food processor to slice the peppers? You can, sure. Just know that the slices will not be nearly as uniform as if you’d prepared them by hand.
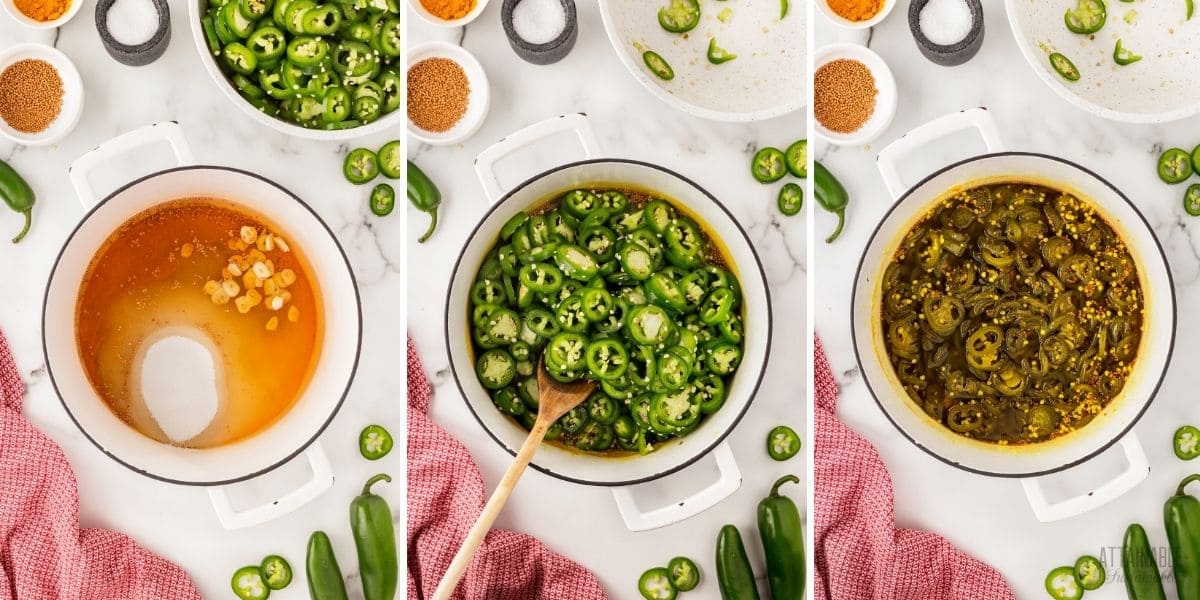
Prepare the Syrup
Bring the vinegar, sugar, and seasonings to a boil in a large saucepan. Once the syrup is boiling and the sugar is dissolved, add the sliced peppers. Simmer for about 15 minutes before filling the jars.
If you do not want to process the peppers to create a shelf stable product, at this point you can transfer the cooked peppers to an airtight container and refrigerate them. They’ll last in the fridge about a month.
What You’ll Need for Canning
This simple recipe makes about 4 pints of shelf stable sweet and spicy peppers. You can safely use 1/4-pint, 1/2-pint, or pint-size jars for this recipe.
Since you’ll be making these in small jars, you may be able to use a large pot; it just needs to allow for about 2″ of water over the top of the jars during processing. Read more about canning without a dedicated water bath canner here.
Canning tools that will make this project easier include jar tongs for safely lifting the filled jars in and out of the hot water and a canning funnel, which helps to avoid spills.
And of course, you’ll need canning jars and lids. Two-piece lids come in both regular or wide mouth. Use canning rings and lids that correspond to your jar size.
🍅 Safety First!
Canning is an excellent way to preserve food for the pantry, but there are some important safety considerations to keep in mind. The recipes on this site have been made following safe canning procedures by a certified Master Food Preserver.
- Know the difference between water bath canning and pressure canning. Low acid items must be pressure canned for safety.
- Altering ingredients may change the recipe’s pH, posing a safety issue. I highly recommend investing in pH paper to test your products for acidity level when canning. Note: For safe water bath canning, the Hawaii Master Food Preservers suggest a pH of 4.2 or lower in the tropics. In other regions, the recommended pH is 4.6 or lower.
- Use the proper jars and lids. Never reuse lids, with the exception of the Tattler or Harvest Right hard plastic lids that are intended for such a purpose.
- For more on canning equipment, please go here.
- Want to learn more? The National Center for Home Food Preservation is the go-to resource for safe canning information.
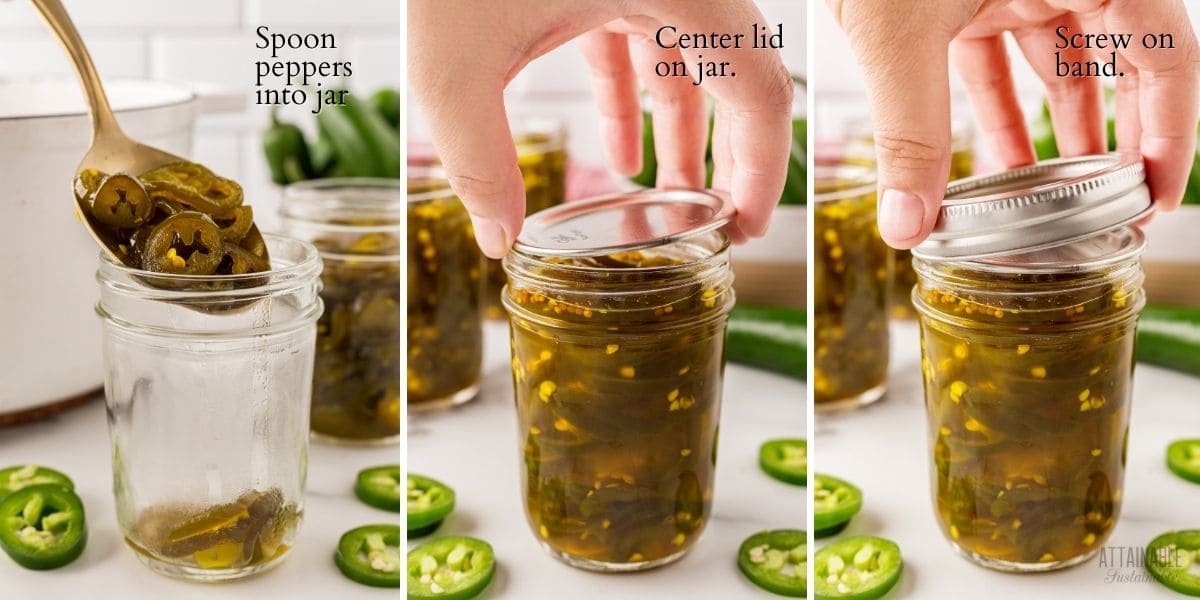
Filling the Jars
Use a slotted spoon to transfer hot peppers to jars to within a 1/2 inch of the top of the jar. Ladle hot syrup over the top maintaining that 1/2-inch headspace.
Wipe each jar rim to remove residue, set a jar lid in place, and screw on a ring.
Use a jar lifter to transfer jars into the gently boiling water. As stated above, the water in the pot should cover the jars by two inches. If necessary add more water to the canner.
Process jars for the recommended time. (See below.) When time is up, use the jar lifter to transfer jars to a flat surface that’s padded with a kitchen towel. Allow jars to cool completely. As they cool, you’ll begin to hear a canner’s favorite sound: That lovely little tink! that indicates a successful seal.
Once jars are thoroughly cooled, check the seal on all of the jars. The lid should be concave and solid. If it flexes at all, it’s not sealed. (Place any jars that didn’t seal in the refrigerator and use them first. They are not shelf stable.)
Remove bands from cooled jars and rinse the jars. Store jars without the bands at room temperature in a cool place.
★ Did you love this recipe? Be sure to give it a star rating below! ★
Candied Jalapenos
This recipe for candied jalapeno peppers calls for water bath canning to make a shelf stable product. Alternatively, you can just pop them in the fridge for adding to recipes.
Ingredients
- 4 pounds jalapeño peppers
- 3 cups apple cider vinegar
- 2 teaspoons salt
- 4 cups sugar
- 6 cloves garlic, sliced
- 1 tablespoon turmeric powder
- 1 tablespoon mustard seeds
Instructions
Prepare for Canning
- Wash the jars you'll use, making sure each is clean and free of nicks in the rim, which could impede sealing.
- Wash the lids and rings in hot soapy water. (If you're using non-Ball brand lids, prepare as suggested by manufacturer.)
- Place empty jars in a canning pot or large stock pot with enough water to cover by an inch or two, cover pot, and set on high heat. It can take awhile for the water to heat, so get it started before you begin making the recipe.
Make the candied peppers
- Slice peppers into ¼ inch rings; set aside.
- Combine remaining ingredients in a large saucepan or stock pot. Bring to a full boil over high heat; cook and stir until sugar is completely dissolved.
- Add jalapeños to the cooking liquid, lower heat, and simmer for 15 minutes. Peppers will darken in color.
- Use a slotted spoon to ladle the peppers into hot jars, leaving a 1/2” headspace.
- Pour boiling syrup over the peppers, maintaining the 1/2” headspace. Slide a non-metallic tool around the inside of the jar to remove air bubbles.
- Wipe the rims of the jars to remove any liquid that may have spilled. A clean rim is essential to a good seal.
- Set jar lids in place. Screw bands on finger tight.
- Use a jar lifter to gently place jars into the hot water bath. Be sure to put a wire rack in the bottom of the pot to prevent the jars from sitting directly on the bottom. Water should cover the top of the jars by an inch or two. The water will cool somewhat in reaction to the addition of the jars. Return the water to a low boil and then set the timer.
- Process in a boiling water bath for 15 minutes. Add a minute to the boiling time for every 1,000' above sea level.
- Check seals. Lids should be solid and pulled down tight. (if they flex and pop, the jar didn’t seal; put unsealed jars in the refrigerator and use those first).
- Remove rings and wash outsides of jars. Store in a cool, dry place.
Notes
If you have leftover syrup, store it in an airtight container in the fridge for several weeks. Use it to flavor marinades or salad dressings.
Pickling salt is a fine grain salt without any additives (no anti caking agents) that will easily and fully dissolve into the water. You can also use plain white sea salt or kosher salt, so long as they are free of anti-caking agents, which can make the brine cloudy.
You may substitute white vinegar for the apple cider vinegar if you prefer.
If you do not want to process the peppers to create a shelf stable product, you can transfer the cooked peppers to an airtight container and refrigerate them. They'll last in the fridge about a month.
Boiling lids or heating above 180°F as once recommended can damage the sealing compound.
SOURCE: Adapted from ballmasonjars.com


Can you freeze the brine or turn into a dipping sauce? Can we water bath and save brine as well? Same shelf life as with the jalapeños?
The brine is a great addition to marinades or dipping sauces, as you note. It’s freezable, and yes, it’s also safe to can the leftovers following the instructions above.
Can I use monk fruit sugar in place of the regular sugar?
Some sweeteners develop an unpleasant taste when heated for canning. Stevia and Splenda are two that don’t.
Is it possible to cut the sugar in half so that it isn’t so sweet
Yes, you can do that but I’d transfer the cooked peppers to an airtight container and refrigerate them instead of canning. They’ll last in the fridge about a month.