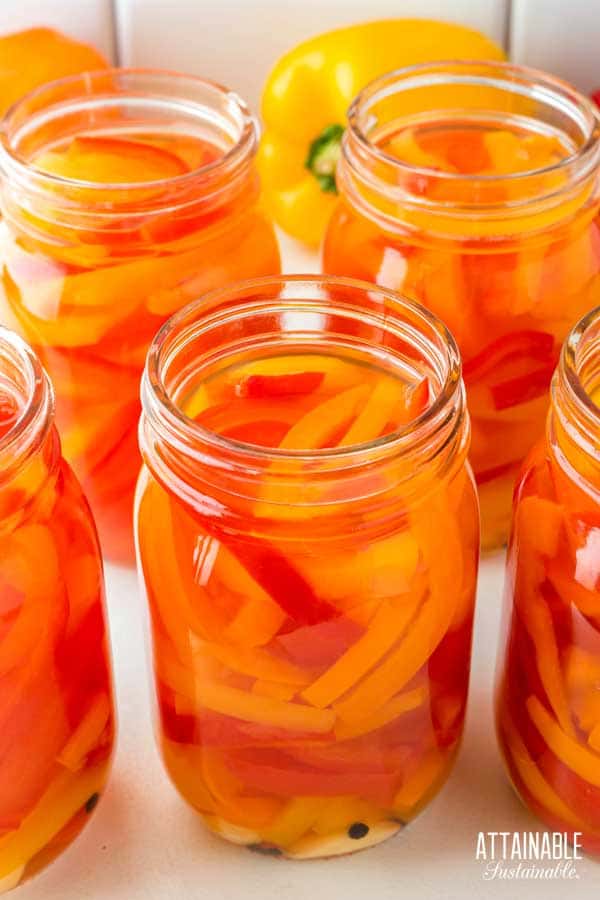
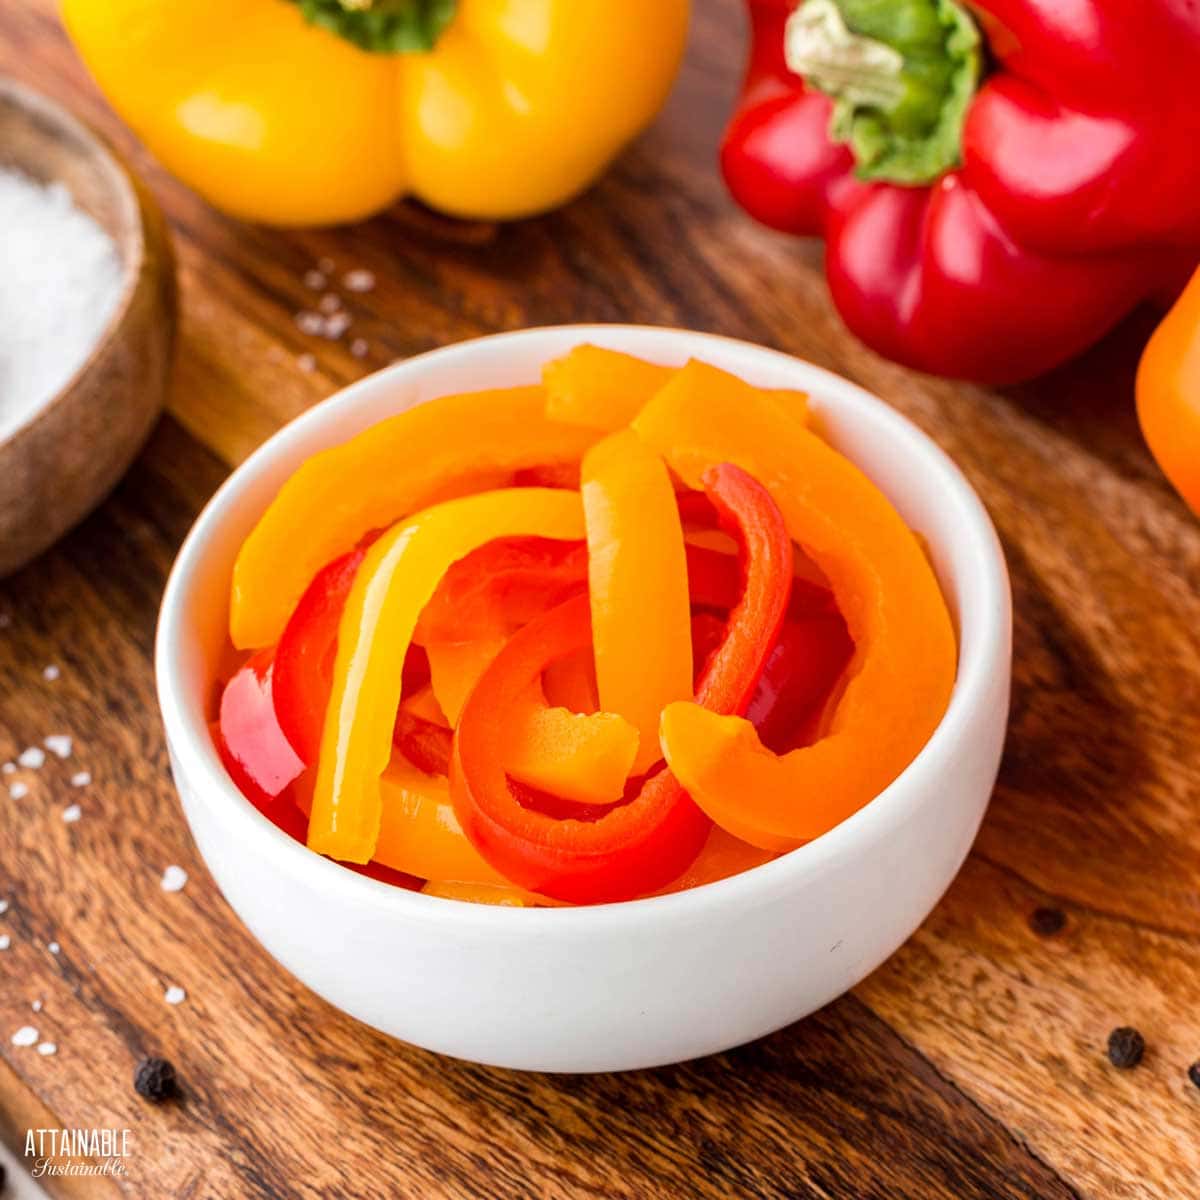
When sweet bell peppers are in season, be sure to make up a batch (or two!) of these sweet and tangy pickled peppers. They’re great for adding to sandwiches and they’ll provide a pop of color to your charcuterie board.
Love pickles? Try canning these pickled green beans, too!

Are you growing your own pepper plants yet? Whether you’ve got a lot of peppers coming in from the garden or simply want to prevent those Costco industrial sized packages of peppers from going to waste (who can eat that many peppers before they go bad?), preserving them with this pickled peppers recipe is a great way to prevent food waste and stock the pantry.
This recipe can be made with sweet banana peppers, too.
Ingredients
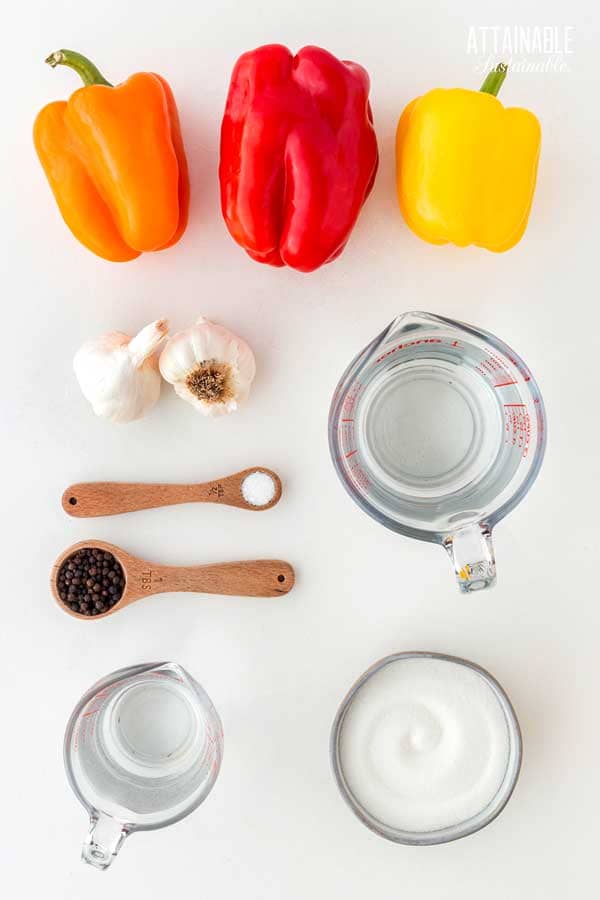
Sweet peppers — Choose ripe bell peppers or sweet peppers; yellow peppers, orange peppers, or red peppers are what you want. Green bell peppers are not going to taste as good. You can technically (safely) use and type of pepper, including hot peppers, for this recipe, but the brine is intended to work well with the sweet peppers.
Take a Peek Inside My Book!
Get a free excerpt from my book, Attainable Sustainable: The Lost Art of Self-Reliant Living! You’ll also get my free weekly newsletter, complete with recipes, gardening tips, and a little peek at what’s going on around here — both the zany and the mundane.
Vinegar — Use white vinegar or apple cider vinegar, either one is fine. Be mindful of this little tidbit when buying apple cider vinegar.
Salt — Pickling salt is a fine grain salt without any additives (no anti caking agents) that will easily and fully dissolve into the water. You can also use sea salt or kosher salt, so long as they are free of anti-caking agents, which can make the brine cloudy. Read more about pickling salt vs. table salt in canning.
Garlic — Please only use fresh garlic cloves here! Peel them and trim off the end before adding to the jars.
 Ready to DIY your pantry with more wholesome ingredients? Check out my new book from National Geographic! Attainable Sustainable Pantry is filled with delicious recipes for some of your favorite condiments, snacks, and toppings, along with an entire section on safe home food preservation. It’s the guide you need to start skipping packaged products and embrace homemade.
What You’ll Need for Canning
This simple recipe makes about 9 pints of shelf stable pickled peppers. This is just enough to fit into a full-sized canner, making the most of the time and effort you spend, as well as the energy used to heat the water in the canning pot.
If you don’t have a canner, you may be able to use a standard stock pot or other large pot; it just needs to allow for about 2″ of water over the top of the jars during processing; you can safely use 1/2 pint jars instead of pints in order to achieve this, if necessary. Read more about canning without a dedicated water bath canner here.
Canning tools that will make this project easier include jar tongs for safely lifting the filled jars in and out of the hot water and a canning funnel, which helps to avoid spills.
And of course, you’ll need canning jars and lids. This recipe can be made with half pints or pint sized jars, in either a regular or wide mouth.
You can use a quart jar size if you don’t plan to process these, instead putting them directly in the fridge, but the recipe isn’t tested for quarts.
Use canning rings and lids that correspond to your jar size. Rings can be reused; jar lids cannot be reused.
Prepare the Peppers
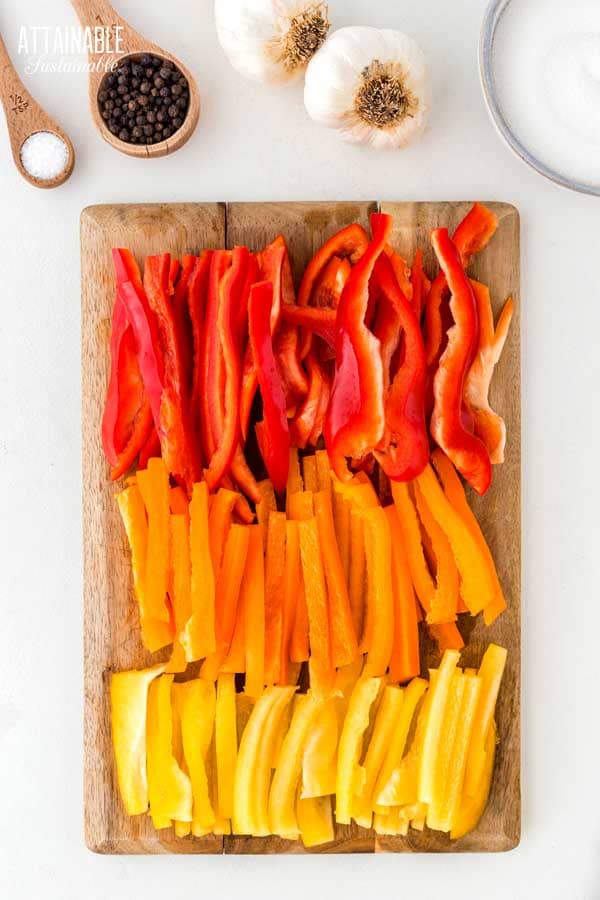
Prepare the peppers by washing and removing the stem and seeds. Small peppers can be halved; large peppers can be cut into strips. You can also cut them into smaller chunks. Or you can do some of each! Pickled sliced peppers are delicious added to sandwiches, while the chunks can be stirred directly into recipes like potato salads or even chili or used to top hot dogs and hamburgers.
Prepare the Pickling Liquid
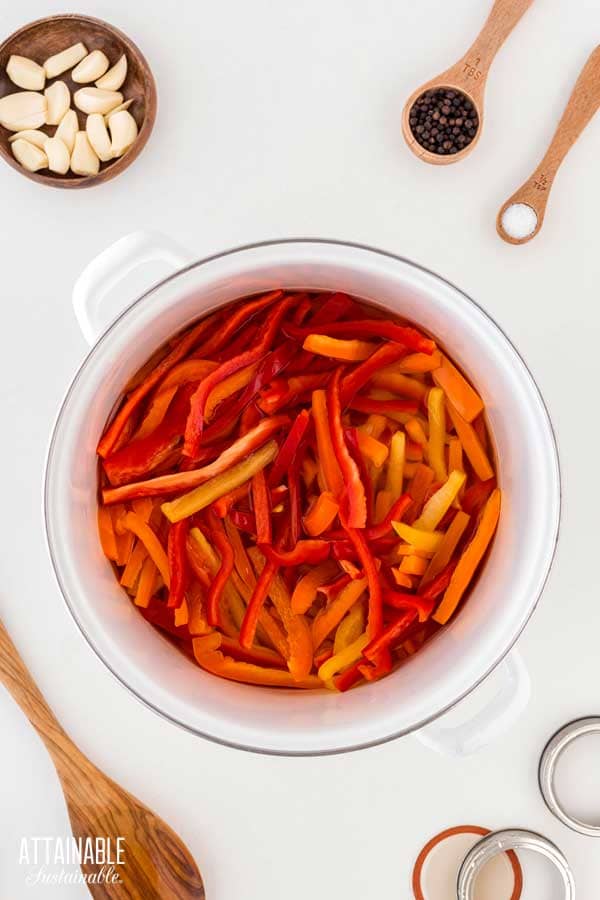
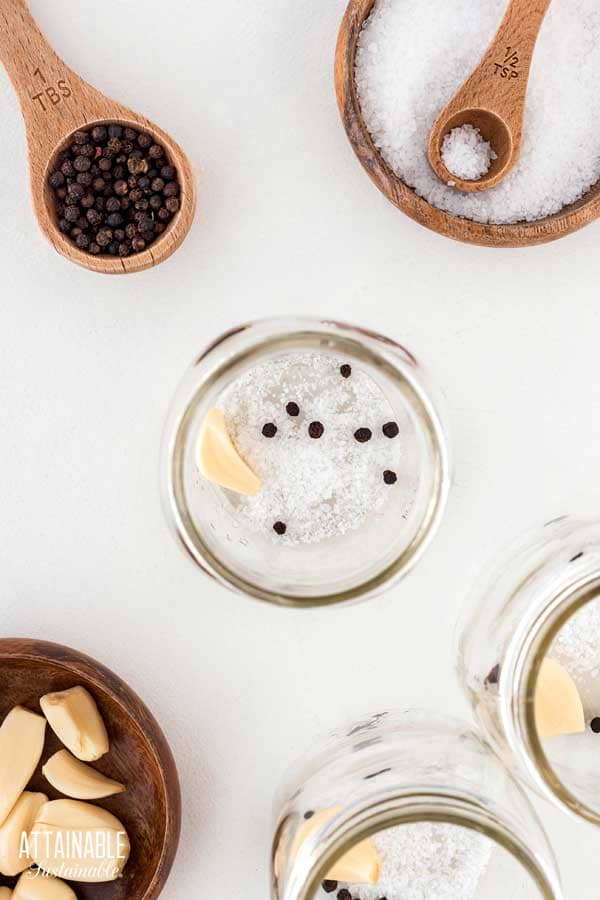
Bring the vinegar, sugar, and water to a boil in a large saucepan. While this is heating, place 1 clove garlic, 1/2 teaspoon salt, and 6-8 peppercorns in each pint jar. (Use half as much for 1/2 pint jars.)
Once the brine is boiling, add the prepared peppers. Return to a boil and immediately remove from heat and start filling the jars.
🍅 Safety First!
Canning is an excellent way to preserve food for the pantry, but there are some important safety considerations to keep in mind. The recipes on this site have been made following safe canning procedures by a certified Master Food Preserver.
- Know the difference between water bath canning and pressure canning. Low acid items must be pressure canned for safety.
- Altering ingredients may change the recipe’s pH, posing a safety issue.
- Use the proper jars and lids. Never reuse lids, with the exception of the Tattler or Harvest Right hard plastic lids that are intended for such a purpose.
- For more on canning equipment, please go here.
- Want to learn more? The National Center for Home Food Preservation is the go-to resource for safe canning information.
Filling the Jars
Use a slotted spoon to transfer peppers to Mason jars within a 1/2 inch of the top of the jar. Ladle hot vinegar mixture over the top leaving a 1/2-inch headspace.
Wipe each jar rim to remove residue, set a jar lid in place, and screw on a ring.
Use a jar lifter to transfer jars into the gently boiling water. As stated above, the water in the pot should cover the jars by two inches. If necessary add more water to the canner.
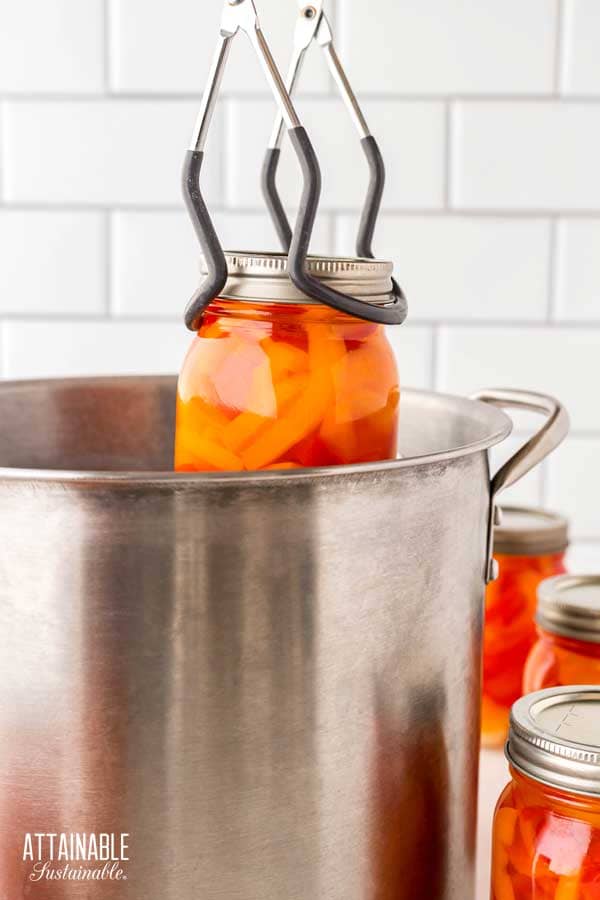
Process jars for the recommended time in the boiling water canner. (See below.) When time is up, use the jar lifter to transfer jars to a flat surface that’s padded with a kitchen towel. Allow jars to cool completely. As they cool, you’ll begin to hear a canner’s favorite sound: That lovely little tink! that indicates a successful seal.
Once jars are thoroughly cooled, check the seal on all of the jars. The lid should be concave and solid. If it flexes at all, it’s not sealed. (Place any jars that didn’t seal in the refrigerator and use them first. They are not shelf stable.)
Remove bands from cooled jars and rinse the jars. Store jars without the bands at room temperature in a cool place.
Using Peppers Pickled in Vinegar
These pickled peppers have a tangy sweet flavor and are a delicious snack in their own right. They’re also a great addition to charcuterie boards, sandwiches and wraps, or chopped into potato or egg salad.
★ Did you love this recipe? Be sure to give it a star rating below! ★
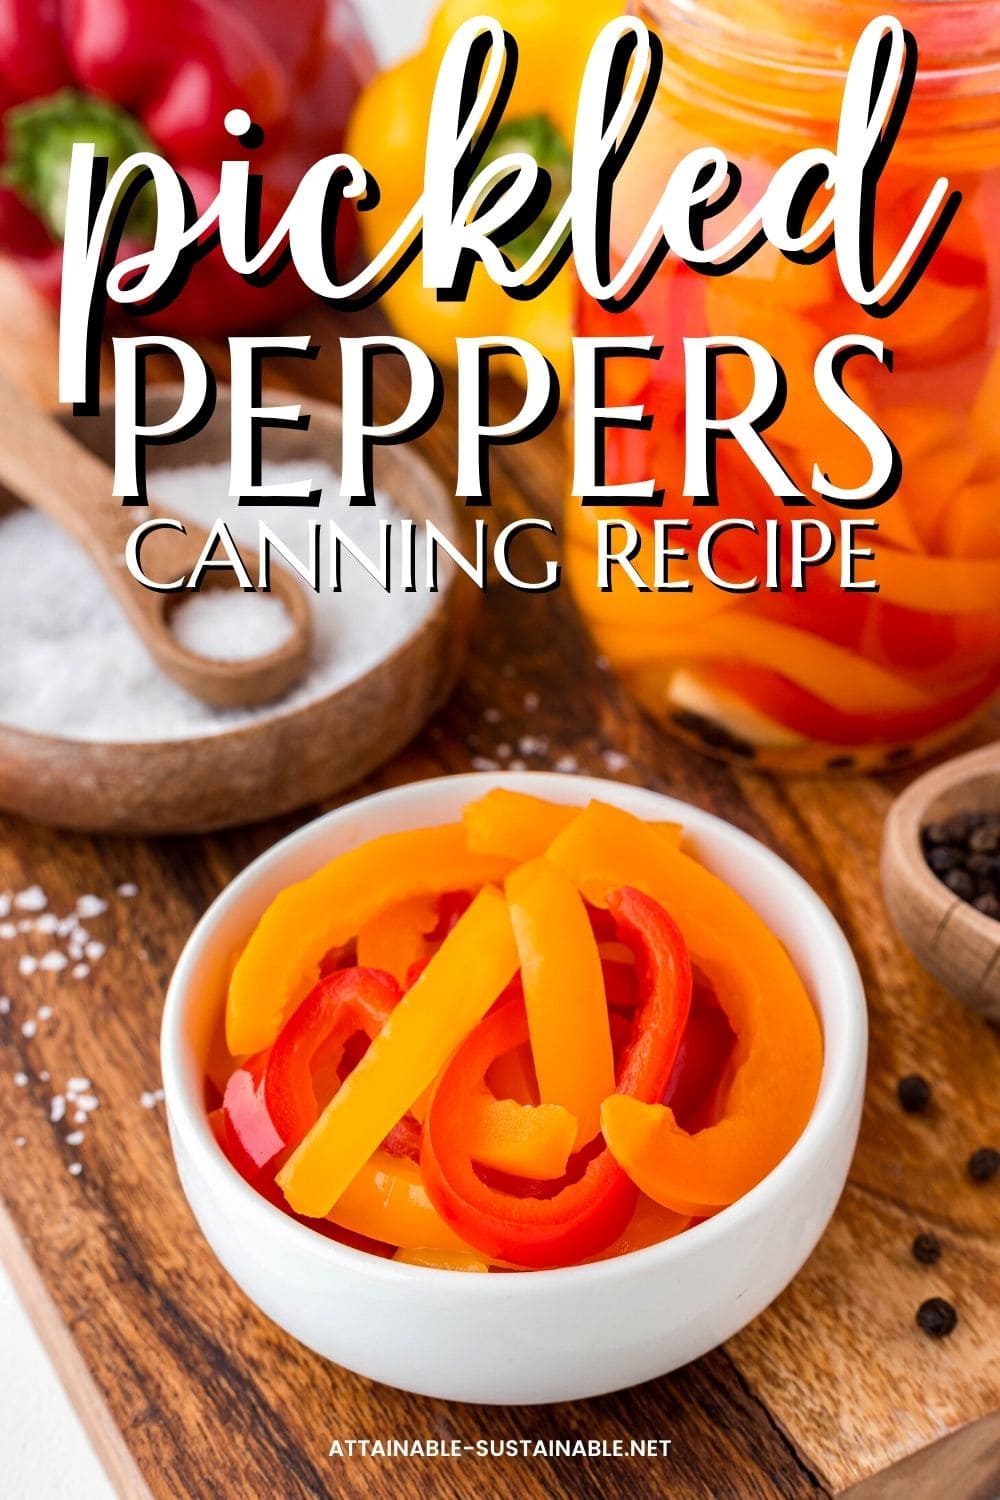
Easy Pickled Peppers Canning Recipe
Equipment
- 9 pint jars adjust quantity for half-pint
- 9 canning lids and rings
- canning funnel
- water bath canner with lid or deep pot
- jar tongs
- canning bubble popper/measurer optional but handy
Ingredients
- 7 lbs bell peppers red, yellow, orange
- 1 ¾ cups sugar
- 3 cups vinegar 5 percent
- 3 cups water
- 9 cloves garlic
- 1 tablespoon black peppercorns
- 4 ½ teaspoons non-iodized salt
Instructions
Recipe yields 9 pint jars.
Prepare for Canning
- Wash the jars you'll use, making sure each is clean and free of nicks in the rim, which could impede sealing. This recipe is approved for use with 1/2 pint and pint size jars.
- Place jars in a canning pot with enough water to cover by an inch or two, cover pot, and set on high heat. It can take awhile for the water to heat, so get it started before you begin making the recipe.
- Wash the lids and rings in hot soapy water. (If you're using non-Ball brand lids, prepare as suggested by manufacturer.)
Prepare the Peppers
- Wash peppers. Remove cores and seeds then slice peppers into strips or cut into smaller pieces.7 lbs bell peppers
- Combine vinegar, sugar, and water in a large saucepan and heat over high heat until boiling. Boil for one minute, add peppers, return to a boil, and remove from heat.1 3/4 cups sugar, 3 cups water, 3 cups vinegar
Process the Jars
- While peppers are heating, remove the empty jars from the canner, draining the water back into the pot.
- Place 1 clove garlic, 1/2 teaspoon of salt, and 6-8 peppercorns in each canning jar.9 cloves garlic, 1 tablespoon black peppercorns, 4 1/2 teaspoons non-iodized salt
- Use a slotted spoon to transfer peppers to jars; ladle hot brine over the top of the peppers leaving a 1/2” headspace.
- Run a plastic knife around the inside of the jar to release any air bubbles. Add more liquid to the jar if necessary to maintain 1/2" headspace.
- Wipe the jar rims and set a flat lid in place. Screw a canning ring on, firmly tight.
- Use a jar lifter to transfer filled jars into warm water in a boiling water bath canner.
- Process half-pint or pint jars for 5 minutes in a water bath canner. (10 minutes for elevations between 1,001’ and 6,000’; 15 minutes over 6,000’.)
- Remove jars to a flat surface and allow to cool.
Notes
- Recipe yields 9 pint jars.
- You can use white vinegar or apple cider vinegar for this recipe. Note that apple cider vinegar may cause the pickling brine to be slightly brown.
- The varieties of peppers you use can vary; choose firm, ripe, mature sweet peppers for the best results. For a little kick in these pickled peppers, you can safely add a couple jalapeno peppers or slices of hotter peppers.
- Based on a tested recipe from the National Center for Home Food Preservation.
- Boiling lids or heating above 180°F as once recommended can damage the sealing compound.
- SOURCE: Adapted from the United States Department of Agriculture (USDA) Complete Guide to Home Canning, page 6-21.


I just love the canning process. There is nothing better than to look at the jars of canned food and say to yourself that I did that and know that I won’t go hungry! My pepper plants are producing gobs of peppers, so I am excited to try this recipe. Thank you for sharing it!
So satisfying!
Looks good, doesn’t boiling the peppers make them soft and mushy? (In Prepare the Peppers, step 2)?
I just went and had a couple. 😉 Still crunchy. If you’re not canning these, and sending them directly to the fridge, it is ok to skip that step. But not for canning!
Can you leave out the sugar or substitute either Allulose or Bocha Sweet (made from the kabocha plant)?
I’m diabetic and can’t have sugar.
These look really good.
Thank you
The sugar helps to temper the acidity. You can certainly try your favorite alternative sugar if you make them as refrigerator pickles. For canning, there are only a couple of sugar replacements that are recommended (some don’t do well with the heat). More info: https://extension.psu.edu/canning-with-less-sugar