
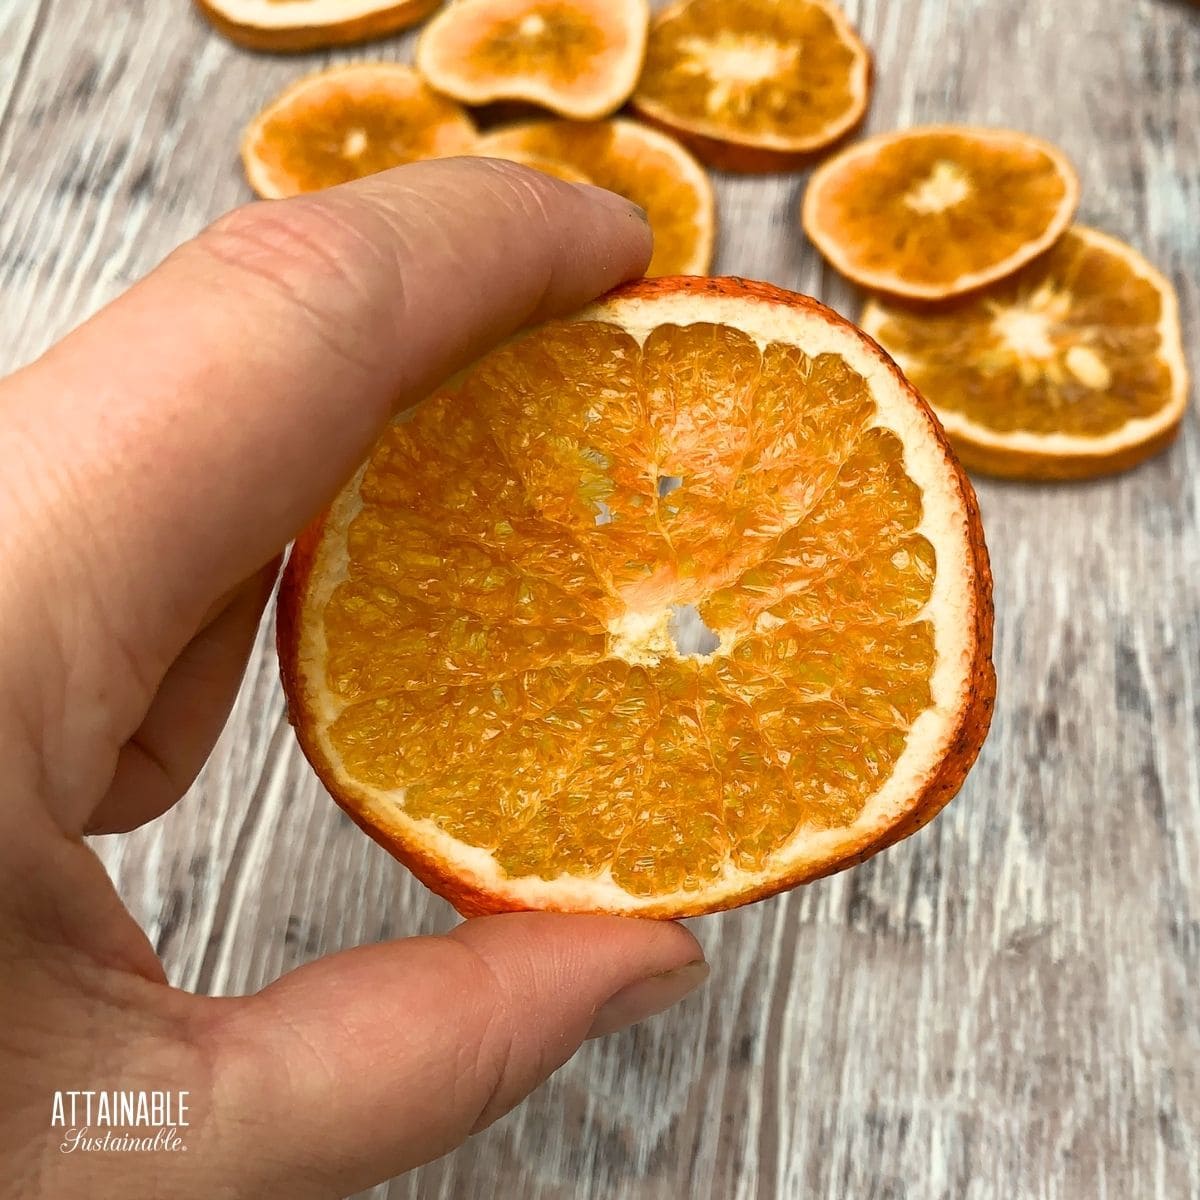
I live in a region that is overflowing with citrus in the winter months. From our own trees to those of our neighbors and friends, using them all is impossible. Making dried orange slices is a way to save some of the overflow!
Do you have plenty of oranges, too? Be sure to try this DIY orange liqueur recipe!
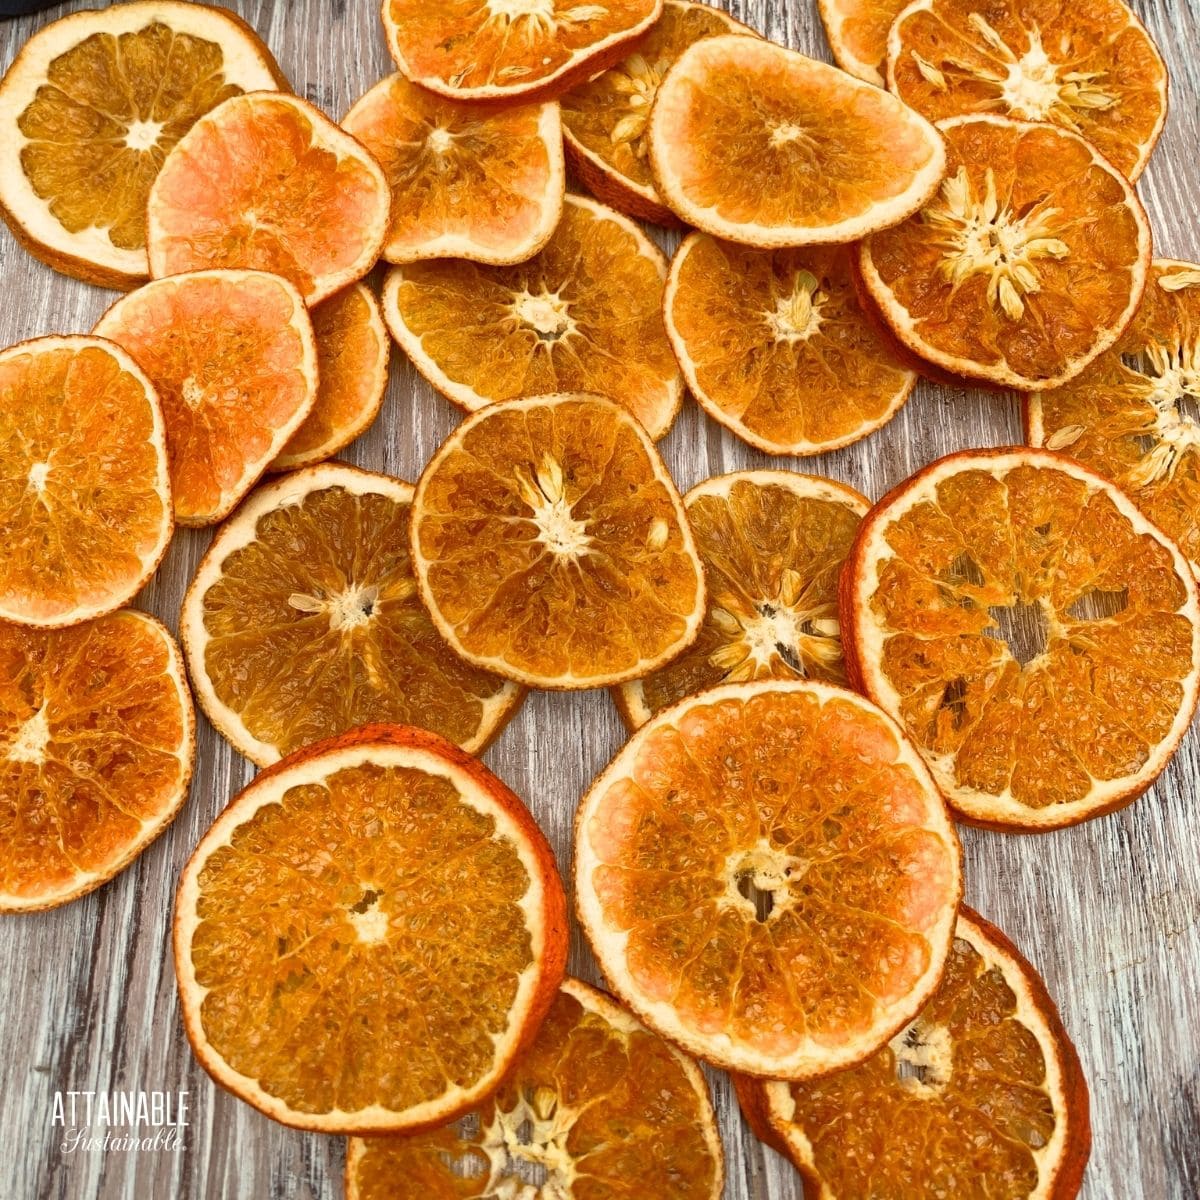
In my opinion, dried oranges aren’t as tasty as dried apples or dried bananas as a snack, but they are excellent for adding flavor to recipes and for crafting. (Some people love them though!)
Dehydrated Oranges
There are a number of methods for dehydrating fresh fruit, but the end result is generally the same. The fruit is leathery and slightly pliable and will last in the pantry for extended periods of time. It’s not unheard of for properly stored dried fruits to last a couple of years.
Ingredients
Fresh oranges — You can use any variety of oranges for this project. Navel or Valencia oranges are most commonly available, but dried blood oranges are quite beautiful as well. Or do a combination! You can also substitute any of the citrus fruits you like; the process is the same.
Get a Quick Start Guide to Safe Canning!
Want to learn how to preserve the harvest? Dive in for a look at various canning techniques and methods! Grab my FREE 6-part guide to getting started.

The Drying Process
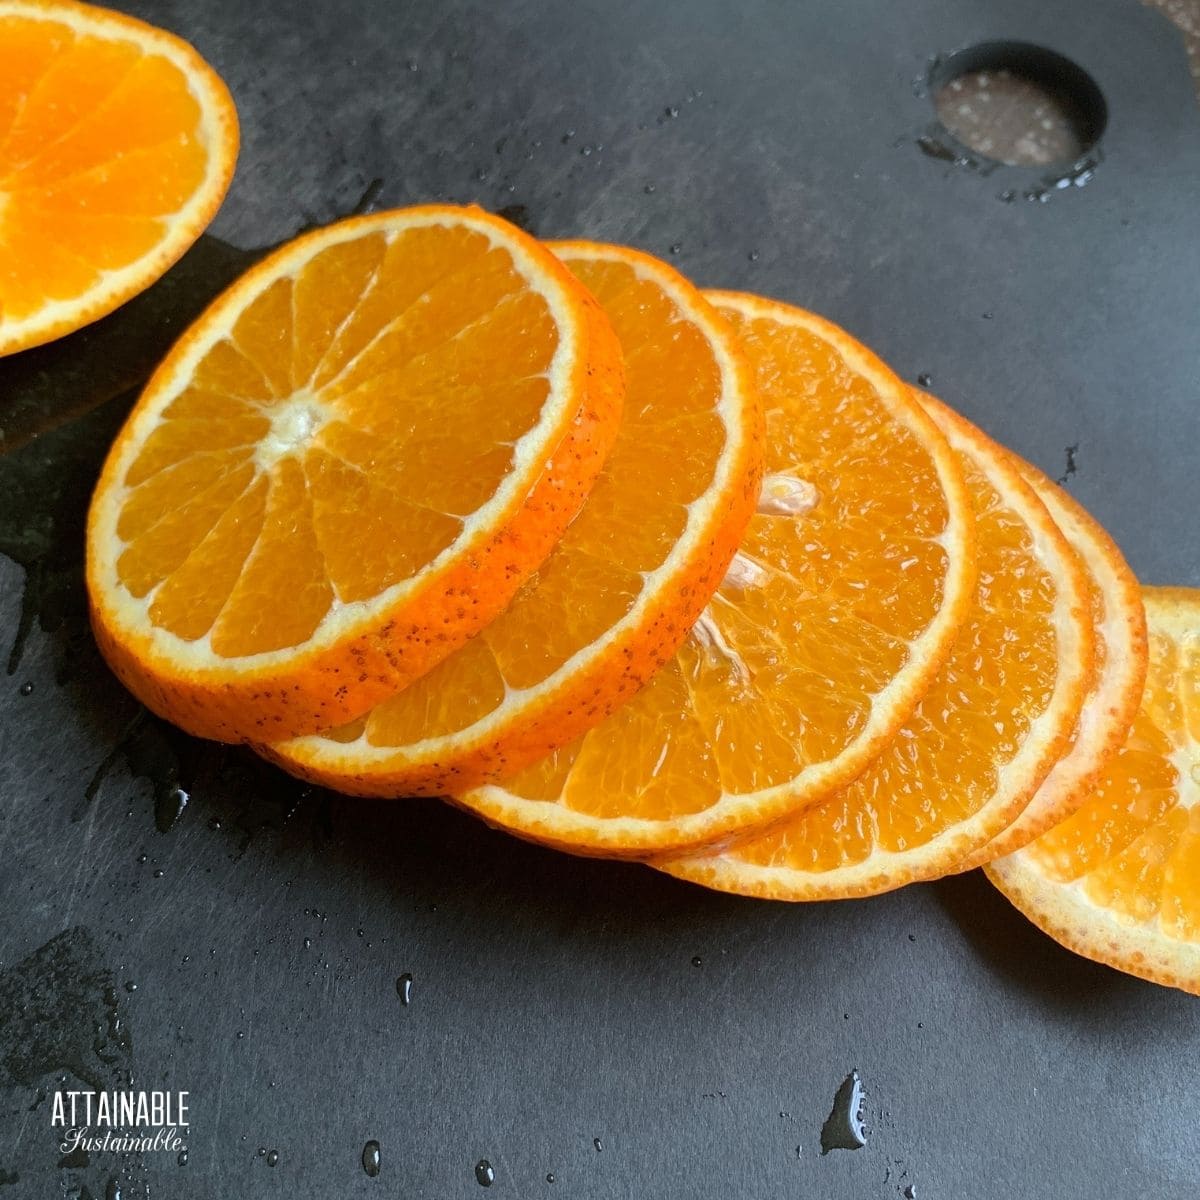
No matter which method you opt to use, preparing the orange slices will be the same. Wash them, dry them, and slice them. No peeling necessary!
Use a sharp knife to cut oranges into thin slices (about 1/4″ thick).
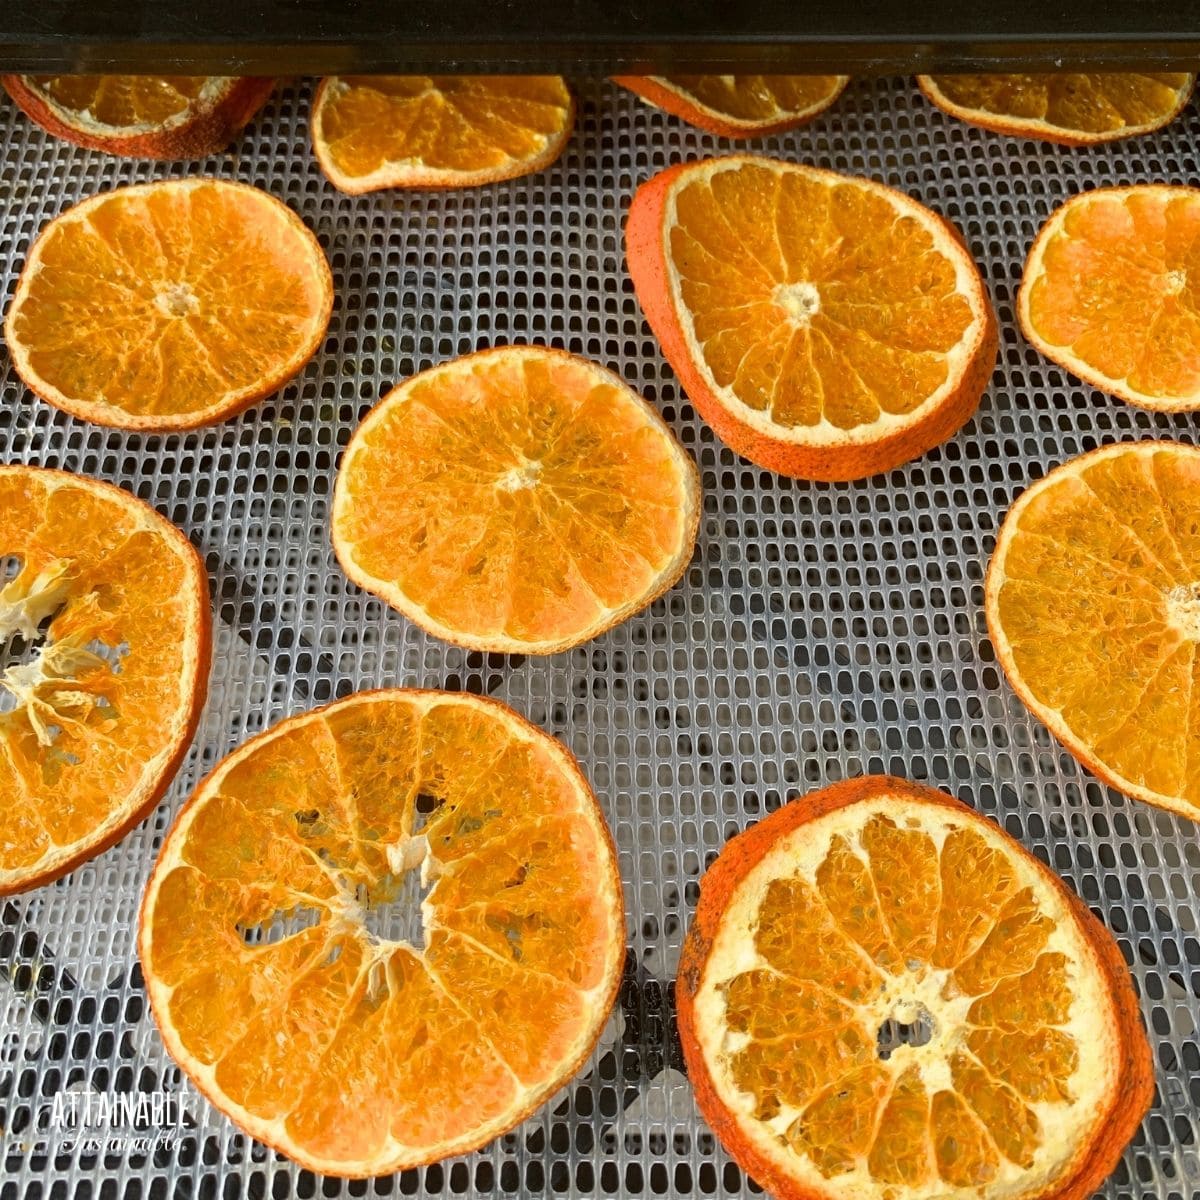
Spread the slices out on the tray of a dehydrator or air dryer, or a baking sheet lined with a wire rack in the case of oven drying. Place them close together in a single layer but not touching.
Process as suggested below, noting that the time called for will vary substantially based on the method you use and the thickness of the slices.
Using a Food Dehydrator
If you have a dehydrator, pull it out! I’ve had an Excalibur 9-tray dehydrator for years; thats what I use for drying all kinds of fruit and for making beef jerky (check my book for that recipe). That said, you don’t need a dehydrator to make dried orange slices. There are a couple of other ways to save that flavor.
5 Easy Steps to Transform Your Pantry!
Ready to switch from store bought to homemade? Let me help you make some changes! Grab my FREE five-part guide to getting started.
Dry Orange Slices in the Oven
Drying strawberries in the oven uses equipment most people already have on hand. It’s not the most energy-efficient method, but it does the trick in a pinch.
Drying fruit requires low heat, and using a low heat for drying orange slices will help to retain the color of the fruit. On newer ovens, the “bread proofing” setting is probably the best way to dry fruit.
Place orange slices on a wire rack on baking sheets. This allows the air to flow around the slices. Alternatively, you can line each sheet with parchment paper.
Air Drying
If you live in a dry region or heat your home during the winter months, you can use warm air for drying out orange slices. Suspend oranges on twine in a warm area of your home. (Hint: Hot air rises, so if you can hang them near the ceiling or in rafters, they’ll dry more quickly.)
Drying Oranges in an Air Fryer
While an air fryer works much like a dehydrator, they don’t hold as much as a large dehydrator. Use it if you have one, certainly, but your yield will be limited by how many slices the air fryer can hold.
Conditioning the Fruit
Due to inconsistent thickness or density, some pieces of fruit may retain a bit more moisture than others. As a result, moisture levels can vary within a single slice of fruit.
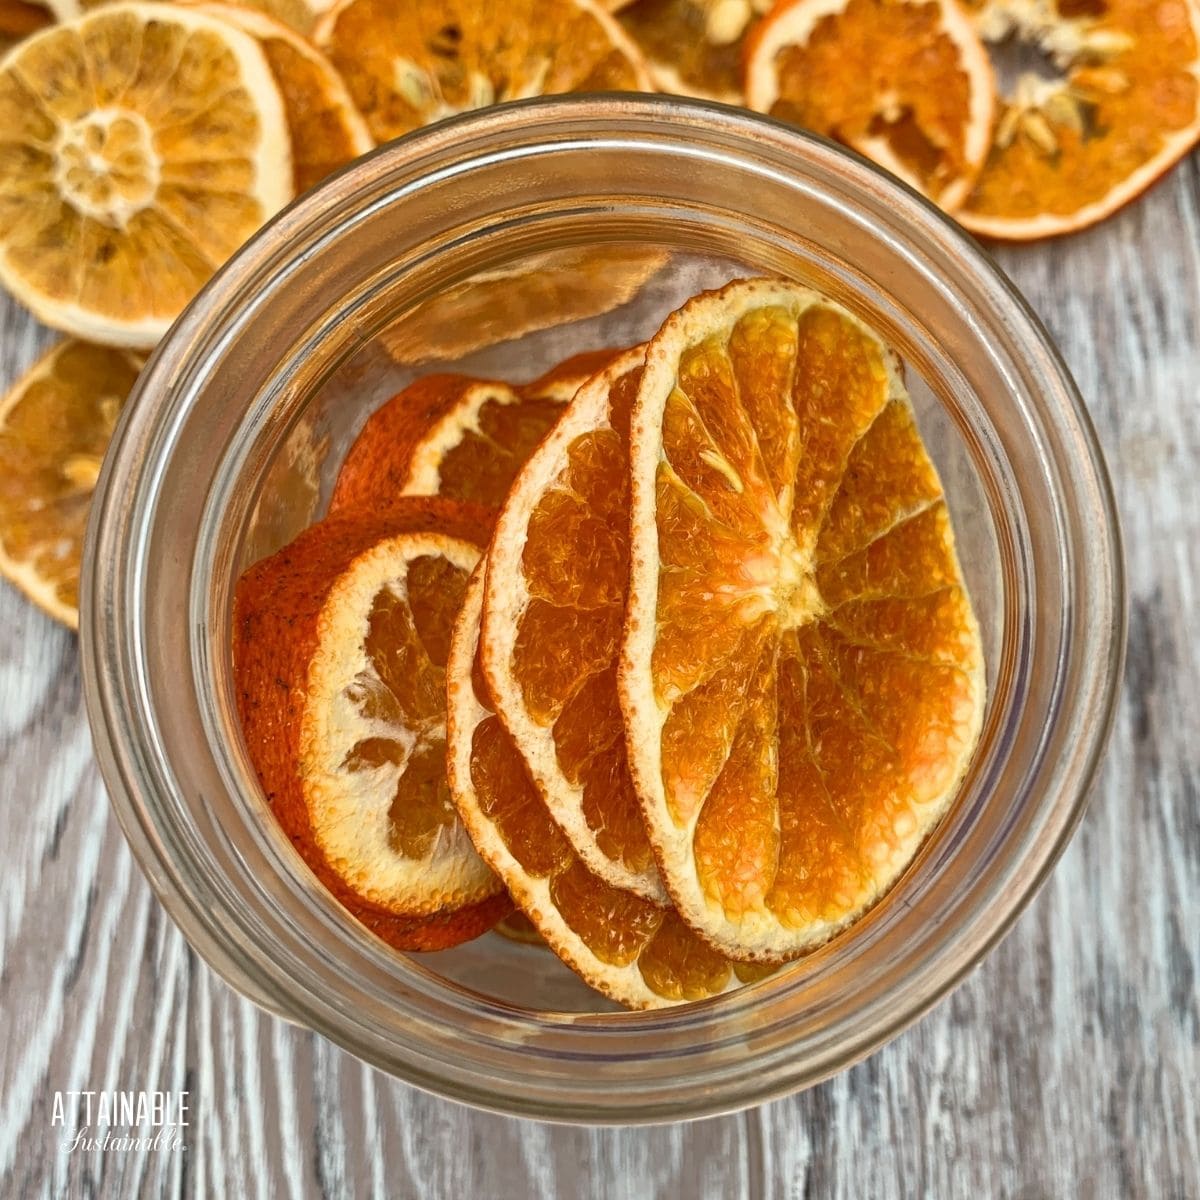
Conditioning the dried orange slices will help redistribute the moisture evenly. Cool slices thoroughly and place loosely packed pieces in a sealed container. Seal the jar and let stand for a week, shaking it daily to break up the fruit.
The excess moisture in some pieces will be reabsorbed by drier pieces. If any condensation appears on the inside of the jar itself, there’s still too much moisture in the fruit. Return it to the dehydrator to remove more moisture.
Storage
For long term storage, place conditioned dried fruit in an airtight container at room temperature. I’m a fan of a Mason jar coupled with the reusable leak-proof Ball lids. They are more air tight than both the metal lids or the white plastic lids. And upcycled glass jar can work, too, as long as the lid has a secure fit.
FAQs
How can you tell if dried oranges are done?
They should feel completely dry on both sides, with no detectable moisture. If they feel sticky, continue drying. Oranges that are dried sufficiently should not bend when squeezed between your fingers. If they do, return to the dehydrator and continue processing.
How long will dried orange slices last?
For several years! I have a jar of them on my shelf from at least three years ago. They still look and smell great.

Fun Ways to Use Dried Oranges
As a unique snack. Some people really like the flavor of dehydrated oranges. I’m not one of them, but you should definitely give it a try!
Top a cake. Dried orange slices are a natural cake decoration for making a simple dessert look fancy.
Powder them. Turn the dried slices into orange powder for adding to smoothies or recipes like these orange muffins.
Garnish with them. Serving up a Christmas punch? Set some dried orange slices floating on top for a pretty punch bowl. Or add them to a warm winter drink like this spiced winter sangria.
Add them to mulling spice mix. Combined with cinnamon sticks, whole allspice, cloves, and other spices, they make hot apple cider into one of my favorite warming winter drinks.

Make a garland. Use these dehydrated oranges as a garland all by themselves to add a little brightness to the winter months. Or add them to an evergreen Christmas garland for a holiday season pop of color.
Wrap a gift. If you love wrap pretty gifts for giving but dislike the waste that comes with traditional wrap and ribbons, try tying dehydrated orange slices atop a brown bag wrapped gift. Simple and pretty.

★ Did you love this recipe? Be sure to give it a star rating below! ★
Easy Dried Orange Slices
Equipment
- Dehydrator
- 3 quart jars
Ingredients
- 30 fresh oranges
Instructions
Recipe yields 3 quart jars.
- Thoroughly wash and dry oranges.
- Slice oranges into uniform 1/4" thickness. Set the orange ends aside. Tip: Set the cutting board on a rimmed baking tray to capture the orange juice as you slice. This will save you some cleanup.
- Place orange slices onto dehydrator tray as close as possible without overlapping.
- Once the dehydrator is full, turn it on to 135 degrees Fahrenheit for 8-10 hours. This of course depends on the thickness of the slices, the climate and humidity, and the drying process (see below for alternative drying methods). Plan to be around to check them during those last couple of hours.
- Test orange slices for doneness by trying to bend them; they should not bend.
- Cool slices thoroughly and place - loosely packed - in a sealed container. Let the jar stand for a week, shaking it daily. This conditions the fruit, allowing the excess moisture in some pieces to be reabsorbed by drier pieces. If any condensation appears on the inside of the jar itself, there’s still too much moisture in the fruit. Return it to the dehydrator to remove more moisture.
Notes
- Recipe yields 3 quart jars.
- My Excalibur dehydrator fits 3-4 oranges on each tray. How many oranges you'll need will depend both on the size of the oranges and the size of your dehydrator.
- The method you use to dry the oranges, the thickness of the fruit, and the humidity will all play a part in how long it takes for the slices to be sufficiently dried. Check them hourly after the first 3-4 hours.
- Line a baking sheet with a kitchen towel or place a wire cooling rack inside. Place orange slices in a single layer and set tray in oven. Set the oven to a low temperature; 135°F is ideal, but some older ovens may not go that low. To maintain a low enough heat, you may need to prop the door open slightly.
- While an air fryer works much like a dehydrator, they don't hold as much as a large dehydrator. Use it if you have one, certainly, but your yield will be limited by how many slices the air fryer can hold.
- If you live in a dry region or heat your home during the winter months, you can use warm air for dehydrating the orange slices. Suspend slices on twine in a warm area of your home and let them dry. This process will take days.
- Save the orange pieces you trimmed off the ends and dry those, too. The orange peels can be used for flavoring or processed into a powder to use in recipes and homemade cleaning solutions (such as the soft scrub recipe included in my book).


How about using a mandolin to slice the oranges? A better way to get uniform slice depths. (If you do use a mandolin, get those cutting gloves and USE them! I sliced a piece of my index finger off and I HAD a pair of the gloves, but wasn’t using them!)
I might use these to make a different kind of pomander: you know: orange, stuffed with cloves then rolled in orris root?
Just put the cloves in the skin around the edges.
Put a string through the orange sections and hang.