
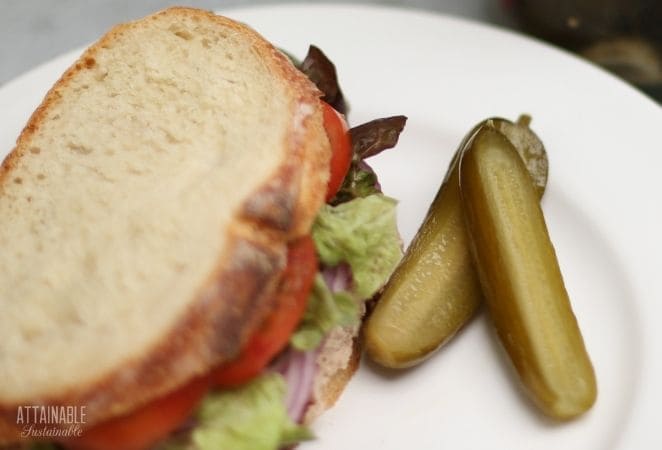
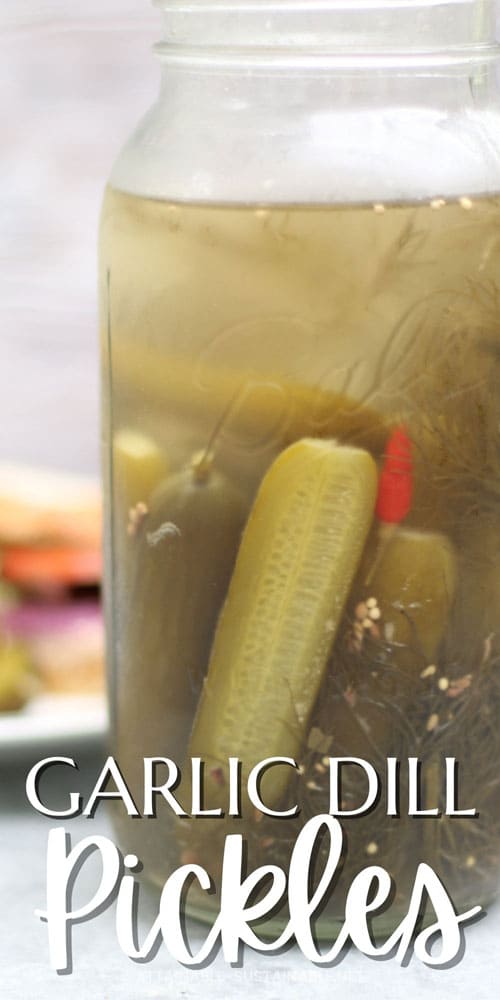
If you love pickles with a crunch, these naturally fermented pickles are for you! They’re easy to make and result in garlic dill pickles perfect for pairing with your favorite sandwich.
Be sure to try making pickled jalapeños if you like a little heat with your pickles!
While fresh cucumbers are in season, it’s never a bad idea to make a batch of pickles! [More on growing your own cucumbers here.]
 Ready to DIY your pantry with more wholesome ingredients? Check out my new book from National Geographic! Attainable Sustainable Pantry is filled with delicious recipes for some of your favorite condiments, snacks, and toppings, along with an entire section on safe home food preservation. It’s the guide you need to start skipping packaged products and embrace homemade.
Crunchy garlic dill pickle recipe
I can remember, eons ago, my mom making a HUGE batch of dill pickles. She made the standard vinegar pickles and canned them in a water bath to preserve them. We were all so excited to eat those pickles.
But when we cracked open the first jar, the pickles inside were mushy. Nobody wanted to eat them. It was such a disappointment, and one that many a home canner has dealt with. Making crunchy pickles can be a challenge when preserving.
My solution is to ferment my dills instead of canning them.
Get a Quick Start Guide to Safe Canning!
Want to learn how to preserve the harvest? Dive in for a look at various canning techniques and methods! Grab my FREE 6-part guide to getting started.
Fermented pickles are not heated at all, so they retain their crispness. And the fermentation process results in a tangy, garlicky dill pickle that will make your mouth happy! Your gut, too, since these are a probiotic pickle.
Ingredients
Cucumbers — Choose cucumbers that are small and firm, as fresh as you can get them. This helps assure that they will retain their crispness.
Dill — There are a number of ways to go here. Fresh dill flower heads, just beginning to open are idea. Next best would be the ferny fronds of dill weed. If you can’t access either of those, dill seed is a good choice. [Go here to learn how to grow dill to use in recipes!]
Garlic — Garlic cloves add that spicy zing we all love so much. Peel the cloves and leave them whole.
Peppers — Adding hot peppers is optional, but if you like your peppers with a kick, add them. You could also use red pepper flakes.
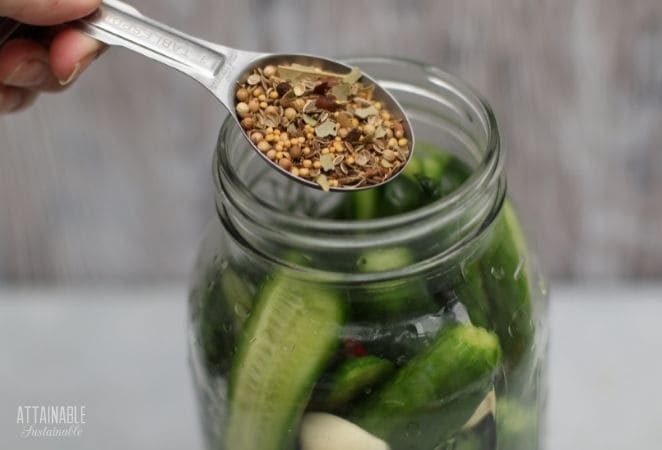
Pickling spices — Grab a ready made mix in the spice aisle or make up a batch of your own.
Salt — Use sea salt, NOT table salt. Table salt often has anti-caking agents that can interfere with the fermentation.
New to fermenting foods? Be sure to read this compilation of frequently asked questions before you get started!
Preparing the cucumbers
I opted to cut my cukes into halves. You can cut them in slices if you prefer or ferment them whole. If you opt to leave them whole, you’ll probably need a second jar to fit them all in.
The Fermentation Process
The process of fermenting pickles entails making a salt brine and pouring it over fresh cucumbers.
This jar is left at room temperature for a couple of weeks to slowly ferment into a delicious dill pickle. What you’ll notice happening over the course of days is that the clear brine will become cloudy. This is normal!
On about the third day, you’ll start to see cloudiness and bubbling. This is the formation of gasses. By the end of the week, the bubbling will have stopped, as no more gas is forming. Leave the pickles on the counter for another week or so to cure in the brine.
The pickles will begin to look a bit translucent in the center.
Troubleshooting
If you notice any sort of scum forming on top of the brine, don’t panic. Just check the jar regularly and skim as needed.
Storage
Once the fermentation process is complete, store the pickles in the refrigerator. They’ll last for a year or so, though as they age, they will slowly become less crispy.
★ Did you love this recipe? Be sure to give it a star rating below! ★

Fermented Deli-Style Garlic Dill Pickle Recipe
Equipment
- 1 half-gallon jar with lid
Ingredients
- 20 4-5" pickling cucumbers
- 5 heads fresh dill or 2 tablespoons dill seed
- 4 cloves garlic
- 2 - 4 dried peppers optional
- 1 tablespoon mixed pickling spices
- 4 tablespoons sea salt or canning salt
- 4 cups water filtered
Instructions
Recipe yields 1 half-gallon jar.
- Wash cucumbers and remove the stem with a thin slice at the end. Cut in halves.20 4-5" pickling cucumbers
- Put half of the dill, 2 cloves of garlic, and half of the hot peppers into the bottom of a half gallon jar.5 heads fresh dill, 2 - 4 dried peppers
- Begin packing cucumbers into the jar, pressing them tightly. When the jar is about halfway full, add the remaining dill, garlic, and peppers. Continue filling jar to within an inch and a half of the rim.4 cloves garlic
- Add pickling spices.1 tablespoon mixed pickling spices
- Pour brine over cucumbers until all are submerged. Use a fermentation weight to hold the cucumbers under the brine.4 tablespoons sea salt, 4 cups water
- Cover with a lid or rubber band a piece of cotton cloth on the top. Set jar on the countertop at room temperature. (Temps over 80ºF can result in soft pickles.)
- Check the pickles daily for the first week, loosening the jar lid to allow gasses to disperse, then every couple of days. Remove any visible scum as needed.
- After fully fermented, tighten on a lid and store your garlic dill pickles in the refrigerator or a cool cellar.
Notes
- In lieu of a half-gallon jar, you can use 2 quart jars.
- You can cut the cucumbers in slices if you prefer or ferment them whole.
- If you notice any sort of scum forming on top of the brine, don't panic. Just check the jar regularly and skim as needed.
- Once the fermentation process is complete, store the pickles in the refrigerator. They'll last for a year or so, though as they age, they will slowly become less crispy.
Nutrition
Adapted from So Easy to Preserve.
More pickle recipes to try:
- Dilly green beans (refrigerator pickles)
- Pickled green beans (shelf stable)
- Bread and butter pickles
- Fermented squash and cukes


What size jar?
half gallon or two quarts.
How do you know when the fermentation process is complete after sitting on the counter for a week?
It’s a little bit subjective, as far as taste preference. But for safety, you can pick up some pH paper and use that to check to make sure that the pH is below 4.6.