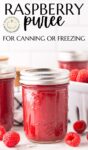
Raspberries just might be the perfect early summertime fruit. If you’ve got an abundance, making raspberry puree for the pantry or the freezer is a great way to extend that flavor into the off season.
Whether you opt to freeze this puree or prefer to process it to create a shelf stable product, it’s easy, you can make it as sweet as you like, and your future self is going to thank you for saving this summertime flavor.
Ingredients
Here’s what you’ll need to make this recipe. See the recipe card below for the exact quantities.
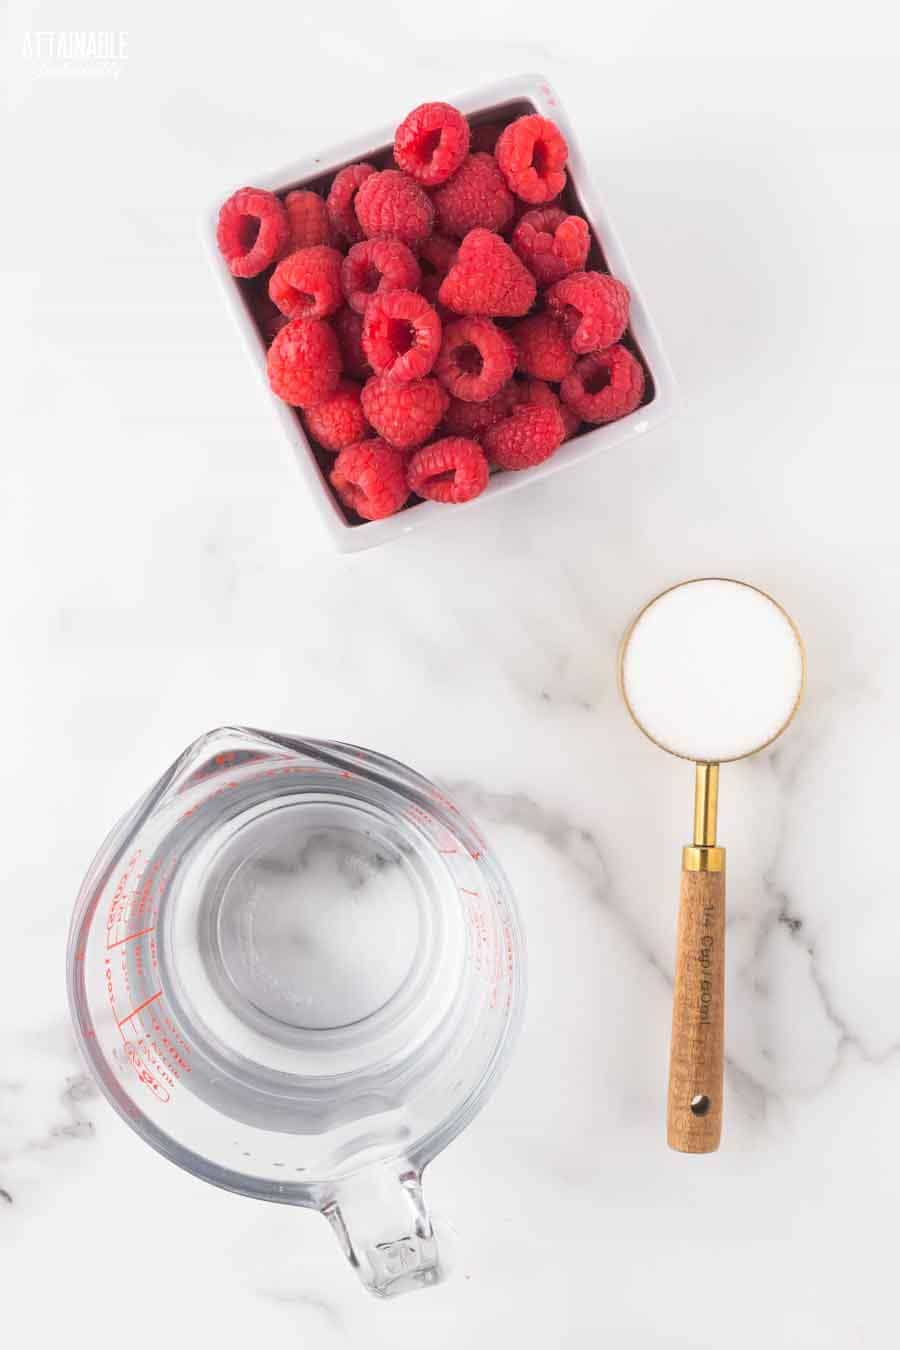
Raspberries — Choose fresh raspberries at the peak of ripeness for the best raspberry flavor. Can you use frozen raspberries? Sure!
Sugar — Adding sweetener is optional and will depend on the sweetness of the berries. (I recommend tasting the puree before adding sweetener; it might not need any!) Granulated sugar is great, but if you prefer to use honey, that will work as well.
Get a Quick Start Guide to Safe Canning!
Want to learn how to preserve the harvest? Dive in for a look at various canning techniques and methods! Grab my FREE 6-part guide to getting started.
How to Puree Raspberries
There are a couple of ways to go about making raspberry puree. If you plan to use the fruit puree immediately or want to freeze it, you can make a raw puree in a blender or food processor. If you want to can the puree to have an easy raspberry sauce on hand year round, you’ll need to cook and heat the berries.
In a Blender or Food Processor
Place the raspberries in the bowl of a food processor or blender. Puree for about one minute, then scrape down the sides of the container and process for another minute.
Sample and add sweetener if desired, then process for another 30 seconds or so to incorporate the sugar.
Cooked Puree
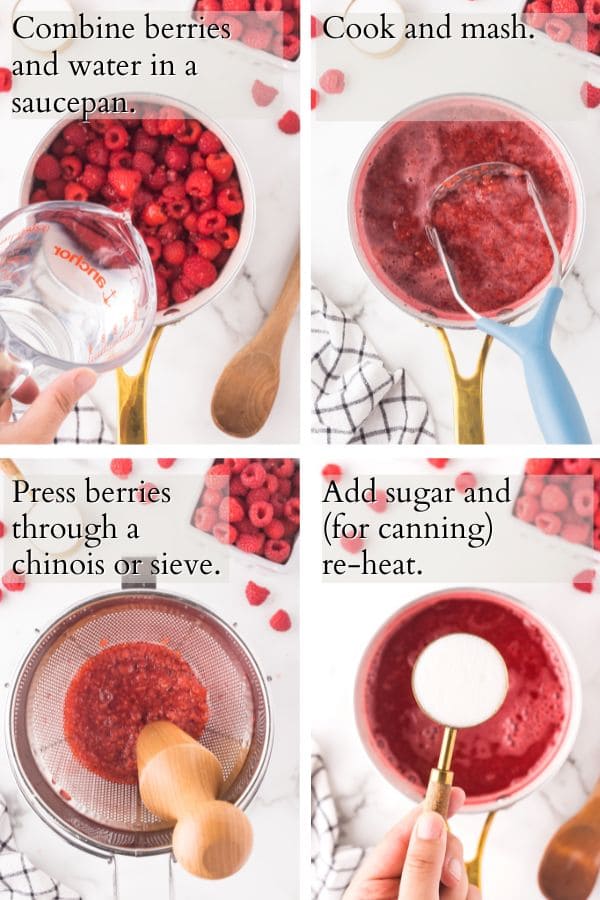
Combine berries and water in a large pot and cook until berries are soft. Mash the berries in the pot and strain. This is the method you’ll need to use if you wish to can jars of puree for the pantry – you must hot pack the puree.
Seedless Puree
Removing the seeds to make a seedless puree is easy enough to do with a sieve or food mill, or you can simply strain the puree using a fine mesh strainer over a large bowl and press the puree through with the back of a spoon.
 Ready to DIY your pantry with more wholesome ingredients? Check out my new book from National Geographic! Attainable Sustainable Pantry is filled with delicious recipes for some of your favorite condiments, snacks, and toppings, along with an entire section on safe home food preservation. It’s the guide you need to start skipping packaged products and embrace homemade.
How to Freeze Raspberry Puree
If you’re not using the raspberry puree immediately, it can be frozen, regardless of which method you use to make it. It will last in the freezer for up to three months without losing quality.
To freeze, portion the puree into freezer-safe containers, being sure to allow enough room for expansion. If you’re using canning jars, opt for straight-sided jars and leave a minimum 1-1/2″ of headspace.
If you tend to use it in smaller quantities, fill ice cube trays with raspberry puree and freeze until solid. Transfer frozen puree to an airtight container and pull out cubes as needed.
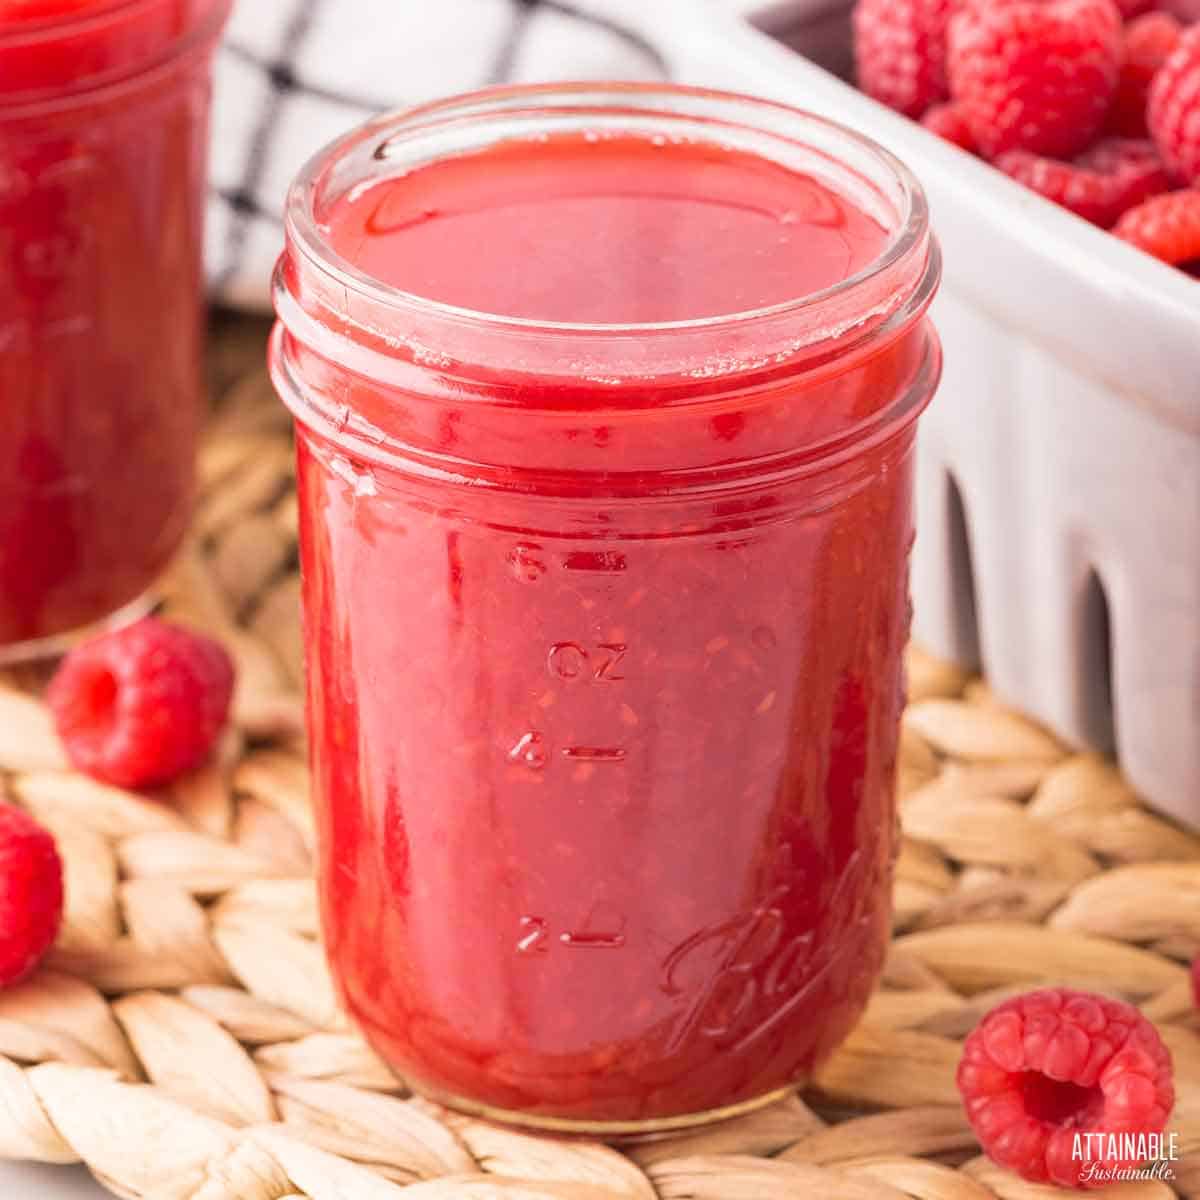
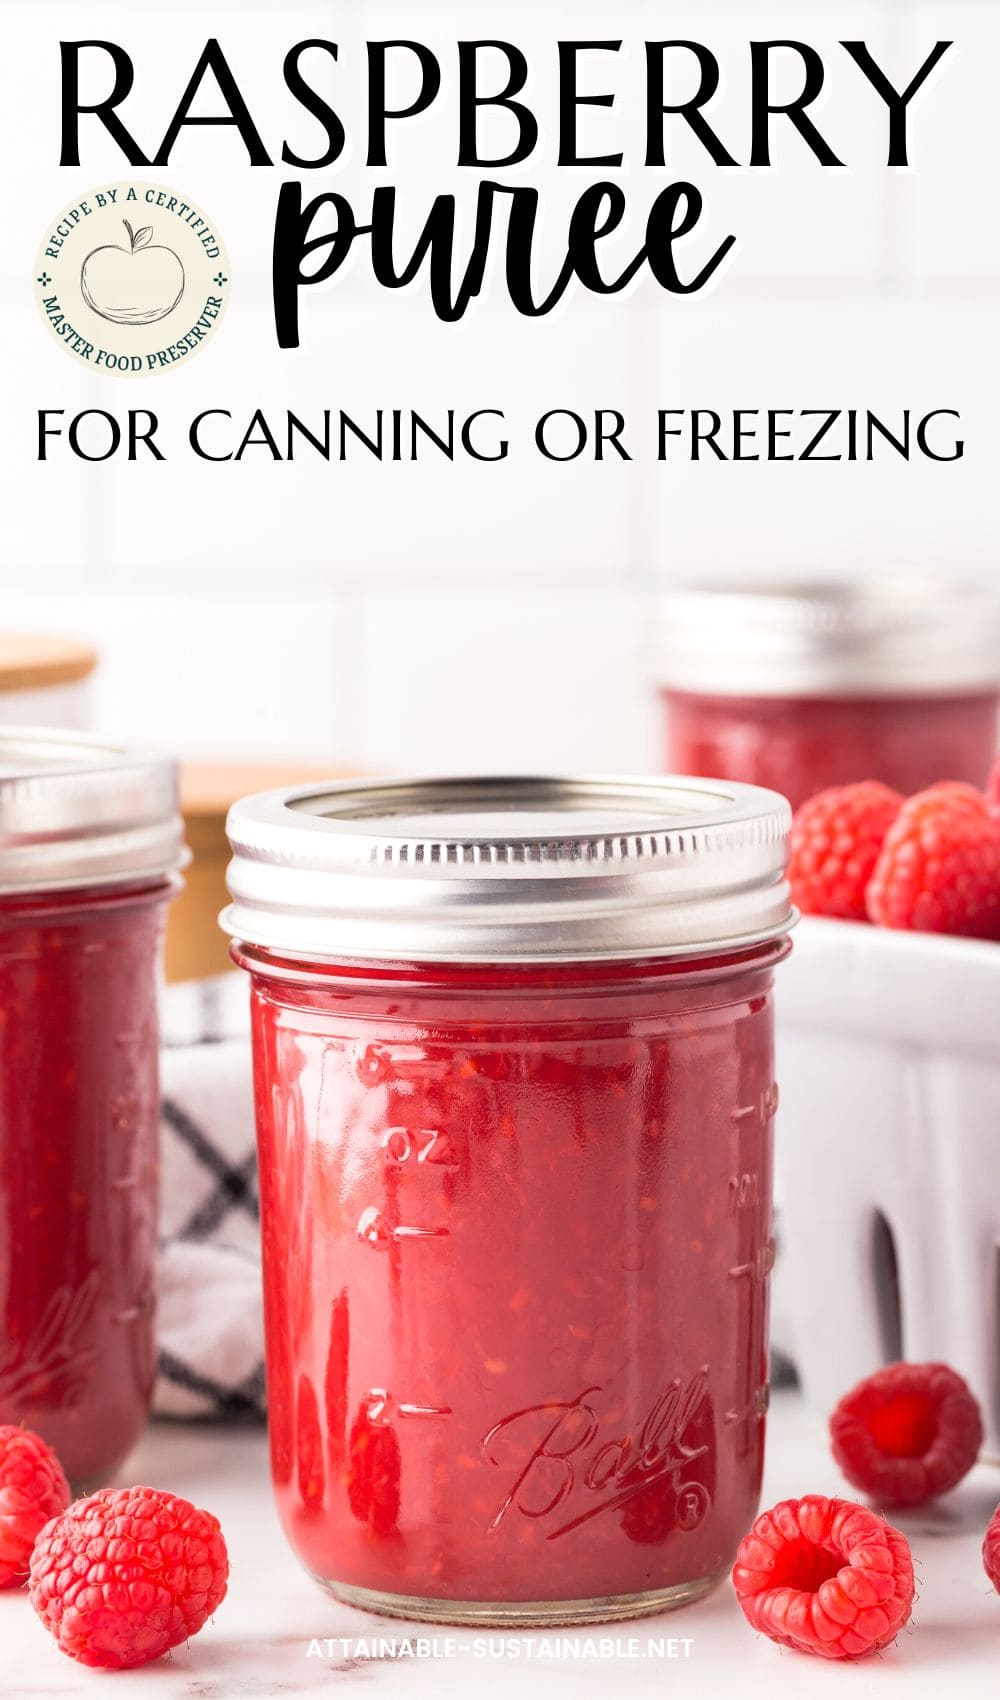
Canning Raspberry Puree
Once you’ve cooked the berries down and run through a sieve or food mill, return the puree to the cooking pot and reheat. The puree needs to be hot-packed into jars.
If you prefer a thicker puree, continue cooking over medium heat, stirring often, to make a reduced raspberry puree.
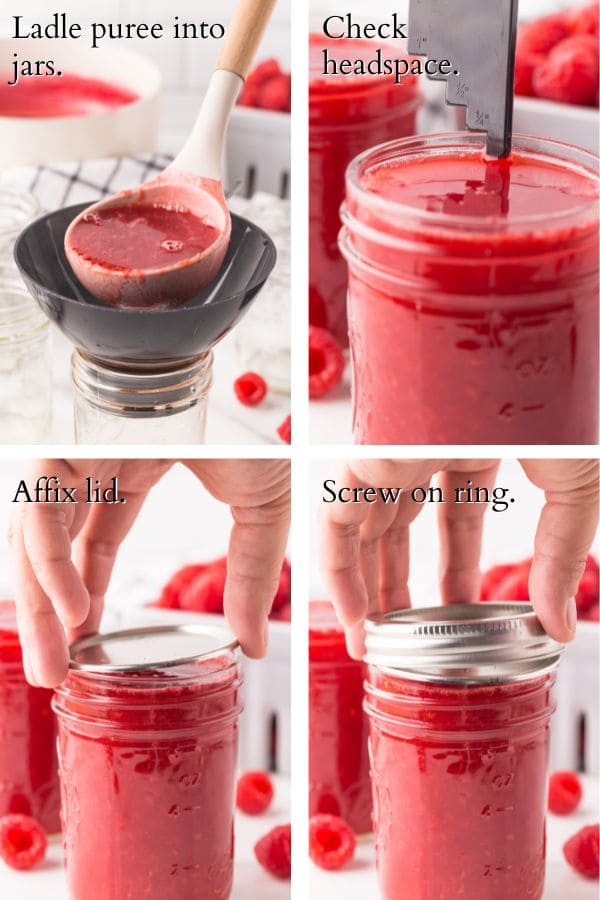
Ladle hot puree into hot jars and wipe the rims to remove any sticky residue. (This assures a good seal.) Center lid on each jar and screw ring on finger tight.
Once the jars are filled, place jars in a water bath canner. What this means is you’ll put the filled jars into boiling water and heat them for ten minutes.
Remove the jars to a towel-covered countertop and allow to cool fully. As they cool, you’ll hear the little “tink” sound of the jars sealing. Store any unsealed jars in the fridge and use those first. (This is unusual, but it does happen once in awhile.)
🍅 Safety First!
Canning is an excellent way to preserve food for the pantry, but there are some important safety considerations to keep in mind. The recipes on this site have been made following safe canning procedures by a certified Master Food Preserver.
- Know the difference between water bath canning and pressure canning. Low acid items must be pressure canned for safety.
- Altering ingredients may change the recipe’s pH, posing a safety issue.
- Use the proper jars and lids. Never reuse lids, with the exception of the Tattler or Harvest Right hard plastic lids that are intended for such a purpose.
- For more on canning equipment, please go here.
- Want to learn more? The National Center for Home Food Preservation is the go-to resource for safe canning information.
Remove the ring from each sealed jar, rinse to remove any jam residue, and store (without the ring) in the pantry (or other cool, dark place) so you can enjoy fresh raspberry flavor all year long.
Have plenty of raspberries? Try this raspberry apricot jam, too!
Using this Raspberry Puree
- This fruity sauce pairs beautifully with chocolate cake or chocolate torte.
- Pour it over pancakes or waffles.
- Add this raspberry sauce to a variety of mixed drinks.
- Serve it over ice cream.
★ Did you love this recipe? Be sure to give it a star rating below! ★
Raspberry Puree
Equipment
- 5 half-pint jars adjust quantity for quarter-pint and pint jars
- 5 canning lids and rings
- canning funnel
- water bath canner with lid or deep pot
- jar tongs
- canning bubble popper/measurer optional but handy
Ingredients
- 4 pounds fresh raspberries
- ¼ - ½ cups water
- ¼ cup sugar optional
Instructions
Recipe yields 5 half-pint jars.
MAKE THE PUREE
- Wash and de-stem raspberries. Cut berries in half (or quarters for really large berries).4 pounds fresh raspberries
- Blender puree: Place berries in the carafe of a blender along with about 1/4 cup of water. (The water will help the mixture blend more easily, but you can leave it out if you'd like.) Puree for about one minute, then scrape down the sides of the container and process for another minute. Sample and add sweetener if desired, then process for another 30 seconds or so to incorporate the sugar. If you'd like to remove seeds, run through a food mill, mesh sieve, or chinois. Add sugar to taste. Use immediately or freeze.
- For canning (canned puree must be hot packed): Combine berries and 1/2 cup water in a large pot. Cook over medium-low heat until berries are soft, stirring frequently. Mash berries in the pot, then run through a food mill, sieve, or chinois to remove seeds. Add sugar to taste. Return the puree to the cooking pot. Bring it to a boil and cook until sugar is dissolved; remove from heat.1/4 - 1/2 cups water, ¼ cup sugar
PREP FOR CANNING
- Fill a canning pot with water, set the lid in place, and heat on high heat until boiling. It can take awhile for the water to come to a boil, so get it started before you begin making the jam.
- Gather the jars you'll use, making sure each is clean and free of nicks in the rim, which could impede sealing. Wash jars and place empty jars into the canning pot. This keeps the jars warm and helps avoid temperature shock when pouring hot jam into the glass jars.
- Wash canning lids and rings in hot water; set aside.
CANNING STRAWBERRY PUREE
- Ladle hot puree into 1/2 pint or pint sized jars, leaving 1/4" head space. A canning funnel makes this step easy.
- Remove air bubbles and wipe jar rims to remove any fruit mixture that may have spilled. A clean rim is essential to a good seal.
- Place lids centered on the jar rim. Screw bands on finger tight.
- Use a jar grabber to gently submerge jars into hot water in the canning pot. Water should cover the top of the jars by an inch. The water will cool somewhat in reaction to the addition of the jars. Return the water to a simmer and then set the timer.
- Process for 15 minutes 0-1,000 feet altitude; 20 minutes 1,001-6,000 feet; 25 minutes above 6000 feet.
- Turn off heat and allow jars to sit in the canner for 5 minutes, then remove jars from water using the jar lifter. Transfer to a solid, towel-covered surface. Allow to cool for 24 hours.
- Check seals. Lids should be solid and pulled down tight. (if they flex and pop, the jar didn’t seal; put unsealed jars in the refrigerator and use those first).
- Remove rings and wash outsides of jars. Store in a cool dark place.
Notes
- Recipe yields 5 half-pint jars.
- If you prefer to use honey, that will work to sweeten this sauce as well. Adding sweetener to this puree is optional and for flavor alone; it's not necessary for canning safety.
- Many canning recipes call for the addition of lemon juice to acidify the recipe; this is not necessary for safety with this recipe but if you want to add a little tanginess, it is safe to add a splash.
- This recipe can be made in half pint, pint, or quart-size jars. Based on safe canning instructions from the National Center for Home Food Preservation.
- SOURCE: Adapted from the United States Department of Agriculture (USDA) Complete Guide to Home Canning, page 2-14.


