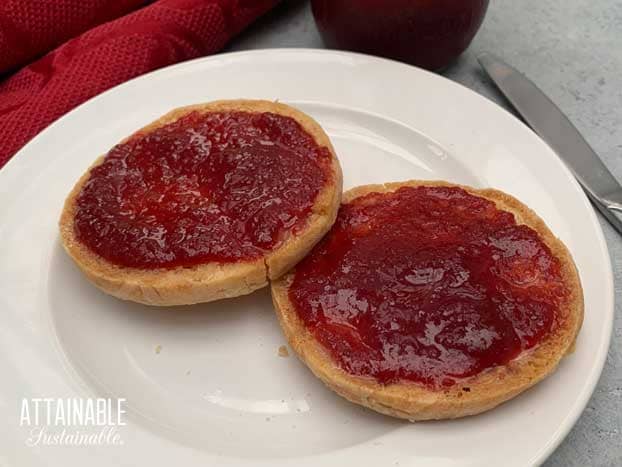
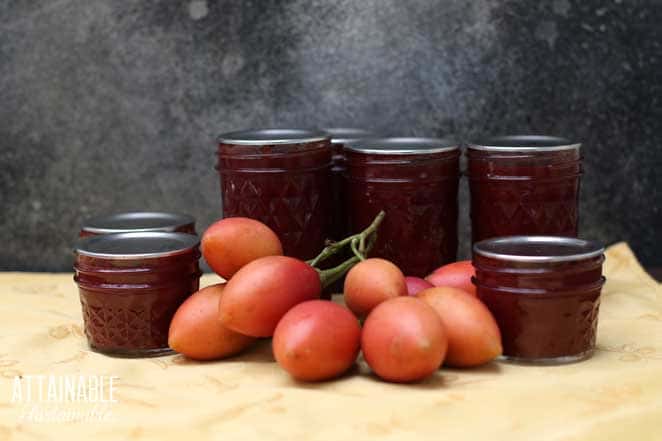
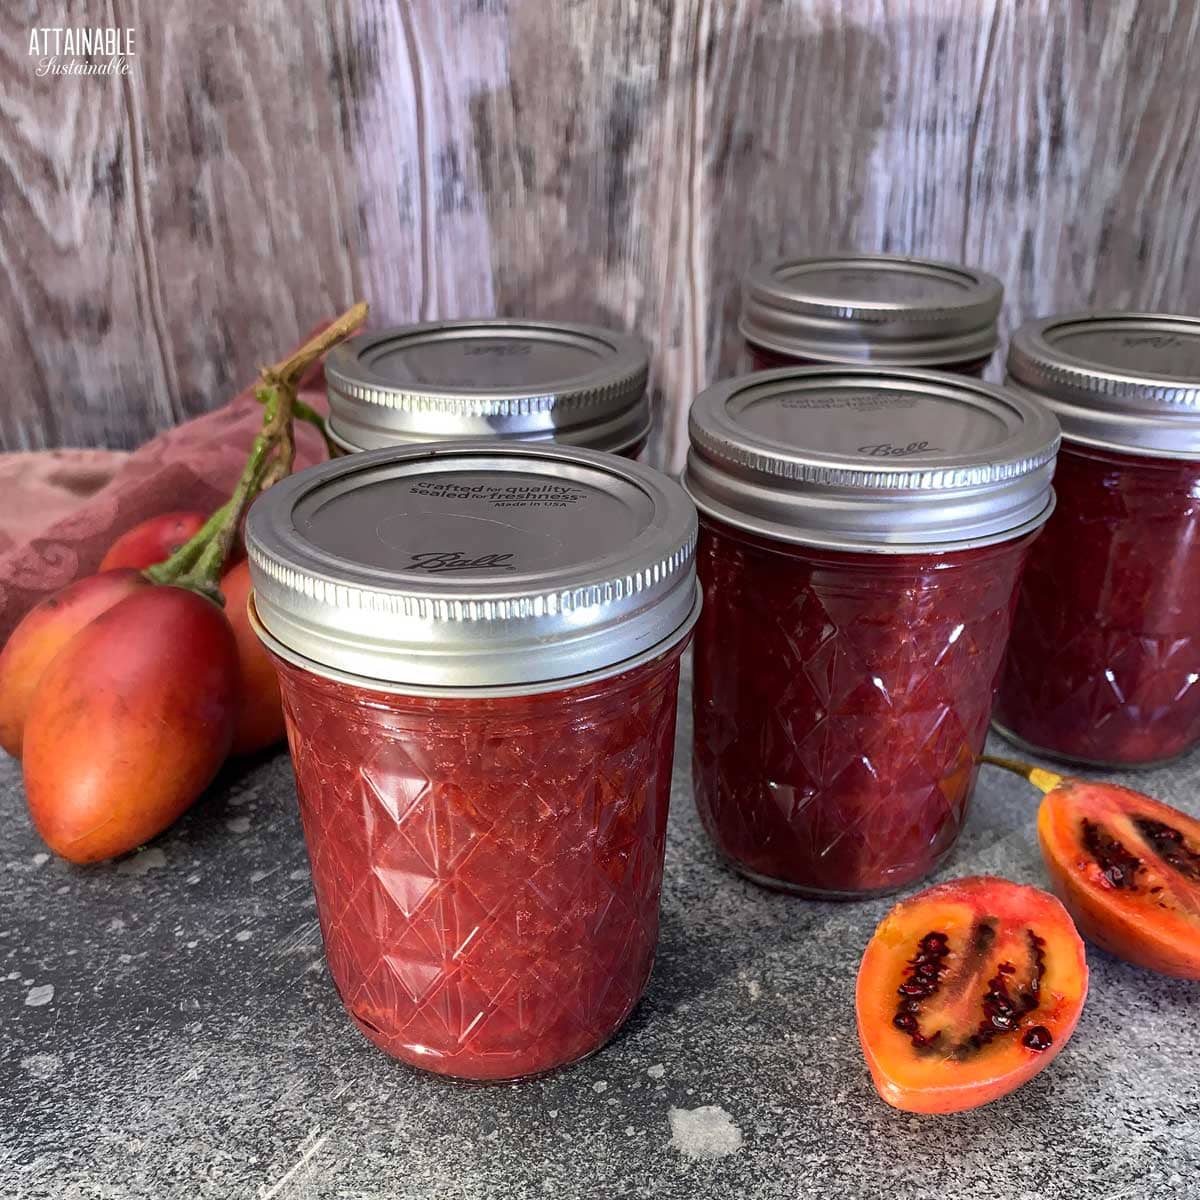
This tamarillo jam recipe is an unexpected use for this unusual fruit. You’ll be surprised at the sweet flavor and how delicious it is on your morning toast.
This mango jam is another favorite, full of tropical flavor.
Originally published December 2021; this post has been updated.
Really? Tamarillo Jam?
I’m beginning to think that tamarillo fruit is magical. Also known as tree tomato, this fruit is slightly sweet, tangy, and complex. It’s good eaten fresh of course, but in cooking, it can be used in both sweet and savory recipes.
In fact, I use the fruit to make homemade ketchup and I’ve made it into barbecue sauce as well.
But what if I told you it makes a lovely fruit spread that’s a surprising stand-in for berry jam?
5 Easy Steps to Transform Your Pantry!
Ready to switch from store bought to homemade? Let me help you make some changes! Grab my FREE five-part guide to getting started.
Ingredients
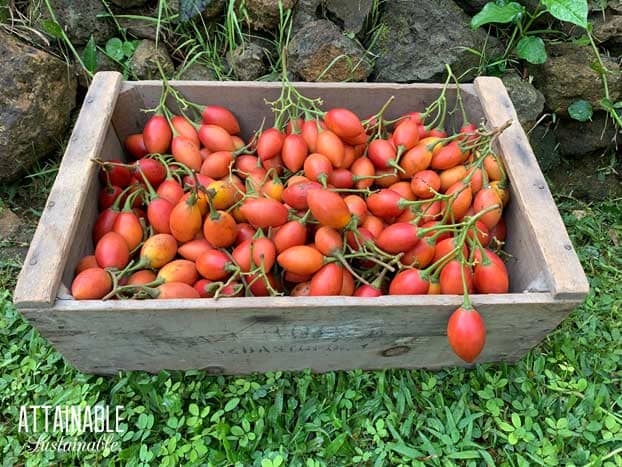
Tamarillos — This unusual fruit, also called a tree tomato, grows in warm regions; rarely is it available on the commercial market.
Sugar — Use your favorite brand of granulated cane sugar. I prefer organic.
Pectin – This recipe is made using Pomona’s Universal Pectin. This is the only pectin I use anymore as it allows me to use much less sweetener. The standard pectin brands use an obscene amount of sugar in my opinion, often requiring equal amounts of sugar and fruit! This product uses a low methoxyl method and calls for using two different ingredients, which are included in the box: pectin (the large packet) and calcium powder (the small packet). The dry pectin is mixed with the sweetener before being added to the fruit. The calcium water is added directly to the fruit.
Pulping the Tamarillo
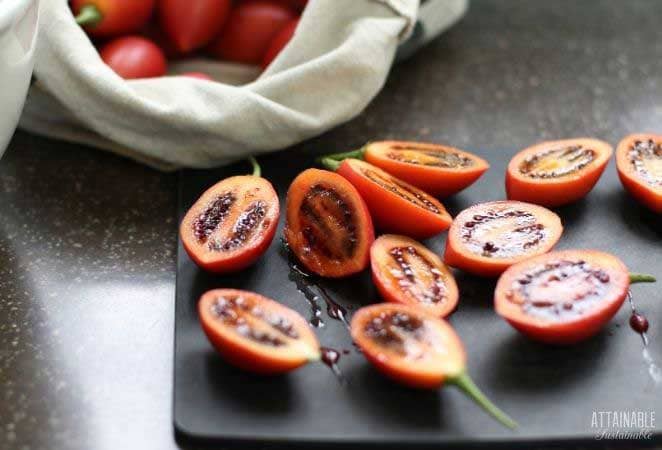
Tamarillos have somewhat hard seeds inside, and those need to be removed before making this jam recipe. You’ll also need to remove the bitter skins. You’ll need 2-3 pounds of fruit to make enough pulp for this recipe.
Some people make the jam with seeds and all, and I’ve tried it that way. The occasional tooth breaking hard seeds that grow inside these fruit make that plan a no-go for me.
Cut tamarillo fruit in half and use a spoon to scoop out the flesh, transferring the fruit to a food mill. [More on using a food mill here.]
Set a manual food mill on top of a bowl to capture the strained pulp. When the food mill is full, turn the handle repeatedly until the only thing left in the strainer bowl is a thick paste of seeds.
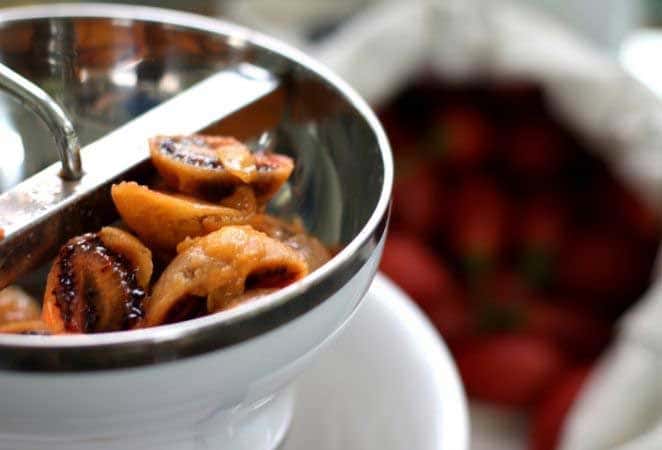
Alternatively, you can use a chinois. To do that, put the tamarillo pulp in a food processor and pulse several times to break it up. Transfer to a chinois and use the wooden tool to press the pulp out into a bowl.
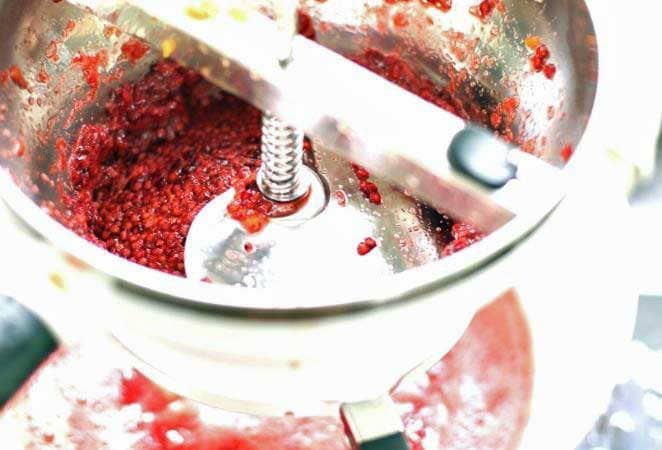
I’ve done this both ways and feel that I’m able to retrieve more pulp with the food mill.
Once pulped, you can begin making the jam right away, or refrigerate the pulp overnight.
🍅 Safety First!
Canning is an excellent way to preserve food for the pantry, but there are some important safety considerations to keep in mind. The recipes on this site have been made following safe canning procedures by a certified Master Food Preserver.
- Know the difference between water bath canning and pressure canning. Low acid items must be pressure canned for safety.
- Altering ingredients may change the recipe’s pH, posing a safety issue. I highly recommend investing in pH paper to test your products for acidity level when canning. Note: For safe water bath canning, the Hawaii Master Food Preservers suggest a pH of 4.2 or lower in the tropics. In other regions, the recommended pH is 4.6 or lower.
- Use the proper jars and lids. Never reuse lids, with the exception of the Tattler or Harvest Right hard plastic lids that are intended for such a purpose.
- For more on canning equipment, please go here.
- Want to learn more? The National Center for Home Food Preservation is the go-to resource for safe canning information.
Making Jam
This is often the sticking point for people who have never canned before. It’s something “new” and why is it that we think “new” is difficult?? It’s not! You will need special canning jars, lids, and rings (read more about canning equipment here), but it’s not difficult.
Start by measuring out the fruit pulp. Heat in a large saucepan along with the calcium water.
Combine the pectin with the sweetener, making sure it’s thoroughly combined.
When the mixture is boiling, add the sugar mixture, stirring for a minute or two to assure that the pectin is well distributed. Return to a boil and it’s done!
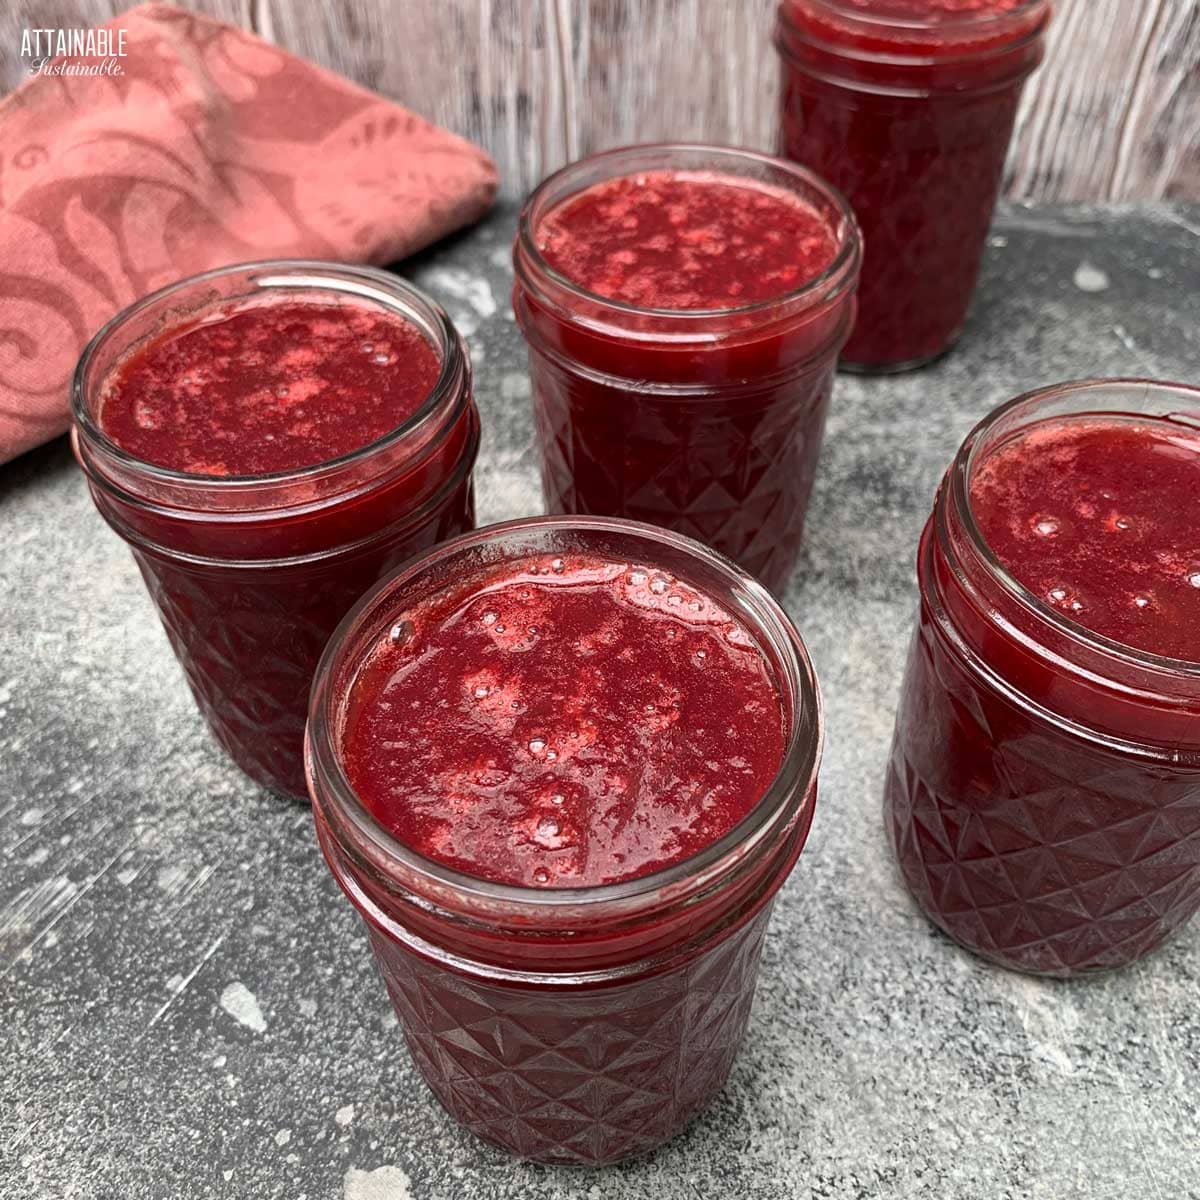
Canning Jam
You’ll need special canning jars, lids, and rings (read more about canning equipment here) to make this homemade jam shelf-stable, but the process isn’t difficult.
Use quarter-pint or half pint jars for this recipe.
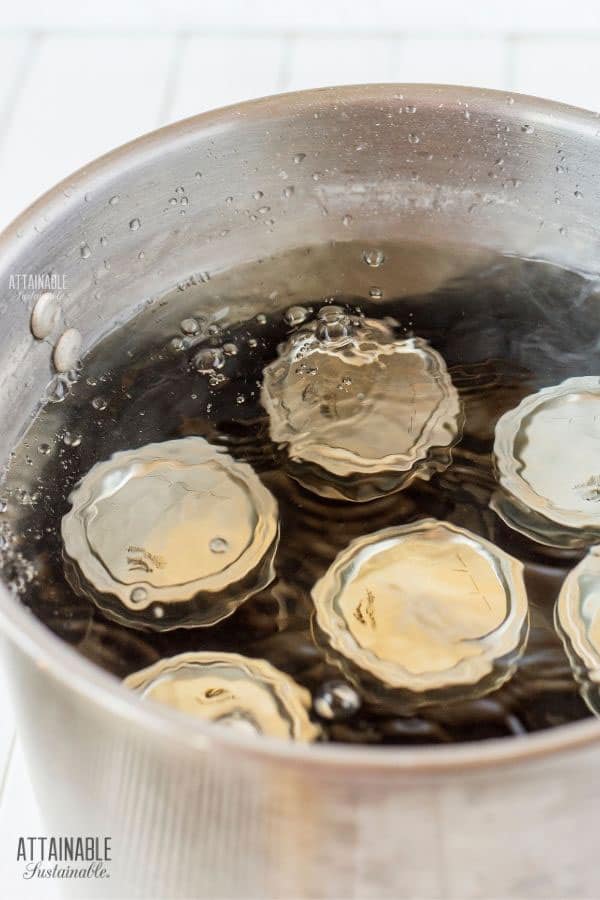
Once the jars are filled, you’ll process them in a water bath. What this means is you’ll put the filled and sealed jars of jam into boiling water and heat them for ten minutes. This assures that the jars will seal well.
You might be able to use a large pot, rather than a special water bath canner.
Place hot jars on a countertop lined with a kitchen towel and allow to cool fully. As they cool, you’ll hear the little “tink” sound of the jars sealing. Store any unsealed jars in the fridge and use those first. (This is unusual, but it does happen once in awhile.)
Remove the ring from each sealed jar, rinse to remove any jam residue, and store (without the ring) in a cool, dry place, such as the pantry.
Here’s a more detailed look at canning jam and jelly and a collection of even more jam recipes!
Once the jars are properly filled with jam, you’ll process them in a water bath. What this means is you’ll put the filled and sealed jars of strawberry jam into boiling water and heat them for ten minutes. This assures that the jars will seal well.
Remove the jars to a towel-covered countertop and allow to cool fully. As they cool, you’ll hear the little “tink” sound of the jars sealing. Store any unsealed jars in the fridge and use those first. (This is unusual, but it does happen once in awhile.)
Remove the ring from each sealed jar, rinse to remove any jam residue, and store (without the ring) in the pantry.
Here’s a more detailed look at canning jam and jelly.

Seedless Tamarillo Jam
This tamarillo jam recipe taste like a berry fruit spread! Also known as tree tomatoes, you'll be surprised at the sweet flavor & how delicious it is on morning toast. It can be made with pectin, or without (see notes)
Ingredients
- 7 cups tamarillo pulp (see below)
- 4 teaspoons calcium water (from Pomona's Universal Pectin box)
- 1 1/2 cups sugar
- 4 teaspoons pectin (from Pomona's Universal Pectin box)
Instructions
PREPARE FOR CANNING
- Prepare the calcium water: Combine ½ teaspoon calcium powder (from the small packet in the box of Pomona’s pectin) with ½ cup water in a small jar. Screw on a lit and shake until well-combined. You'll have more than you need for this recipe. Store the excess in the refrigerator for use in making additional jam or jelly recipes.
- Wash the jars you'll use, making sure each is clean and free of nicks in the rim, which could impede sealing.
- Wash the lids and rings in hot soapy water. (If you're using non-Ball brand lids, prepare as suggested by manufacturer.)
- Place empty jars in a canning pot or large stock pot with enough water to cover by an inch or two, cover pot, and set on high heat. It can take awhile for the water to heat, so get it started before you begin making the recipe.
MAKE THE CALCIUM WATER
- Combine ½ teaspoon calcium powder (from the small packet in the box of Pomona’s pectin) with ½ cup water in a small jar.
- Screw on a lid and shake until well-combined. You'll have more than you need for this recipe.
- Store the excess in the refrigerator for use in making additional jam or jelly recipes.
MAKE THE JAM
- Measure the tamarillo pulp and calcium water into a large saucepan; bring to a boil.
- Meanwhile, combine the sugar with the pectin until it's thoroughly combined.
- When the fruit mixture comes to a boil, stir in the pectin and sweetener, stirring vigorously for 1 to 2 minutes to dissolve the pectin while bringing the jam back to a boil. Remove from heat when the jam boils.
CANNING TAMARILLO JAM
- Ladle hot jam into quarter-pint, half-pint, or pint sized jars, leaving 1/4" head space. A canning funnel makes this easy.
- Wipe jar rims to remove any jam that may have spilled. A clean rim is essential to a good seal.
- Set jar lids in place. Screw bands on finger tight.
- Use a jar lifter to gently submerge jars into hot water in the canning pot. Water should cover the top of the jars by an inch. The water will cool somewhat in reaction to the addition of the jars. Return the water to a simmer and then set the timer.
- Process for 10 minutes 0-1,000 feet altitude; add an additional minute for every additional 1,000 feet in elevation.
- Remove jars from water using the jar lifter and transfer to a solid, towel-covered surface. Allow to cool for 24 hours.
- Check seals. Lids should be solid and pulled down tight. (if they flex and pop, the jar didn’t seal; put unsealed jars in the refrigerator and use those first).
- Remove rings and wash outsides of jars. Store in a cool, dry place.
Notes
This recipe is made using Pomona’s Universal Pectin. This is the only pectin I use anymore as it allows me to use much less sweetener. The standard pectin brands use an obscene amount of sugar in my opinion, often requiring equal amounts of sugar and fruit! This product uses a low methoxyl method and calls for using two different ingredients, which are included in the box: pectin (the large packet) and calcium powder (the small packet).
This recipe tests with a pH between 3.0 and 3.5, making it safe for home canning in a water bath. The recipe above, made with Pomona's Universal Pectin, does not require the addition of lemon juice for acidity.
Boiling lids or heating above 180°F as once recommended can damage the sealing compound.
Tamarillo Jam without Pectin:
7 cups tamarillo pulp (4-5 pounds of fruit)
3 cups sugar
3 tablespoons lemon juice