
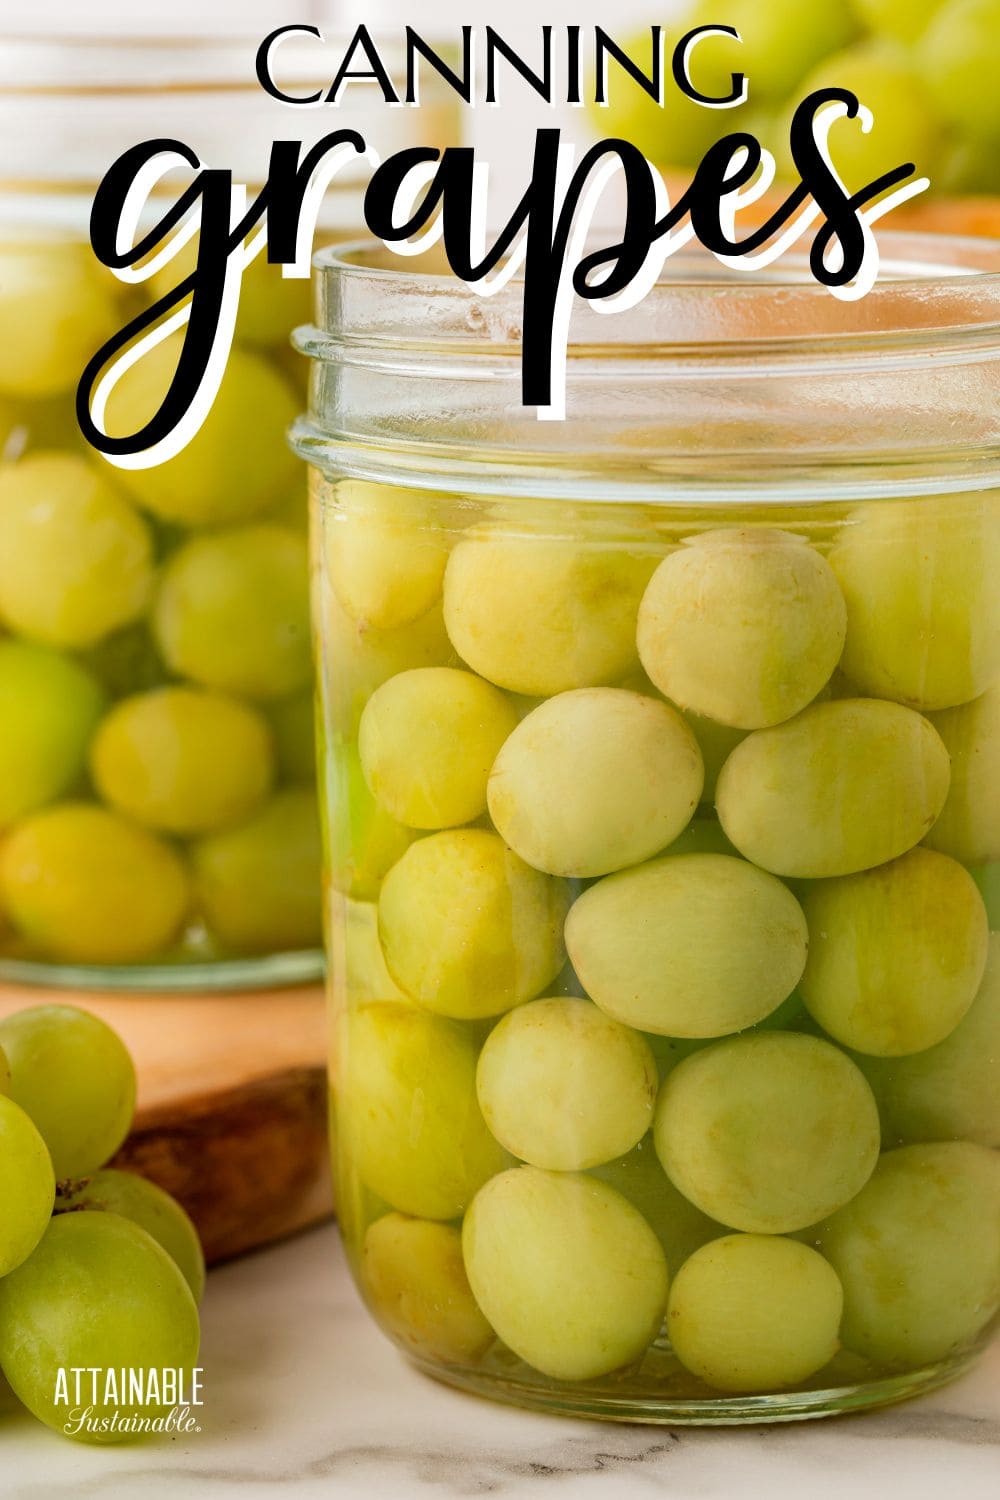
When my mom served canned fruit cocktail when I was a kid, the first thing I did was devour the grapes. Bar none, the best part of the fruit cocktail. Canning grapes — just grapes — at home means an entire jar full of nothing but my favorite.
If you’re harvesting lots of grapes from your own grape vines, be sure to try this homemade grape jelly recipe, too.
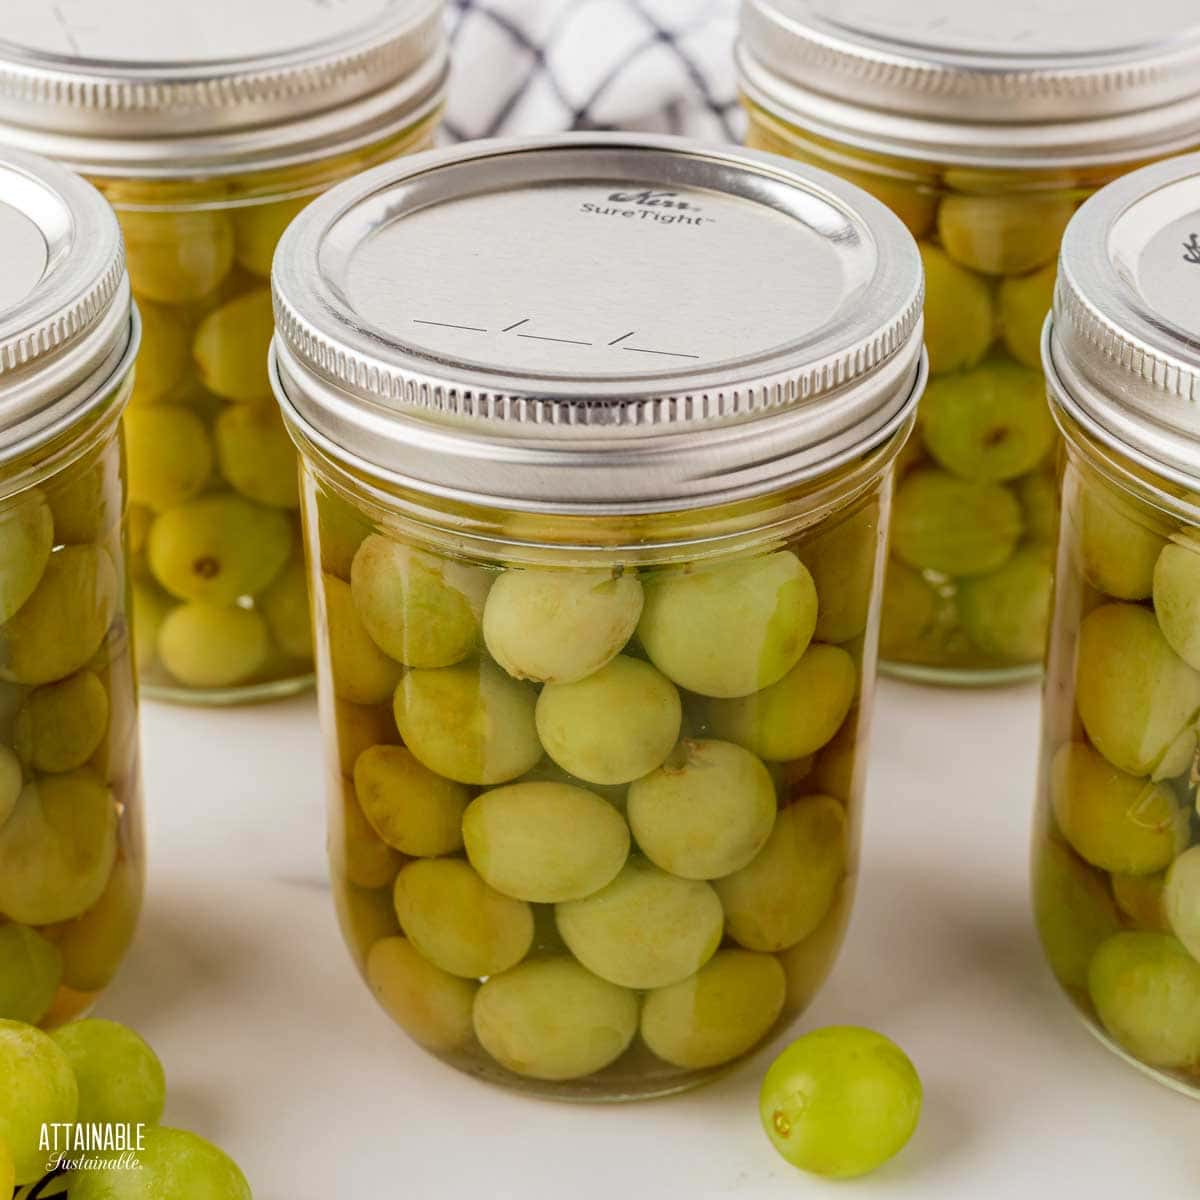
This is one of the easiest canned fruits you can make, simply because the grapes require little in the way of preparation. They go into the jar whole, with their peels intact.
 Ready to DIY your pantry with more wholesome ingredients? Check out my new book from National Geographic! Attainable Sustainable Pantry is filled with delicious recipes for some of your favorite condiments, snacks, and toppings, along with an entire section on safe home food preservation. It’s the guide you need to start skipping packaged products and embrace homemade.
Ingredients
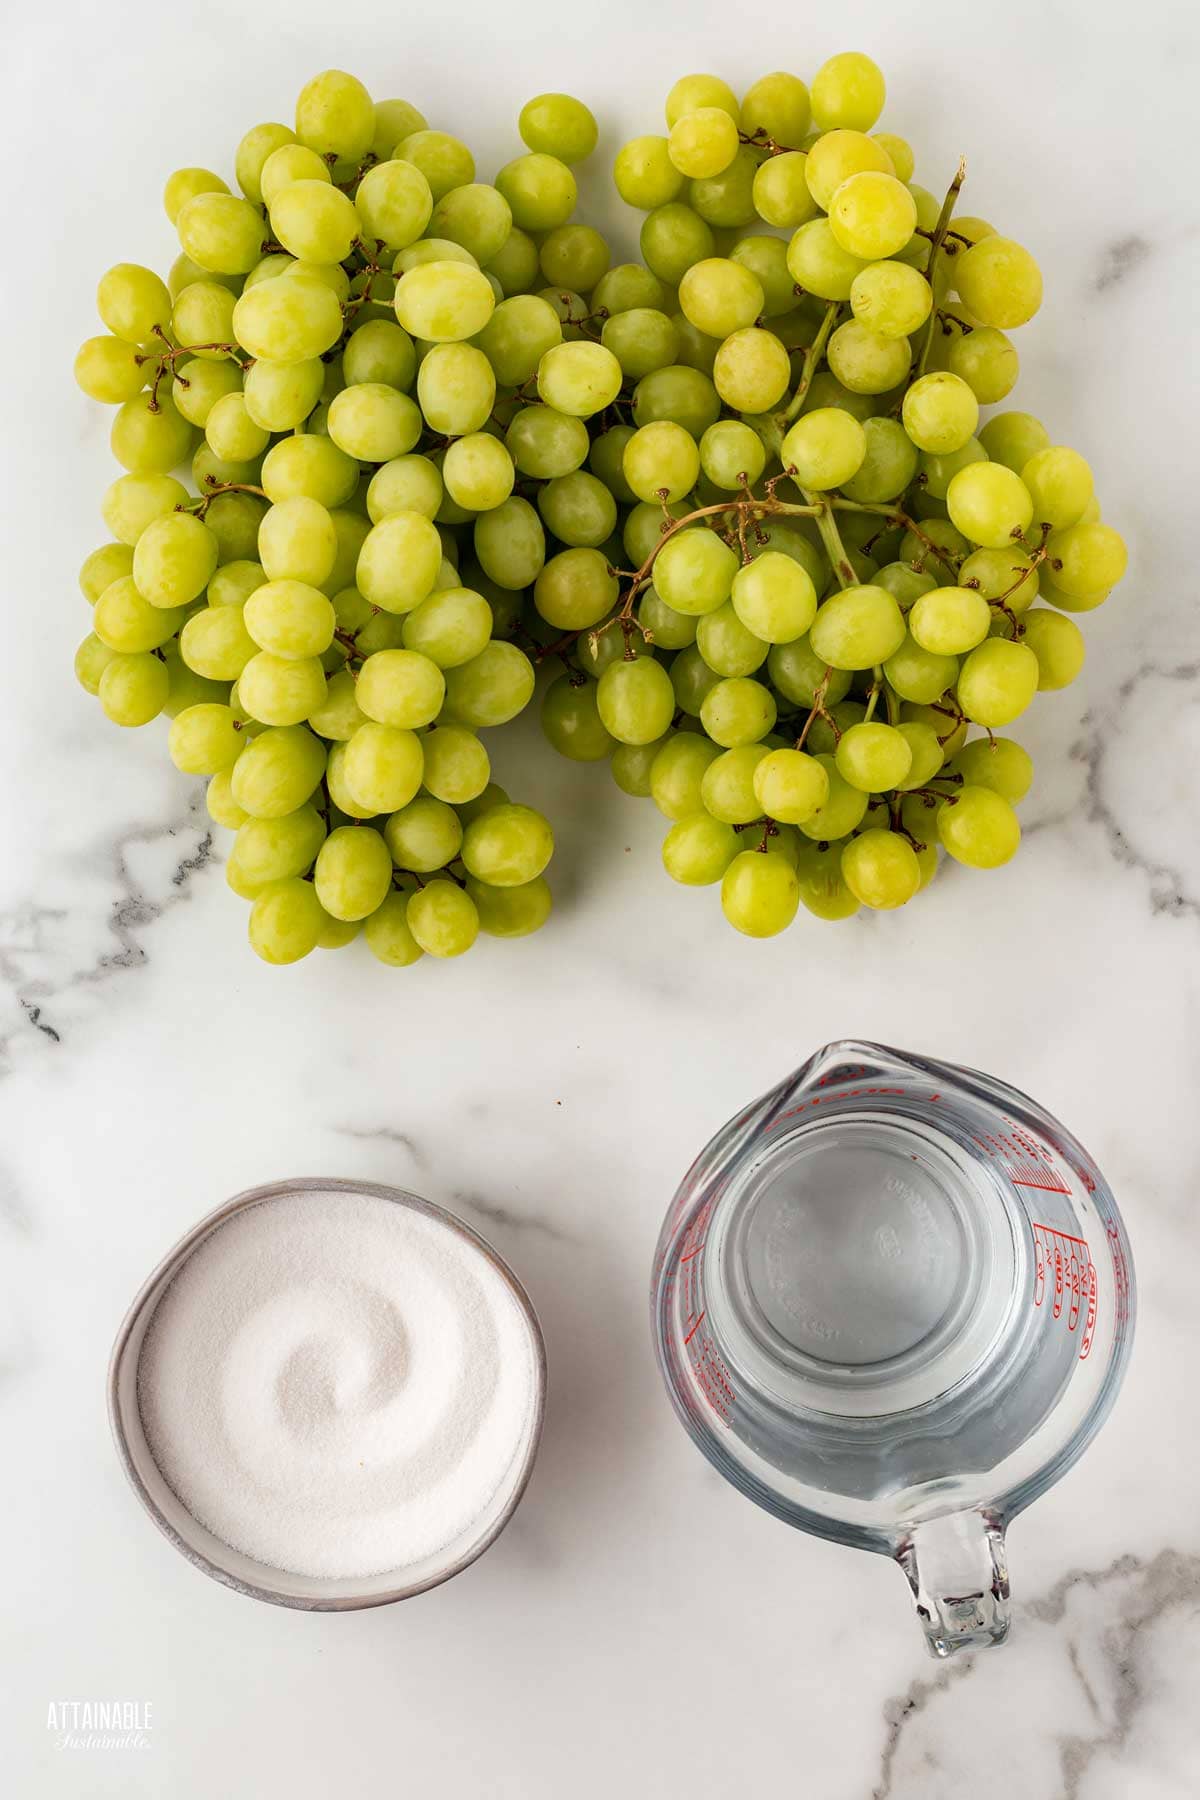
Fresh grapes — You can use green grapes or red grapes, but I do recommend using seedless grapes. Can you use grapes with seeds? You can, but you’ll want to cut the grapes in half and remove the seeds. More work, but doable. You’ll need about 9 pounds of grapes to fill 9 pint jars. If you wish to use quart jars, you’ll need about 15 pounds of grapes to fill 7 jars, which is a full canner load.
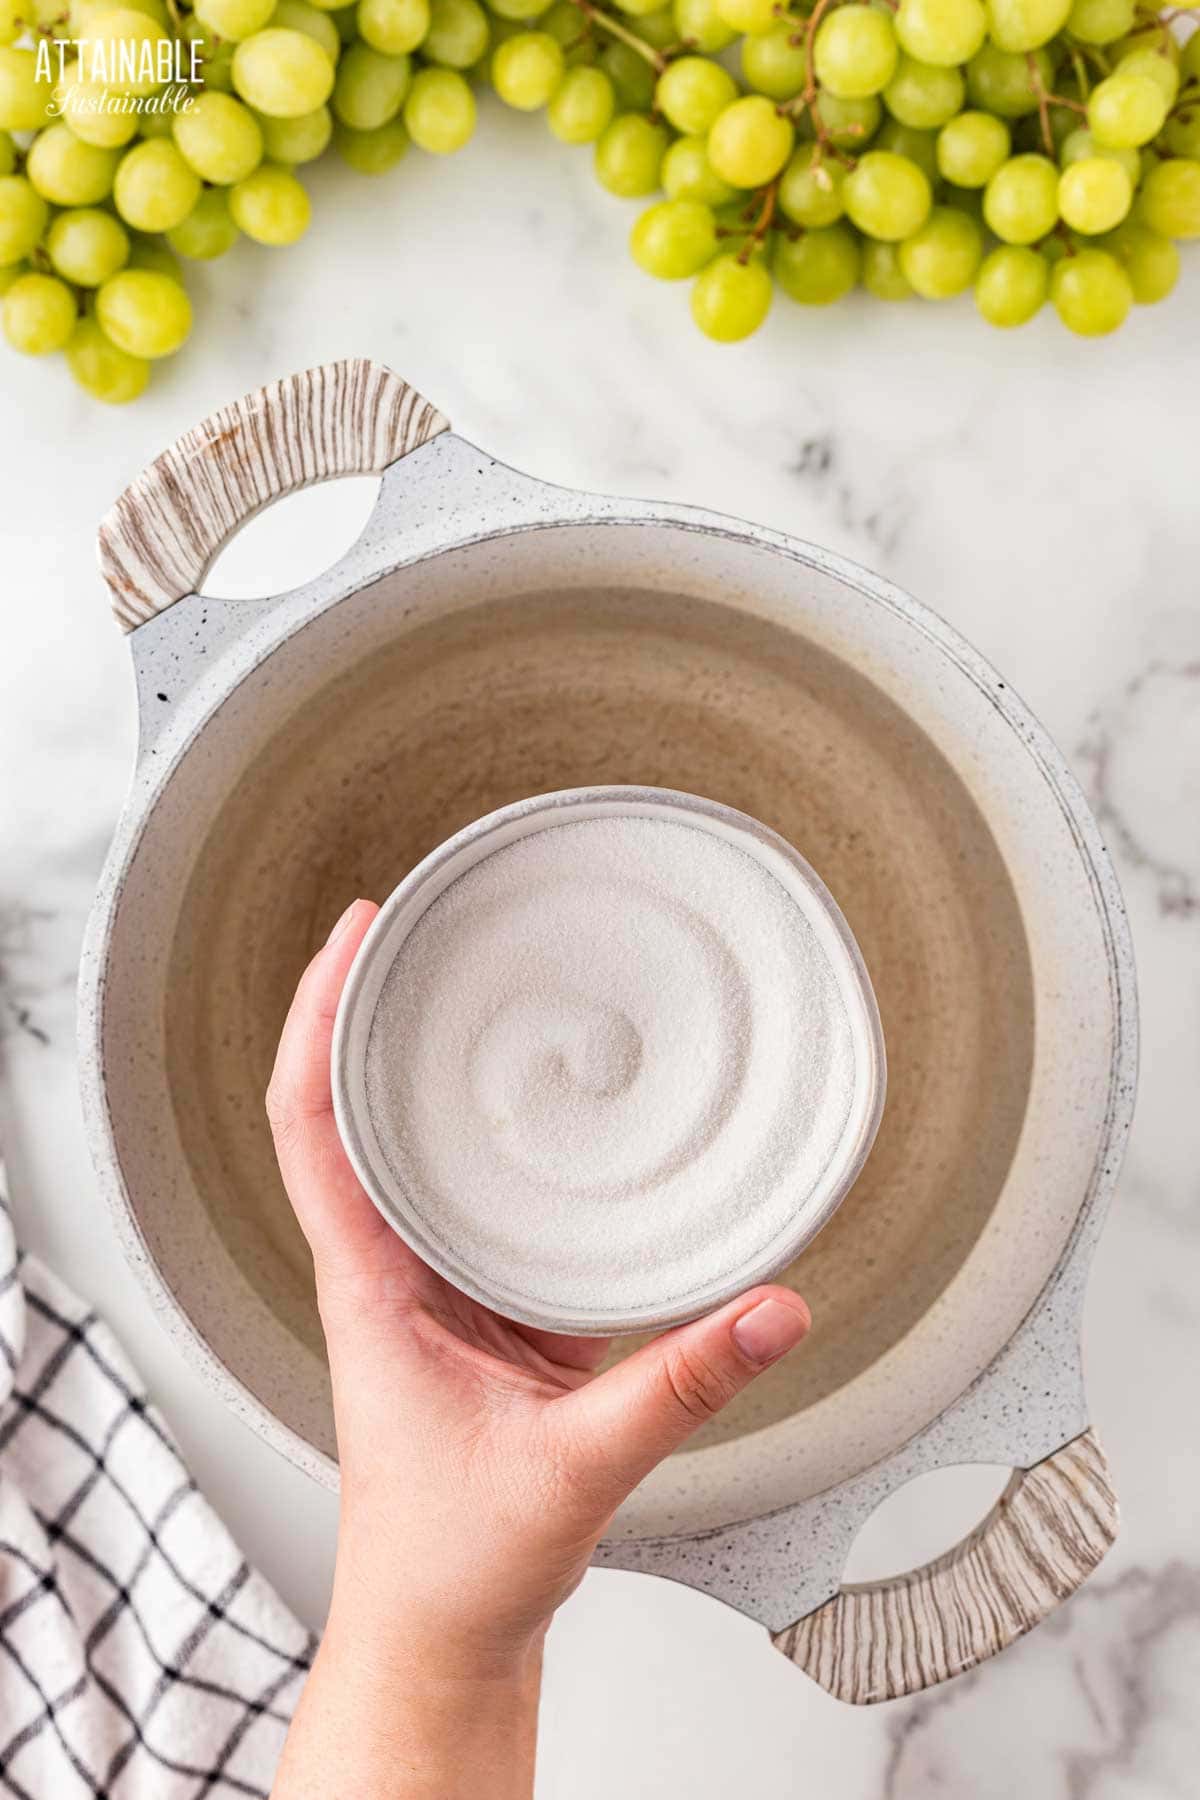
Sugar — Use your favorite brand of granulated cane sugar. I prefer organic. The amount of sugar you use can safely be varied. This recipe calls for a very light syrup, but if you prefer a sweeter syrup, you can certainly use a medium or heavy syrup. (Go here to grab a printable sugar syrup cheat sheet for canning fruits!)
Get a Quick Start Guide to Safe Canning!
Want to learn how to preserve the harvest? Dive in for a look at various canning techniques and methods! Grab my FREE 6-part guide to getting started.
🍅 Safety First!
Canning is an excellent way to preserve food for the pantry, but there are some important safety considerations to keep in mind. The recipes on this site have been made following safe canning procedures by a certified Master Food Preserver.
- Know the difference between water bath canning and pressure canning. Low acid items must be pressure canned for safety.
- Altering ingredients may change the recipe’s pH, posing a safety issue.
- Use the proper jars and lids. Never reuse lids, with the exception of the Tattler or Harvest Right hard plastic lids that are intended for such a purpose.
- For more on canning equipment, please go here.
- Want to learn more? The National Center for Home Food Preservation is the go-to resource for safe canning information.
Canning Grapes
Because they can be processed in a boiling water canner, preserving grapes for the pantry is a good recipe for those just starting with home food preservation. Grapes do not need to be processed in a pressure canner.
Prepare the Canning Pot
Fill a large canner with water. Just how much water to use depends on the size of jar you’ll be processing. You’ll want the water level to sit at least two inches above the full jars during processing.
Do this before you begin filling the jars with grapes, since it can take awhile for the water to boil. Turn the heat to high and set the lid on the pot; this helps heat the water faster.
Prepare the Jars
This recipe can be made using either pint or quart jar sizes. You must use specialized canning jars (aka mason jars), since you’ll be processing them in a hot water bath to create a shelf-stable product.
Wash the canning jars and check the rims for nicks that could interfere with sealing. Wide mouth jars are recommended here, simply because it’s easier to pack the grapes.
Place empty jars in the water bath while it heats. This warms the jars and helps to prevent thermal shock.
Make the Syrup
Using a sweetened syrup in canning can help the fruit retain its shape, color, and flavor, but if you’re really restricting sugar, canning grapes in water is perfectly safe. I like to use a very light syrup.
Combine the sugar and water in a saucepan and heat until the sugar is dissolved; stir occasionally. Keep the syrup hot until you’re ready to use it.
Prepare the Grapes
Grapes can be canned using either a hot pack or a raw pack method. Both are very easy. What’s the difference? Grapes packed into jars raw can have a tendency to float. By blanching them quickly in boiling water, you’ll prevent this by driving out some of the oxygen in the tissues of the fruit.
Wash and de-stem the grapes. There’s no need to remove the grape skins.
For hot packed grapes: Put a large stockpot of water on to boil. Once boiling, place grapes in the hot water for 30 seconds. Remove grapes with a slotted spoon directly into the prepared jars, packing as closely as you can without crushing the fruit.
For raw packed grapes: Place raw grapes into canning jars, packing as closely as you can without crushing the fruit.
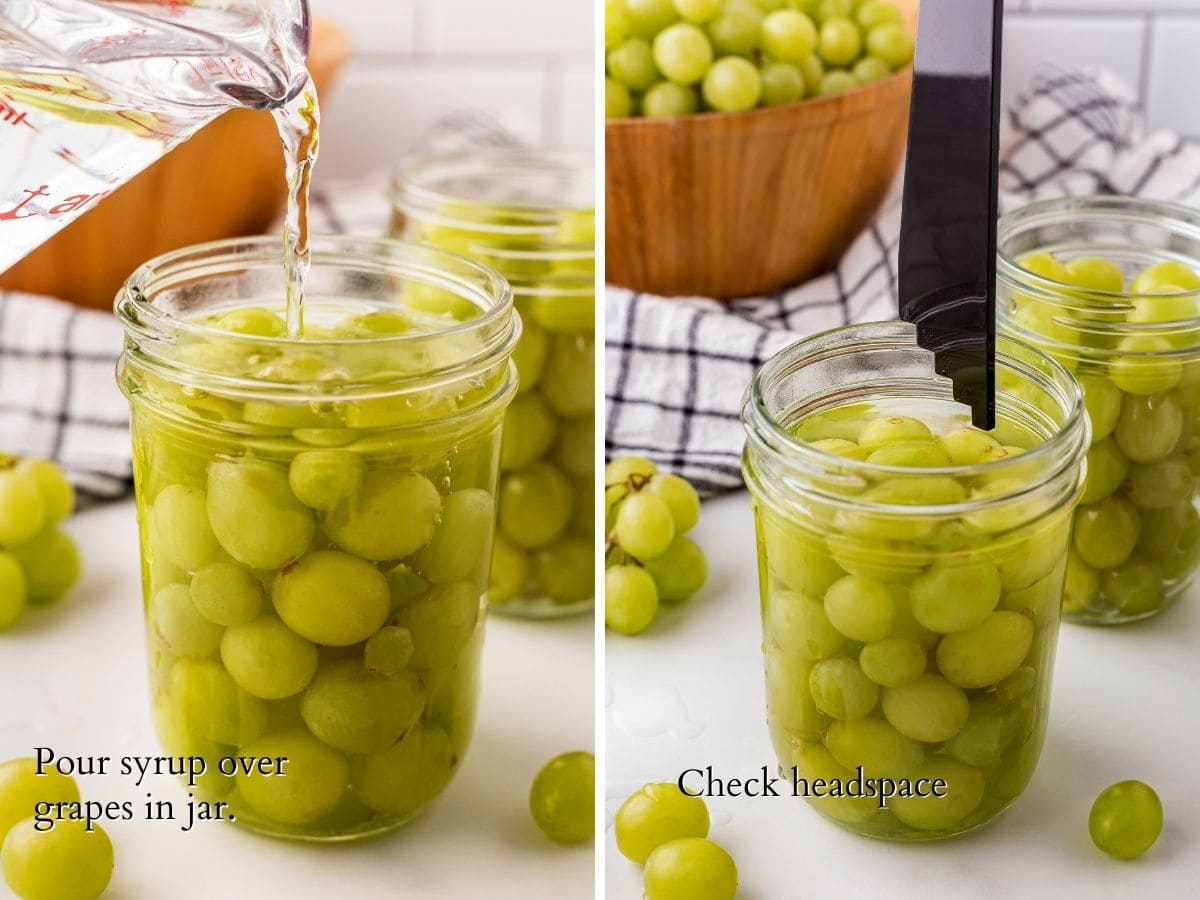
Once packed, pour the hot syrup over the fruit. Slide a non-metal tool (a wooden chopstick works well) down inside the jar edge to release any bubbles.
Double check the level of liquid and top each jar off, filling to a 1/2″ headspace.
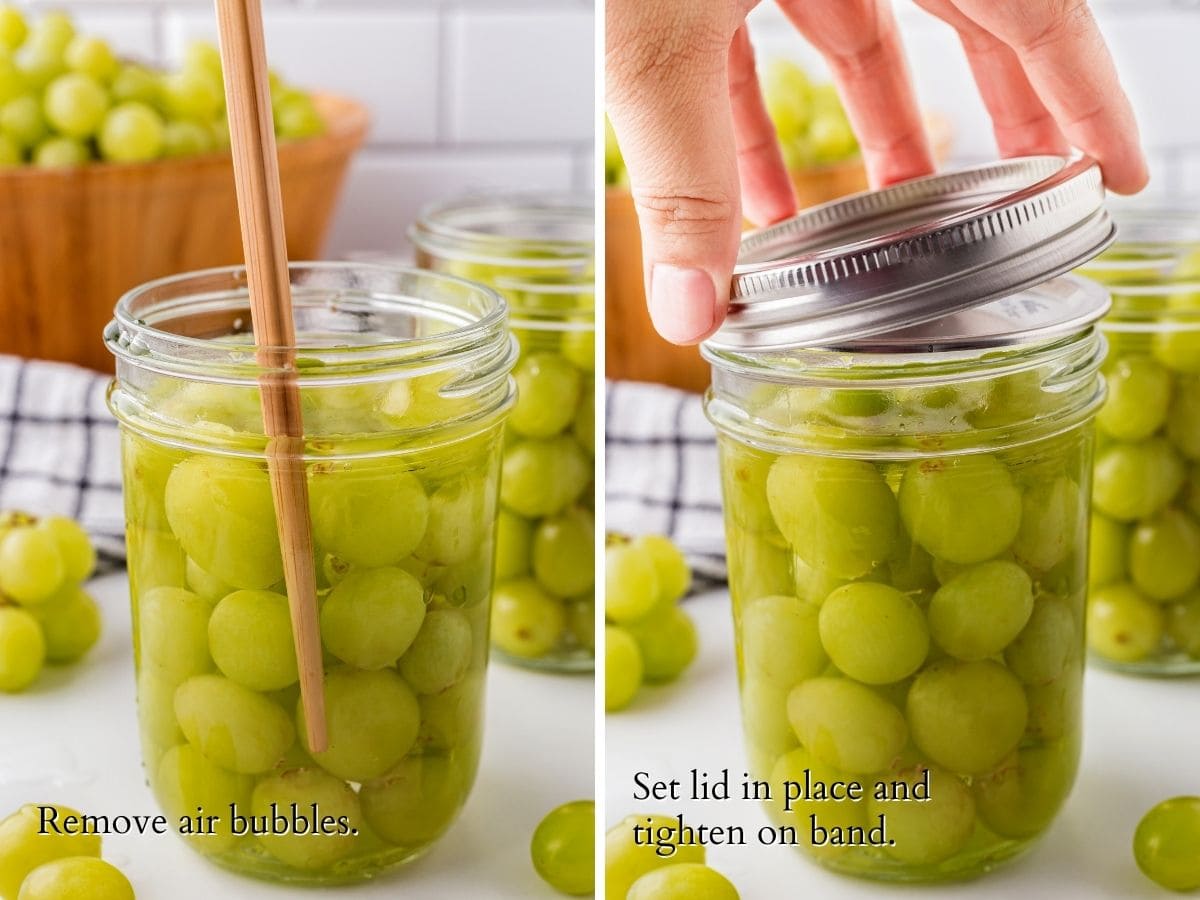
Use a damp cloth to wipe rim; a little bit of food on the jar rim can prevent the lids from sealing properly. Set the lids in place and screw the bands on firmly tight (but not too tight).
Use a jar lifter to transfer jars into the gently boiling water. As stated above, the water in the pot should cover the jars by at least an inch. If necessary add more water to the canner.
Canning Process
Place jars in water bath canner and process jars for the recommended time. (See recipe card below.) When time is up, use the jar lifter to transfer the hot jars to a flat surface that’s padded with a kitchen towel. Allow jars to cool completely. As they cool, you’ll begin to hear a canner’s favorite sound: That lovely little tink! that indicates a successful seal.
Once jars are thoroughly cooled, check the seal on all of the jars. The lid should be concave and feel solid. If it flexes at all, it’s not sealed. (Place any jars that didn’t seal in the refrigerator and use them first. They are not shelf stable.)
You might be able to use a large pot, rather than a special water bath canner.
Remove bands from cooled jars and rinse the jars. Store jars without the bands.

★ Did you love this recipe? Be sure to give it a star rating below! ★
How to Can Grapes
Equipment
- 9 pint jars adjust quantity for quart jars
- 9 canning lids and rings
- canning funnel
- water bath canner with lid or deep pot
- jar tongs
- canning bubble popper/measurer optional but handy
Ingredients
- 9 pounds seedless green grapes
- ¾ cup sugar
- 6 ½ cups water
Instructions
Recipe yields 9 pint jars.
PREPARE FOR CANNING
- Wash the jars you'll use, making sure each is clean and free of nicks in the rim, which could impede sealing.
- Wash the lids and rings in hot soapy water. (If you're using non-Ball brand lids, prepare as suggested by manufacturer.)
- Place empty jars in a canning pot or large stock pot with enough water to cover by an inch or two, cover pot, and set on high heat. It can take awhile for the water to heat, so get it started before you begin making the recipe.
PREPPING THE GRAPES
- Boil water and sugar together in a large saucepan to make a very light syrup, stirring occasionally until sugar dissolves. Keep the syrup hot until you’re ready to use it.3/4 cup sugar, 6 1/2 cups water
- Remove stems and wash grapes; drain. For raw pack method: Place washed grapes into prepared jars, packing as closely as you can without crushing the fruit. For hot pack method: Bring a stockpot full of water to a boil. Blanch grapes in boiling water for 30 seconds, then transfer directly to glass jars, packing snugly without smashing the fruit.9 pounds seedless green grapes
- Fill jars with whole grapes, leaving a 1/2” headspace.
- Cover the grapes with boiling syrup, maintaining the 1/2-inch headspace.
- Use a non-metallic tool around the inside of the jars to remove air bubbles. Add more syrup if necessary to maintain the headspace.
- Wipe jar rims to remove any residue that may have spilled. A clean rim is essential to a good seal.
- Set jar lids in place. Screw bands on finger tight.
CANNING
- Use a jar lifter to gently submerge jars into hot water in the canning pot. Water should cover the top of the jars by an inch. The water will cool somewhat in reaction to the addition of the jars. Return the water to a simmer and then set the timer.
- Process pints or quarts for 10 minutes at 0-1,000' feet altitude; 15 minutes for elevations between 1,001-6,000'; 20 minutes over 6,000'.
- Remove jars from water using the jar lifter and transfer to a solid, towel-covered surface. Allow to cool for 24 hours.
- Check seals. Lids should be solid and pulled down tight. (if they flex and pop, the jar didn’t seal; put unsealed jars in the refrigerator and use those first).
- Remove rings and wash outsides of jars. Store in a cool, dry place.
Notes
- Recipe yields 9 pint jars.
- Seedless green grapes are recommended, but you can safely can red or purple grapes, too. Seedless grapes are easier, but if you have lots of grapes with seeds, those can be canned. You'll need to cut the grapes in half and remove the seeds before canning.
- Using a sweetened syrup in canning, as indicated in this recipe, can help the fruit retain its shape, color, and flavor, but if you’re really restricting sugar, canning grapes in plain water is perfectly safe. You can also use 100% apple juice or white grape juice to replace the light syrup called for in this recipe. (Be sure to heat the liquid, regardless of what you use.)
- You'll need about 9 pounds of grapes to fill 9 pint jars. If you wish to use quart jars, you'll need about 15 pounds of grapes to fill 7 jars, which is a full canner load.
- Boiling lids or heating above 180°F as once recommended can damage the sealing compound. Follow manufacturer's guidelines.


an u use sugar substitute
No.
I was on Vancouver Island recently and visited a winery that sold jars of preserved grapes to serve with a charcuterie board. Fabulous! I went looking for a recipe and found your’s. Thank you. I will make it when grapes are ripe here in the Okanagan.
Very easy instructions and much faster than I had anticipated!
Thank you for this! How is the texture of canned grapes? Does it make a difference of syrup vs water on texture?
Very similar to the grapes in store bought fruit cocktail.
9 pounds equal approximately how many cups?
It’s about 9 pint jars, so around 18 cups.
I was going to try canning grapes. I have a lot of grapes on my grape Vines and I don’t want to make any more grape jam. I wasn’t very happy with it either too, overly sweet with the sugar. Or then if I reduce the sugar maybe it wasn’t as thick as I’d like. I did different combinations with blackberries or blueberries and it was fun last year and the year before but I think I’m just going to can them whole like this! I was curious. I was going to heat up the grape juice I wanted to can them without added sugar just using the fruit juice and I was thinking about dipping the grapes in the hot grape juice for about 30 seconds like you recommended, But does doing this make the grapes mushy? I was curious about that or just canning them the heat of the water bath. Does it make the grape mushy at all or are they still firm? Thanks for any info! I have a lot of seedless grapes. I don’t have wide mouth jars, I have a couple I think but I’m going to have to use regular ones. I wanted to buy some wide mouth ones. The store that I got them had a great sale but they didn’t have any wide mouth ones… Ty
I haven’t found the grapes to be mushy, even after following the proper canning instructions.
Thank you for sharing the recipe. I usually eat grape seeds. Is it really necessary to remove the seeds from the grapes before canning them?
They can get bitter; removing them is for quality. It wouldn’t hurt for you to leave them in if you don’t mind that.
THIS IS AWESOME!! THANK YOU FOR THE ADD.
I HAD CANNED SOME GRAPES A FEW YEARS BACK, THEY WERE DELICIOUS 6 MONTHS LATER. I HAD TO GET THE RECIPE AGAIN. I GUESS I HAD LOST THE OTHER ONE. THESE TURNED OUT AMAZING!!
I have never canned grapes. Just curious if they get mushy after canning them?
They aren’t fall-apart-mushy but they are softer due to the canning process.
Why a “Non-Metal” tool to get the bubbles out? Does metal cause a problem with the fruit? I’m curious 🙂 Thank you!
Metal against the glass jars can compromise the jar’s integrity over time.
Van you use apple juice instead of syrup?
Yes, that is safe!
I’ve canned grapes before using this method. They were very good. I had them in the fridge before I canned them so I put them into the syrup for just a minute to warm them up a bit before putting them in the jars. If I had picked them fresh, or had them at room temperature I would have skipped that step
How long are they shelf stable.
It’s recommended that they’re used within 12-18 months for best quality, however as long as they remain sealed (and were processed properly) the contents are safe.
Thank you Very Much for taking such time and care to post such valuable information. I am very new to canning, a group of friends and I are all starting out in a few weeks and I’m very happy to have found you.
All the best to you,
Lisa Marie
How FUN to have a group to learn with!