Homemade stock is a pantry staple that you can make right at home. Canning broth requires a pressure canner, but you’ll love having shelf-stable stock at the ready for cooking.
Originally published November 2017; this post has been completely edited and updated.
Making broth is like creating free food. Leftover bones from roasting a chicken, turkey, duck, or beef roast can be transformed into a rich broth to use in making soups, stews, and other recipes. Those boxes of ready-made broth are expensive; making your own is incredibly budget friendly.
Even if you opt to buy beef bones from the butcher, homemade broth will save you cash at the checkout.
Ingredients
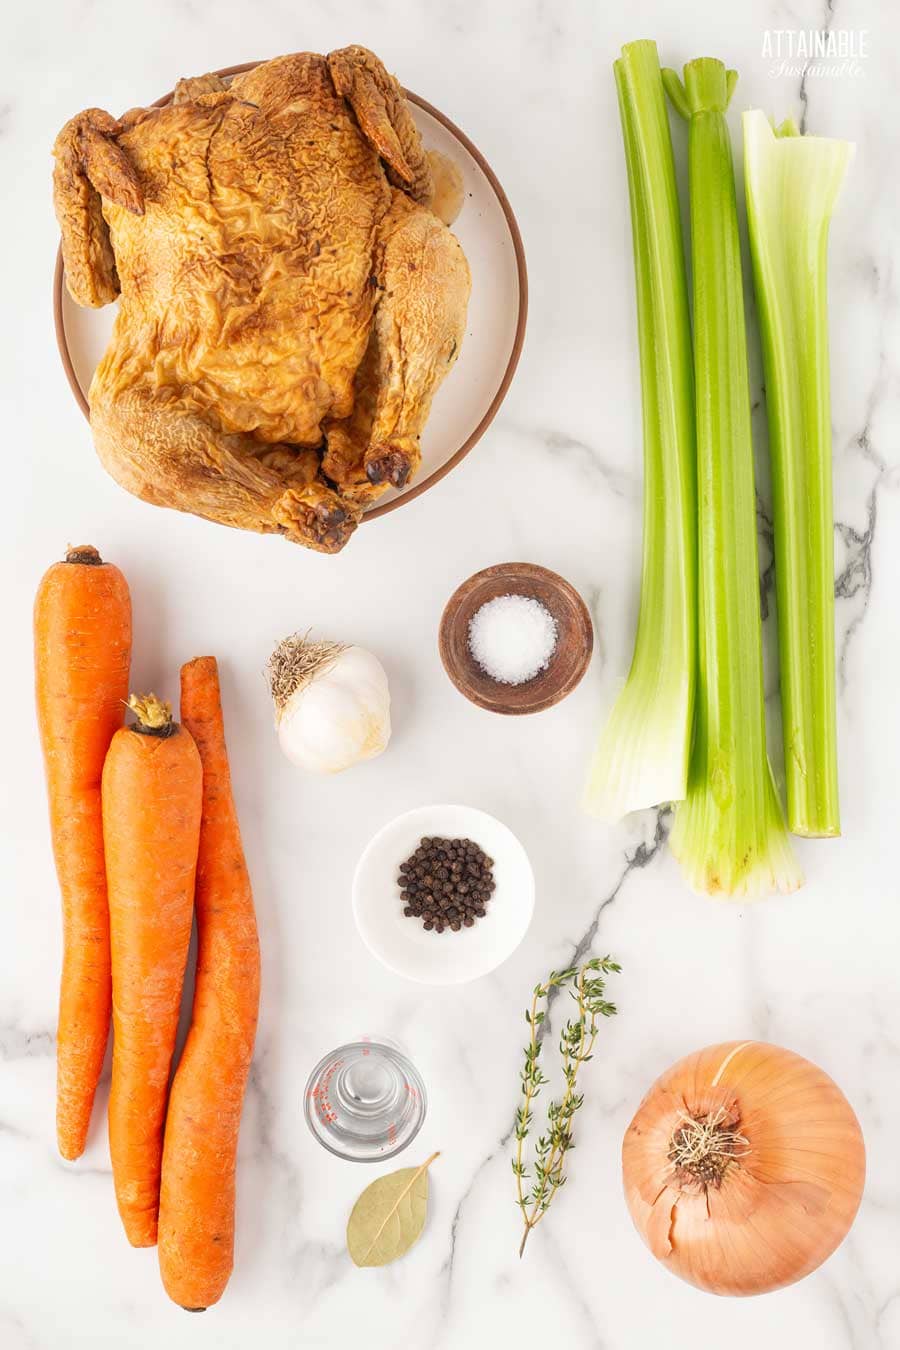
Bones — As this is a meat-based stock, you’ll be using bones. Use the carcass from a roasted chicken, turkey, or even duck. For beef or pork broth, you can use bones from a roast or purchase bones from the butcher. Be sure to roast any raw bones before making the broth for the richest flavor. (I’ve made broth from raw beef bones…once. I’ll never do that again.) One turkey carcass is enough to make a stockpot full of broth; use 2-3 chicken carcasses. If you prefer, you can use a whole roasted bird.
Get a Quick Start Guide to Safe Canning!
Want to learn how to preserve the harvest? Dive in for a look at various canning techniques and methods! Grab my FREE 6-part guide to getting started.
Vegetables — This is an optional ingredient, but adding a couple of handfuls of veggies to the broth adds a bit more flavor. It’s also a chance to use that wilted celery in the crisper drawer. It’s perfectly okay to use veggie scraps, too. Avoid using vegetables in the brassica family (broccoli, cauliflower, cabbage etc) as they can make your stock taste bitter; potatoes can make it cloudy.
Making the Stock or Broth
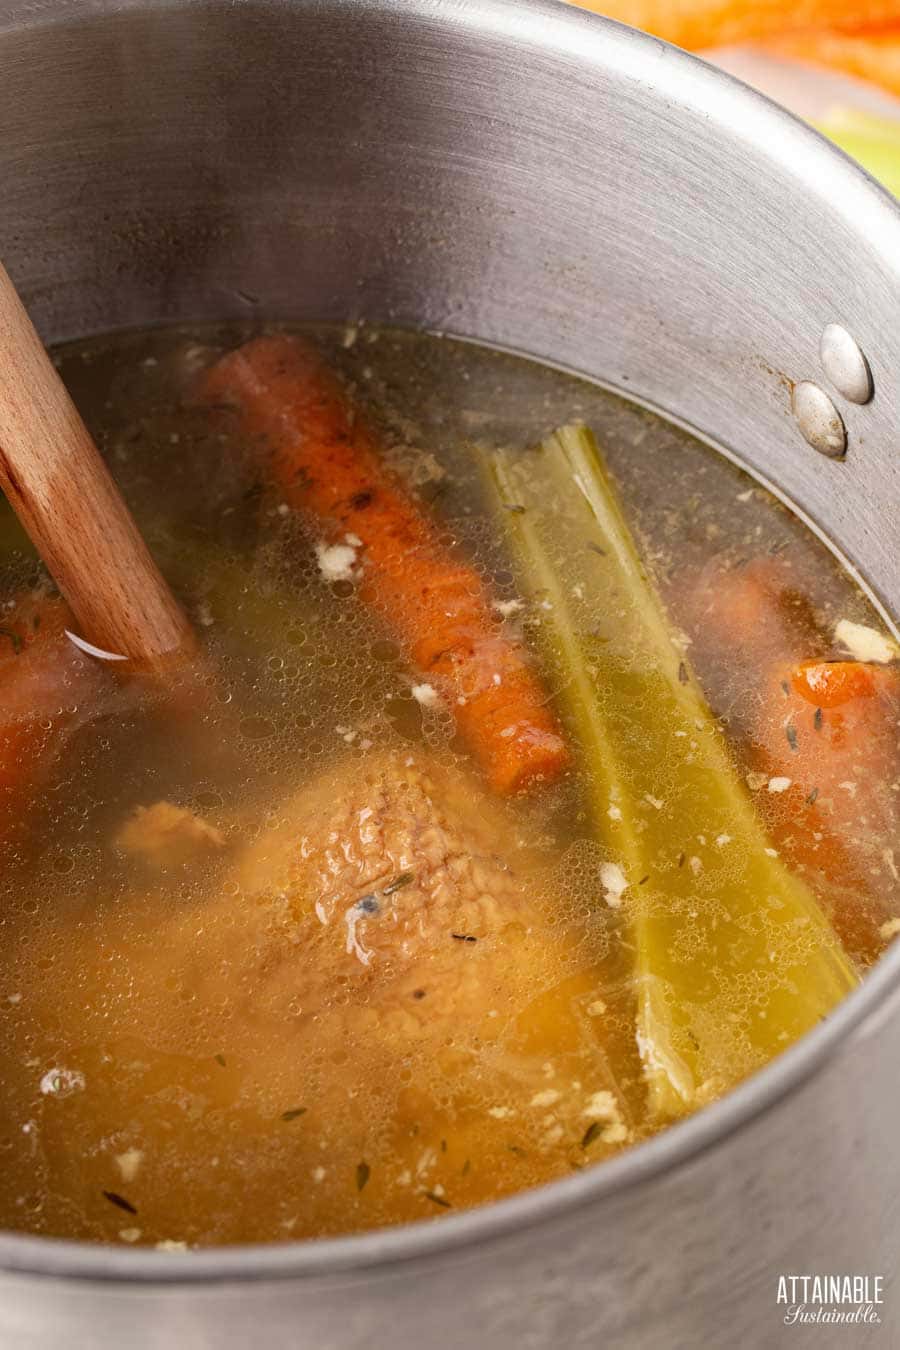
The making of the stock is easy. Place the roasted bones (or whole roasted bird) and optional vegetables in a large pot or slow cooker and cover with water. Cook over low heat for 12-48 hours. A long, slow cooking time draws out all of the flavor from those roasted bones.
Can you use a pressure cooker like an Instant Pot to make broth? Absolutely. Some people love to do it this way for the speed factor. Follow your favorite recipe to make stock this way, then proceed with the canning process.
Remove the solids from the liquid and strain the broth. You can strain the broth before proceeding with canning or ladle the broth into jars through a strainer.
For a more in-depth look at making stock using one of three different methods, go here.

Canning Stock with a Pressure Canner
Jar sizes:
- Quart jar
- Pint jar
Place a wire or metal canning rack in the bottom of the canner to prevent the jars from sitting directly on the bottom. Add water, and go ahead and put the empty canning jars in the canner. You’ll need to let some of the water into the jars so they don’t float.
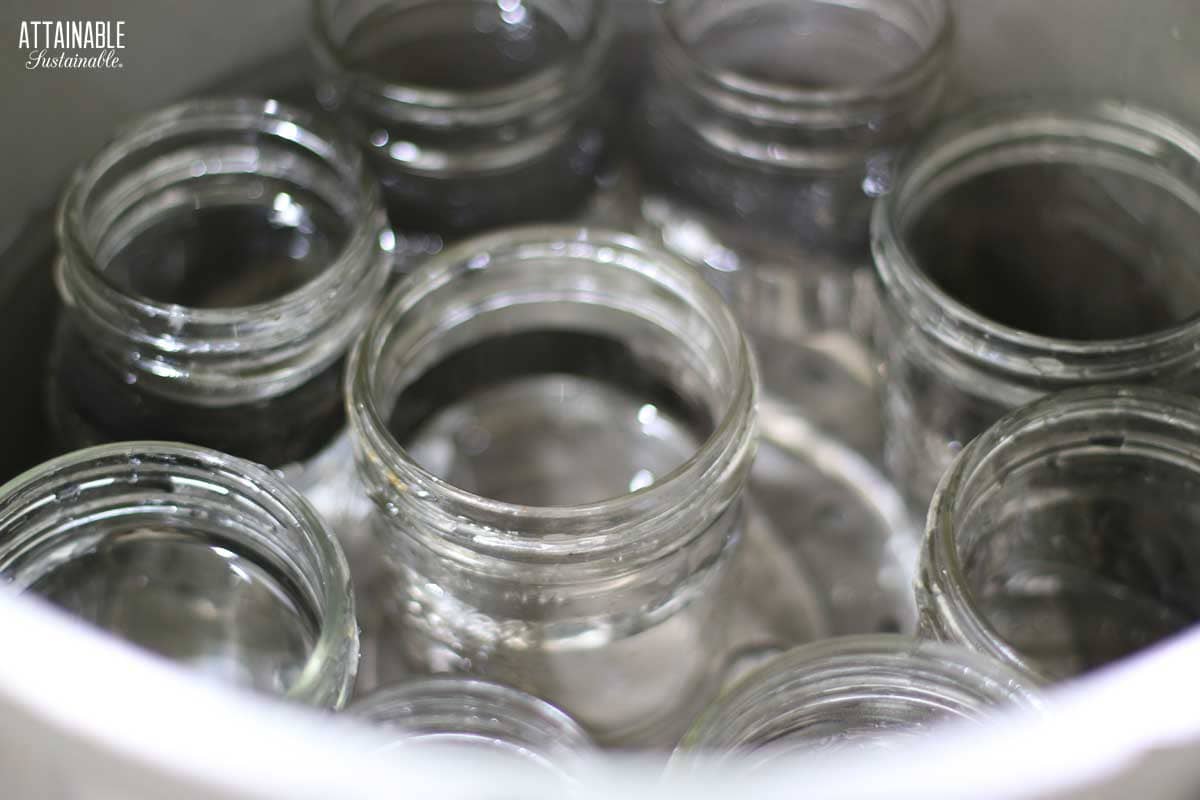
Unlike water bath canning, with pressure canning you’ll only put 2” to 3” of water in the bottom of the canner. (Follow manufacturer’s instructions on this; it varies by model.) The jars do not need to be submerged.
Bring the water in the pot to a low simmer. This prepares the canner, but also warms the jars up, which helps prevent breakage from temperature shock.
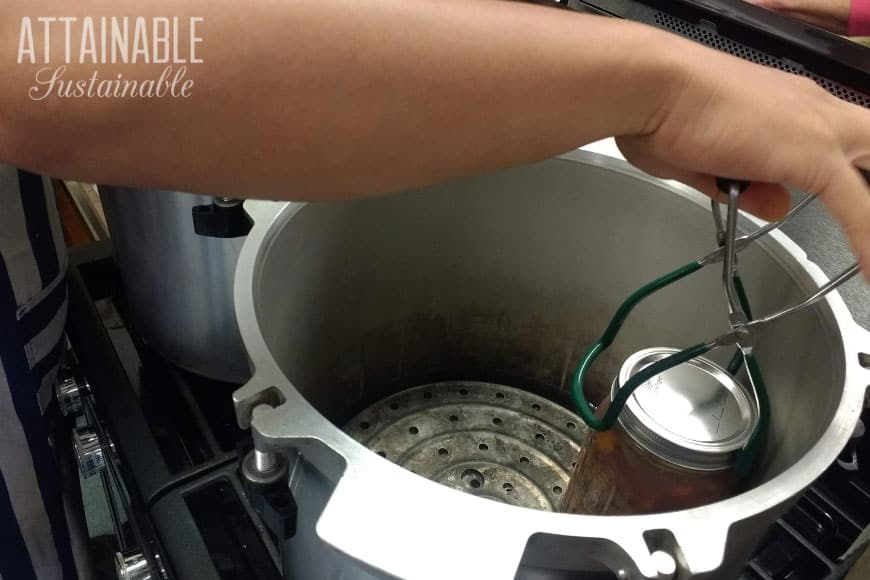
When the broth is ready for canning, use a jar lifter to drain the empty jars and transfer them to a towel-covered countertop.
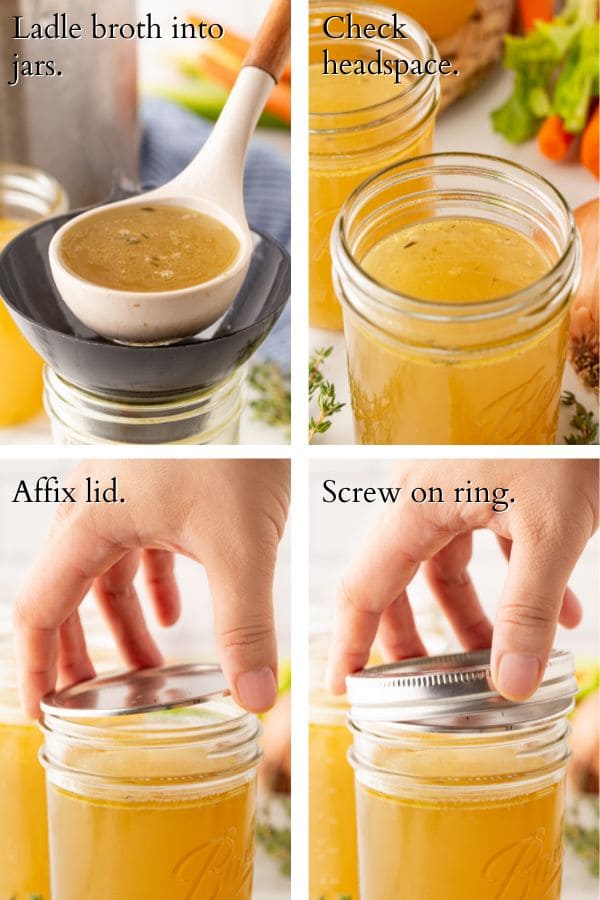
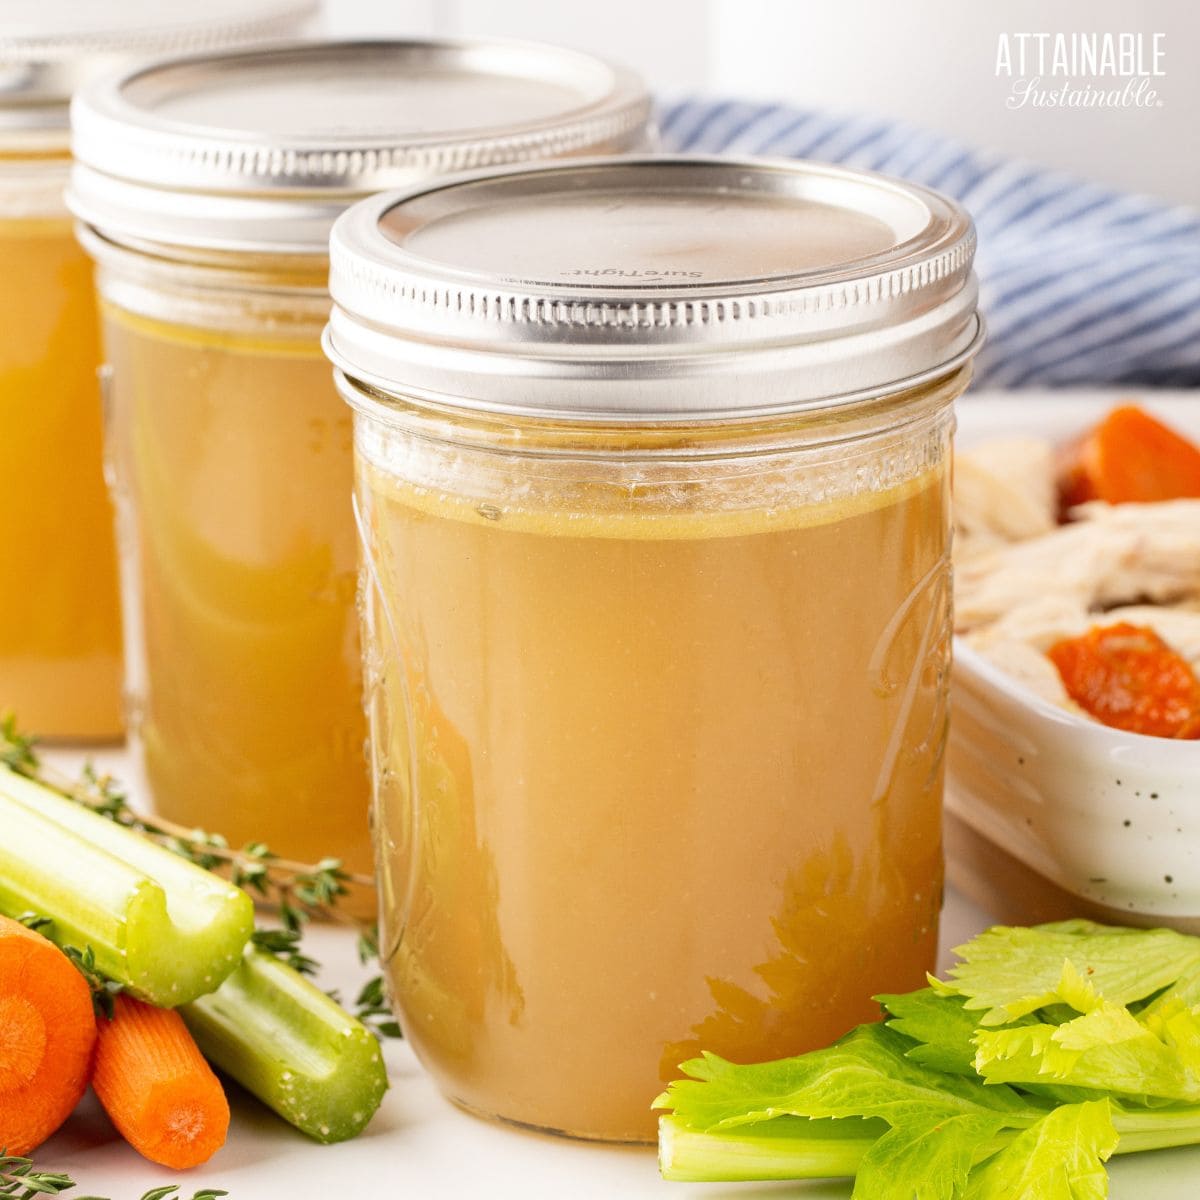
Ladle hot broth into jars, leaving a 1″ headspace. (Headspace is the distance between the top of the food and the rim of the jar.)
Wipe the rims of filled jars to remove any residue. Tighten on the canning lids and rings and transfer the jars to the canner. Be sure to maintain the minimum canner load of two quart jars or four pint jars.
Secure the pressure canner lid in place and turn up the heat. Watch for the steam escaping the vent. When it begins to flow in a steady stream, place the weighted gauge on it to stop the flow of steam, or close the petcock.
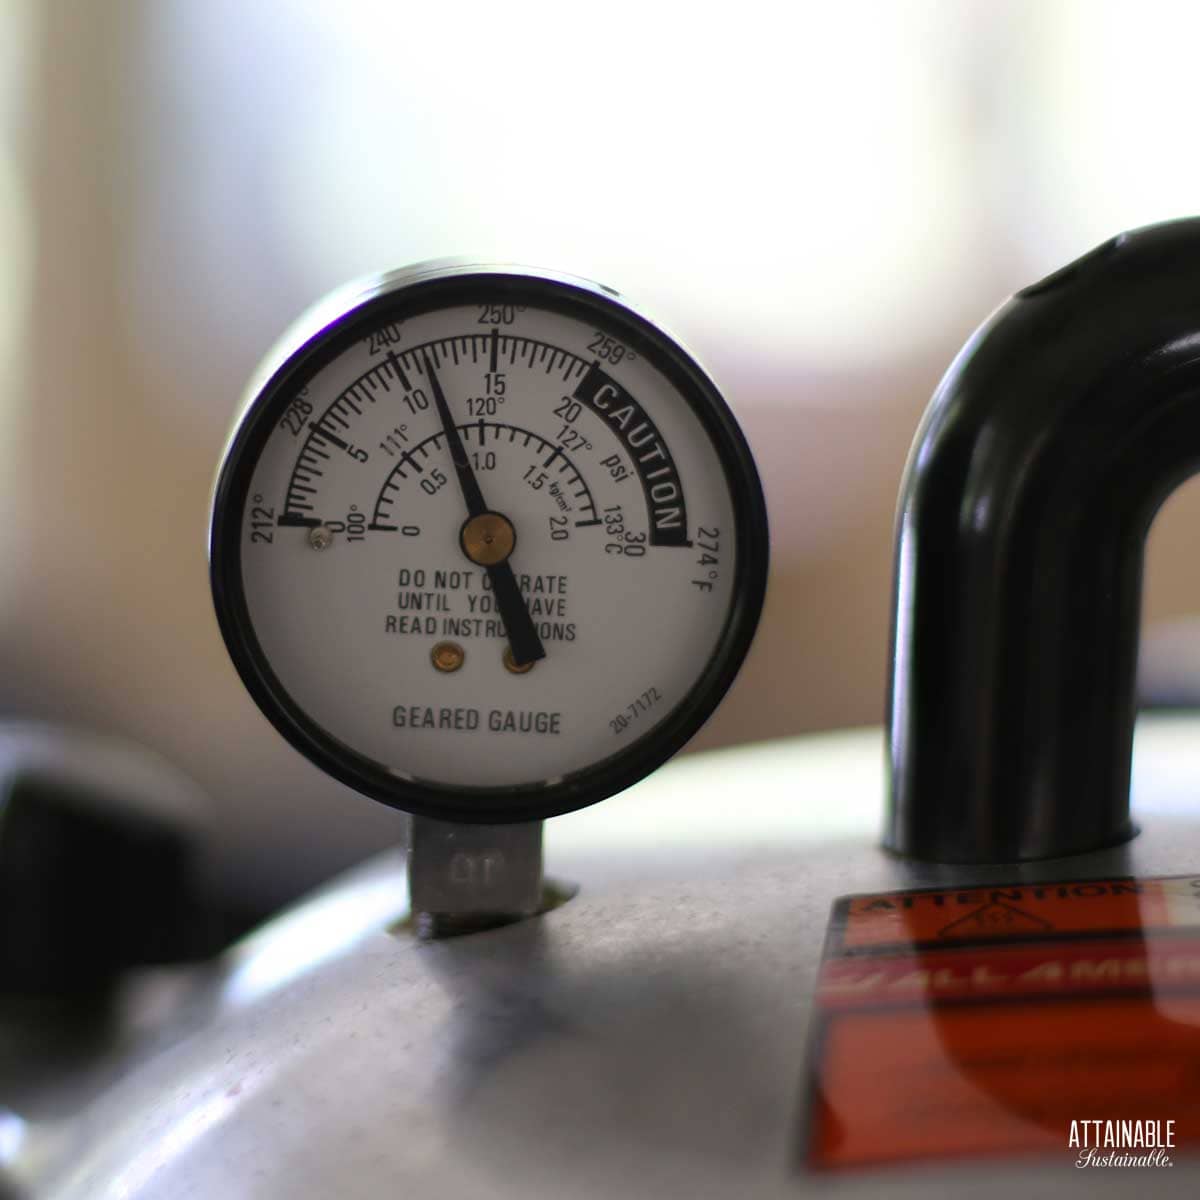
Bring canner up to pressure and diligently watch to keep it close to the required pressure. You will need to adjust the heat under the canner to get it just right. Start timing when the canner reaches the proper pressure.
Do not let the pressure drop below the recommended number or you’ll need to return the canner to the correct pressure and start timing all over again. (It’s okay if the pressure is slightly higher than called for.)
When process time is up, turn off the heat and let the canner cool down naturally. The dial gauge (if you have one) should read zero, otherwise allow the canner to cool for an hour or so or until it reaches room temperature.
Remove the lid from the canner, lift the jars onto a towel covered surface, and allow them to cool undisturbed for 12-24 hours.
Check for a proper seal. The lids should be solid and pulled down tight. (If they flex and pop, the jar didn’t seal; put unsealed jars in the refrigerator and use those first).
Remove rings and wash the outsides of jars. Label and store in a cool place. (Store jars without the rings.)
A Quick Look at Pressure Canning
Like all low acid foods, broth must be pressure canned. This is non-negotiable. Because meat, and the resulting stock, is a low-acid food, the only safe way to can it is in a pressure canner.
A pressure canner allows the inside of the food to reach a sufficient level of heat in order to kill any potential botulism spores (240°F). A water bath canner simply cannot achieve that heat — boiling water tops out at 212°F, which will not kill botulism spores.
If you’ve never pressure canned before and you’re a little hesitant, I hear you. It took me years of home canning before I decided it was a skill I really needed. (The thing that did it for me? Being able to make and can my this broth for the pantry.)
Modern day pressure canners are perfectly safe if used according to manufacturer’s directions. You should always follow the manufacturer’s instructions for your particular unit, because there are some variables between brands. (I use an All-American Pressure Canner and I love it.)
Note that a pressure canner is not the same thing as a pressure cooker. Read here to find out why canning in an Instant Pot isn’t safe.
Canning dry beans is another great way to fill your pantry with budget-friendly ingredients.
 Ready to DIY your pantry with more wholesome ingredients? Check out my new book from National Geographic! Attainable Sustainable Pantry is filled with delicious recipes for some of your favorite condiments, snacks, and toppings, along with an entire section on safe home food preservation. It’s the guide you need to start skipping packaged products and embrace homemade.
Related: Easy Canning Recipes for the Novice Home Canner

Timing
The processing time will depend on the size of your jars. This broth can be made in either pint or quart-sized jars.
For a dial gauge canner:
Process time 0-2000 2,001-4000 4,001-6,000 6,001-8000
Pints 20 minutes 11 lbs 12 lbs 13 lbs 14 lbs
Quarts 25 minutes 11 lbs 12 lbs 13 lbs 14 lbs
For a weighted gauge canner:
Process time 0-1000 ft above 1000 ft
Pints 20 minutes 10 lbs 15 lbs
Quarts 25 minutes 10 lbs 15 lbs
Use your homemade stock in recipes like this DIY Cream of Mushroom Soup, or Easy Lentil Soup. Canning stock for your pantry is a great convenience!

Pressure Canning Broth
Equipment
- 7 quart jars
- 7 canning lids and rings
- canning funnel
- Pressure canner
- jar tongs
- canning bubble popper/measurer optional but handy
Ingredients
- Roasted bones to fill an 8-quart stockpot see notes
- 1 - 2 cups raw vegetables optional
Instructions
Recipe yields 7 quarts.
Make the Broth
- Use roasted bones leftover from cooking a whole chicken, duck, or cut of beef. (You may wish to freeze bones until you have enough to fill a large stockpot.)
- Alternatively, place raw bones on a baking sheet, drizzle with oil, and sprinkle on salt and pepper. Roast in a 425°F oven for 30 minutes or until the bones are well-browned. Discard fat and use bones to make broth as instructed below.
The stovetop version:
- Place the roasted bones in a stock pot along with the vegetables. Fill the pot with water to within 3" of the top.Roasted bones to fill an 8-quart stockpot, 1 - 2 cups raw vegetables
- Bring to a low boil, then simmer (with the lid on) for 12-48 hours.
The slow cooker version:
- If you have a slow cooker or Instant Pot, you have the freedom to let your stock cook for a day or two without having to worry about leaving a burner on for a lengthy time. Cooking for this long draws out all the goodness of those bones and makes a nice, gelatinous broth.
- Place roasted bones in the pot, cover with water, and cook on low heat for 24 to 48 hours to create a rich bone broth.
- Use tongs or a slotted spoon to remove the bones and vegetables.
Prepare for Canning
- Wash the jars you'll use in hot soapy water, making sure each is clean and free of nicks in the rim, which could impede sealing.
- Fill the pressure canner according to manufacturer’s directions. Place jars in canner, filling with enough water to prevent floating. Begin heating canner when the broth is near ready.
- Wash the lids and rings in hot soapy water. (If you're using non-Ball brand lids, prepare as suggested by manufacturer.)
Process the Jars
- Lift empty hot jars from the canner, drain, and set on a towel covered surface. Double check the water level in the canner to make sure it’s where it should be.
- Ladle broth through a strainer into the jars, leaving a 1" headspace.
- Wipe jar rims to remove any residue that may have spilled. A clean rim is essential to a good seal.
- Set jar lids in place. Screw bands on finger tight.
- Use a jar lifter to gently transfer the jars to the pressure canner.
- Lock pressure canner lid in place and turn the heat up to high.
- Watch for steam escaping from the vent pipe. When it begins to come out in a steady stream, set the timer for 10 minutes. Once vented, place the weight on the vent (15 pounds) or shut the petcock.
- For a dial-gauge pressure canner, bring it to 11 pounds of pressure, then adjust heat to maintain that pressure. For weighted gauge canners, heat until the weight begins to jiggle or rock; this indicates that the canner has reached 10 pounds of pressure inside. Adjust the heat so that it rocks steadily. Do not leave the pressure canner unattended.
- When canner reaches necessary pressure, begin timing. Check pressure frequently to maintain required pressure. If pressure drops below what is recommended in the recipe, return to pressure and start timing all over again.
- Process pint jars for 20 minutes; quart jars for 25 minutes at elevations below 1,000'. See notes for altitude adjustments.
- When processing time is complete, turn off heat and allow canner to cool completely. Dial gauge canners should register zero pressure; weighted gauge canners should be allowed to reach room temperature.
- Remove the weight (it will be hot!) or open the petcock; open lid.
- Use a jar lifter to remove the jars from the canner, placing them on a towel-covered surface. Allow to cool undisturbed for 12-24 hours.
- Check seals. Lids should be solid and pulled down tight. (If they flex and pop, the jar didn’t seal; put unsealed jars in the refrigerator and use those first).
- Remove rings and wash outsides of jars. Label and store in a cool, dry place for up to a year.
Notes
- Recipe yields 7 quarts.
- Boiling lids or heating above 180°F as once recommended can damage the sealing compound.
- Use the carcass from a roasted chicken, turkey, or even duck. For beef or pork broth, you can use bones from a roast or purchase bones from the butcher. Be sure to roast any raw bones before making the broth for the richest flavor. (I've made broth from raw beef bones...once. I'll never do that again.) One turkey carcass is enough to make a stockpot full of broth; use 2-3 chicken carcasses, or for pork and beef, use enough bones to fill the pot halfway.
- The making of the stock is easy. Place the roasted bones and optional vegetables in a large pot, slow cooker, or electric pressure cooker and cover with water. Cook over low heat for 12-48 hours. A long, slow cooking time draws out all of the flavor from those roasted bones.
Altitude adjustments for both pint and quart jars
- 0-2,000' - 11 pounds pressure
- 2,001-4,000' - 12 pounds pressure
- 4,001-6,000' - 13 pounds pressure
- 6,001-8,000' - 14 pounds pressure
- 0-1,000' - 10 pounds pressure
- 1,000' and up - 15 pounds pressure
Nutrition


I made turkey stock but I didn’t strain it so may a tiny icees of meat is that a problem I pressure cooked 15 pd for 40 minutes.
Small pieces of meat are fine.
Can’t you just water bath the cooked broth?
Like all low-acid foods, broth must be pressure canned. Meat and the resulting stock is a low-acid food, the only safe way to can it is in a pressure canner. A water bath canner simply cannot achieve that heat, and will not kill botulism spores.
I made a second batch of turkey broth and this time I added turmeric to my broth.. After canning this batch it’s been a week and tonight I decided to try it.. The smell and tasty was beyond gross.. Not sure what I did wrong.. My first batch I made at thanksgiving is still amazing I use every other week..
Do you think it was the turmeric? The broth should taste the same once it’s opened as it did going in.
I recall reading somewhere that “stalk” refers to the whole bunch of celery, and “rib” is that single piece that most of us think of as s stalk. Weird, huh?
I’ve never heard that, but what most people call a “bunch” of bananas, we call a “hand.” A bunch is the entire stalk.
I made chicken stock for the first time and it was super easy and tasty. I probably didn’t start out with enough water and when I refrigerated it, it became thick gelatin. I need to add water (obviously) before canning, but how much. The commercial stock is very thin IMHO and I question canning such a thick substance. How do you determine the liquidity level?
Also, it is okay to mix chicken stock with turkey stock and pc them together? Many thanks!
You don’t need to add water; just reheat it and then pour into jars. And absolutely you can combine turkey and chicken stock!
Thank for the information. Very informative.
when canning stocks how long is the shelf life and whats the best to store it
Yum! I always make stock 🙂