These reusable snack bags are perfect for packing dry snacks for lunch or traveling. If you’re looking for a more eco-friendly food wrap, these might fit the bill.
Need a way to cover bulky bowls? Try these eco-friendly beeswax wraps!
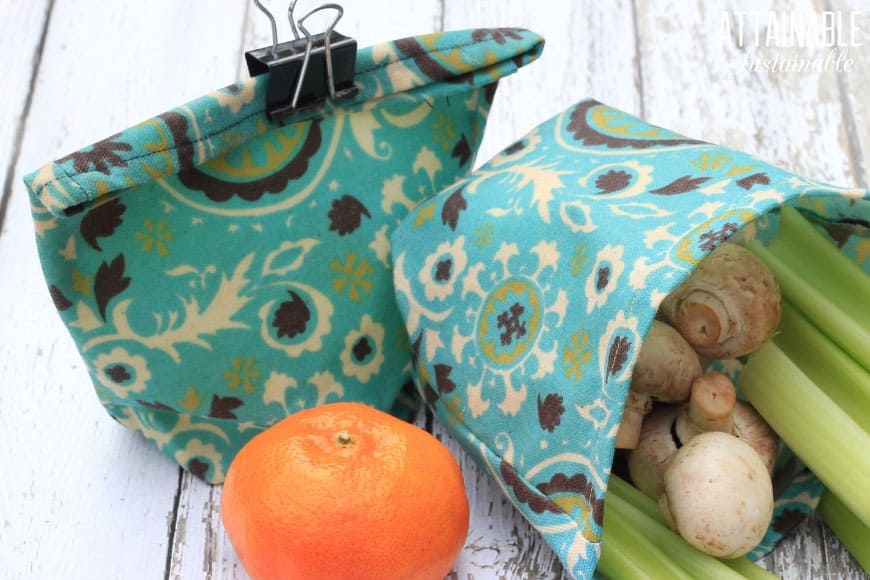
My husband is a hard-sell when it comes to some of my efforts to go green.
When I tried to convince him to switch to reusable snack bags for his lunch, he complained that they were too floppy. He needed something that would stand upright so he could access his snacks easily while he works. Ask and you shall receive, as they say.
Making reusable snack bags
I figured out a way to make reusable snack bags with a bottom. So they’ll stand upright. And then I coated them according to a recipe I found in The Beeswax Workshop by Chris Dalziel. She includes an eco wrap for sandwiches in the book. It’s similar to the beeswax wraps that are so popular on this site, but omits the pine resin (which is used for adding “clinginess.”)
I didn’t need these reusable snack bags to cling, so this recipe was perfect for my needs. I’ve included Chris’s instructions for making sandwich wraps below the instructions for making reusable snack bags. Use whichever method works best for your lunch crew.
Take a Peek Inside My Book!
Get a free excerpt from my book, Attainable Sustainable: The Lost Art of Self-Reliant Living! You’ll also get my free weekly newsletter, complete with recipes, gardening tips, and a little peek at what’s going on around here — both the zany and the mundane.
DIY reusable snack bags
This project requires a sewing machine. The eco wraps for sandwiches (below) does not.
You’ll need:
- Pattern (print it out here)
- 11″ x 17″ piece of cotton fabric for each bag
- Matching thread
- Iron
- 3 tablespoons pelleted beeswax (like this)
- 1 tablespoon jojoba oil (grapeseed oil works, too)
- 2″ wide (or so) paintbrush
Sew the reusable snack bag:
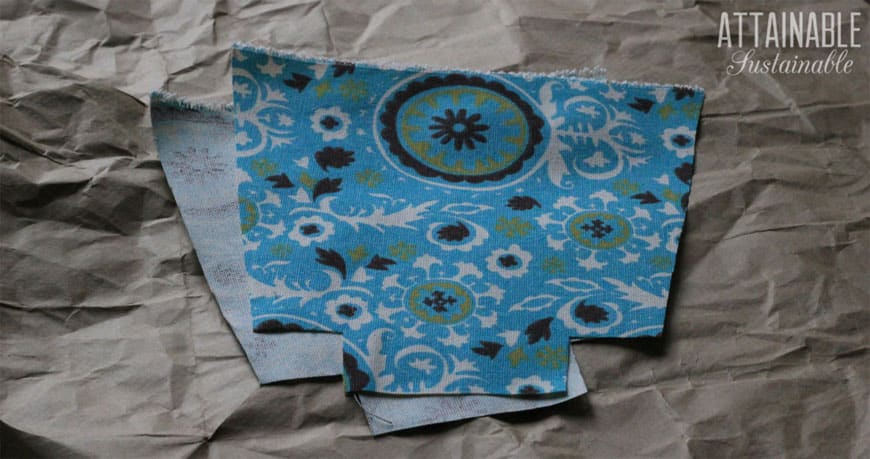
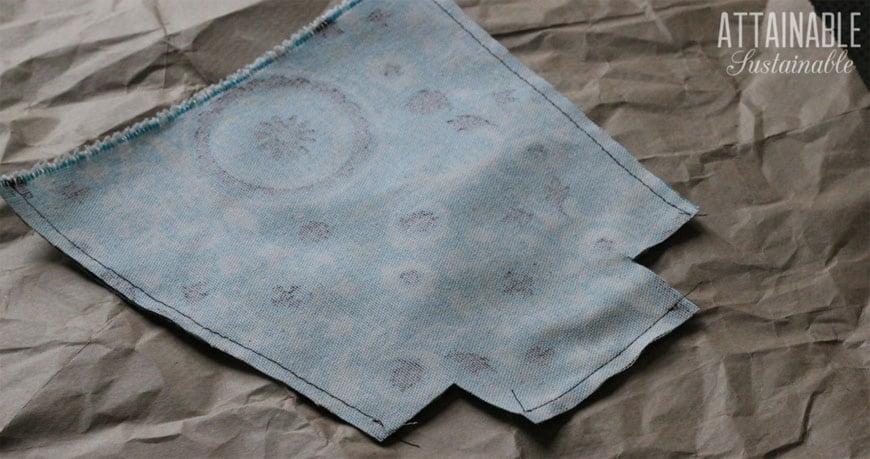
Using the printed pattern as a guideline, cut two fabric pieces to make a front and a back. Shortcut: You can fold the 11″ x 17″ piece of fabric in half and cut through both layers at once.
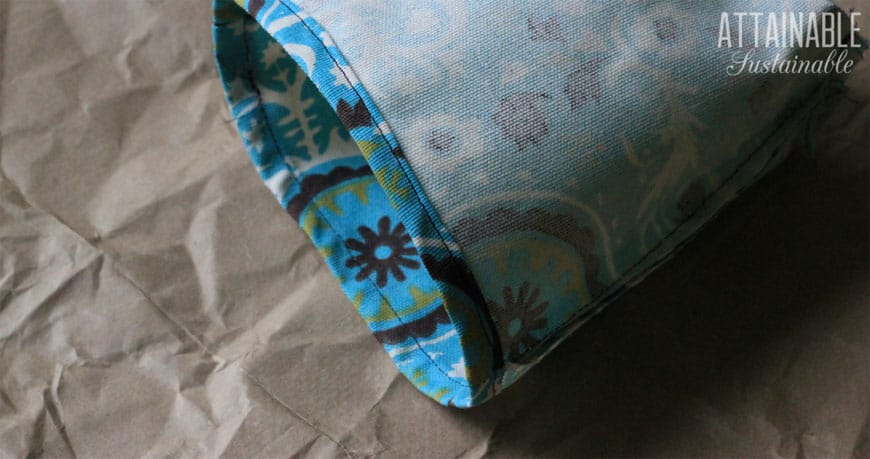
With right sides together, sew a straight stitch up both sides and across the bottom. Use a quarter-inch seam allowance.
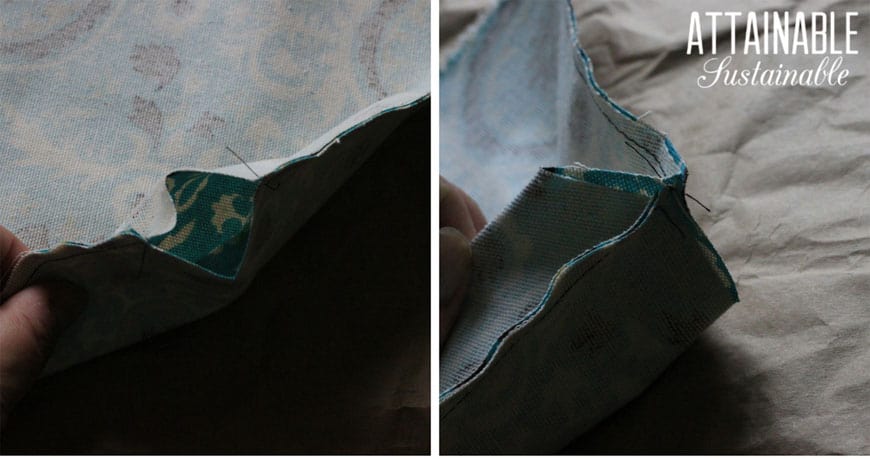
Pull open the little cutouts between each side and bottom until right sides of the fabric come together.
Related: DIY Reusable Cloth Bags for Small Bulk Items
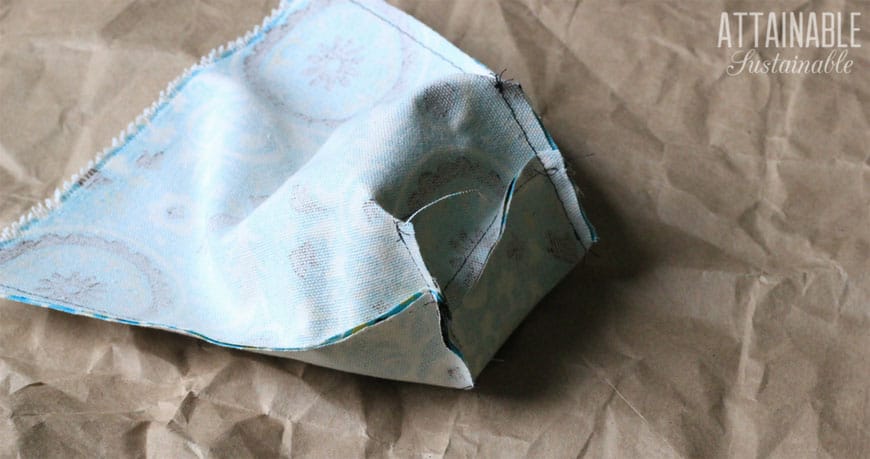
Align the seams and sew a straight stitch, again with a quarter-inch seam allowance.
This creates the “bottom” for the reusable snack bag.
Related: The Eco-Conscious Kitchen: Painless Changes You Can Make Today
Iron a quarter inch fold at the top edge, then fold it over again. Sew hem around the entire circumference of the reusable snack bag. Turn the bag right side out.
Coating the reusable snack bag with wax
Melt the beeswax and jojoba oil together in a glass jar using a double boiler. Stir to make a smooth mixture. Place a piece of parchment paper on a baking sheet. Preheat the oven to 225°F.
Set a snack bag on the parchment and use the paint brush to coat the outside with wax. The wax will begin to harden as soon as it touches the fabric. Just do your best to get a thin coat over most of the bag.
Related: Freezing Without Plastic
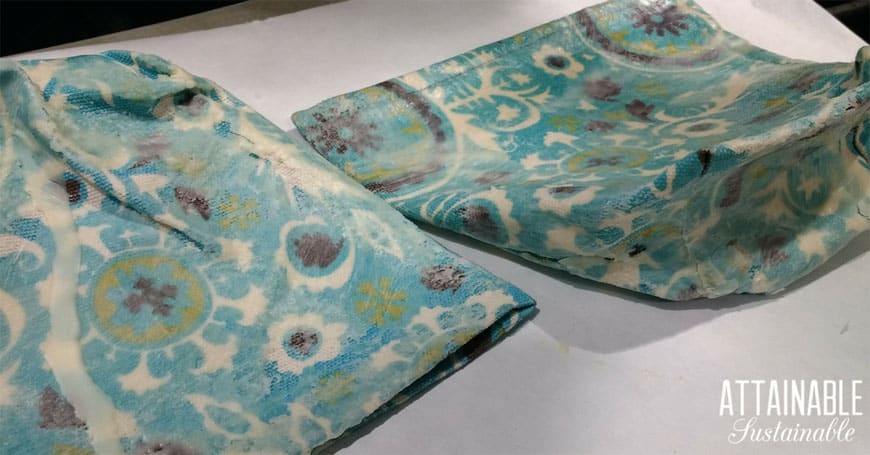
Put the coated snack bag in the oven and keep an eye on it. When the wax becomes visibly liquified again, use the brush to move it around as necessary. Flip the bag over several times, until the fabric is completely saturated. Remove from the oven and allow to cool.
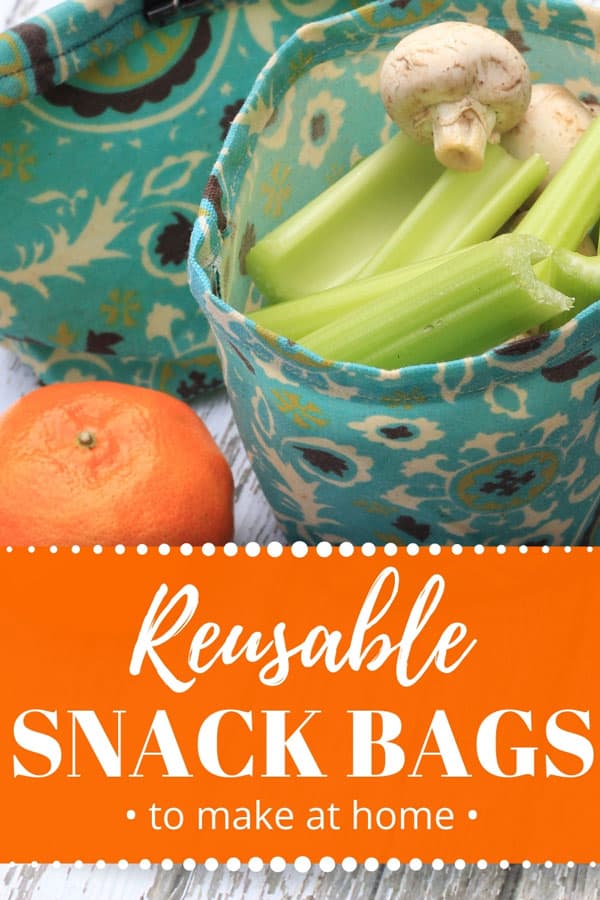
These reusable snack bags are pliable and yet the fabric holds its shape. They have a very slight fragrance of beeswax, too. To close the bag, you can do as I do and simply use a binder clip, or add a couple of buttons as Chris does in the instructions below.
Could these work as a DIY reusable sandwich bag?
Of course. Keep several of these reusable snack bags on hand so that you can wash and dry one DIY reusable sandwich bag while others in use.
The Beeswax Workshop
These instructions are excerpted with permission from The Beeswax Workshop: How to Make Your Own Candles, Cosmetics, Cleaners, Soaps, Healing Balms, and More by Chris Dalziel.
This book is chock-full of (I mean chock-full) of recipes for DIY projects. As you might guess from the title, beeswax is the basis of these recipes.
To start, Chris gives us a look at the wonders of beeswax throughout history. While this is interesting, the meat of the book is in the easy-to-follow instructions. She walks readers through making personal care products like mustache wax, deodorant, cold cream, salves, and ointments. But Chris doesn’t stop there.
How about recipes for DIY floor wax, furniture polish, or car wax? She even takes us out to the garden with projects like grafting wax, beeswax sealant for mushroom logs, and waterproofing.
This book is a boon for do-it-yourselfers, especially if you have easy access to beeswax.
Eco-Friendly Food Wrap for Sandwiches
The 10″ x 10″ size is a perfect eco wrap for sandwiches.
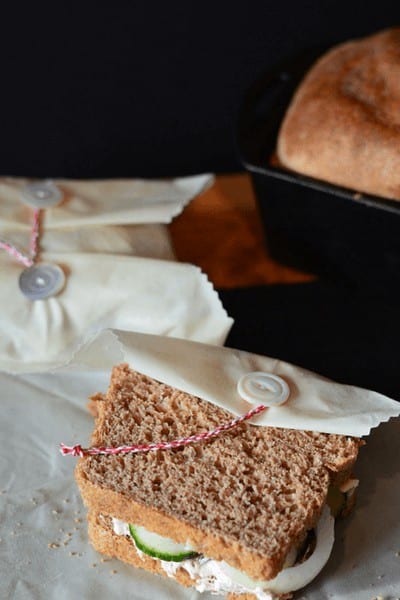
This recipe omits the pine resin used in these beeswax wraps, since when you are wrapping sandwiches you don’t need the wrap to cling. The formula is a little different but it still makes a flexible wrap. These wraps close with a button tie so that your sandwich won’t escape on the bus.
Photo: Chris Dalziel
YIELD: 4 sandwich wraps
Ingredients
- 3 tablespoons beeswax
- 1 tablespoon jojoba oil
- 4 10″ x 10″ squares quilting fabric
- 8 wooden buttons
- 4 10-inch pieces twine
Prepare your fabric and wax
Wash the fabric well to remove the sizing and hang to dry.
Press them with a steam iron to remove wrinkles before waxing. If desired, you can finish the edges with a zigzag stitch, a serged edge, or simply by cutting the edges with pinking shears.
Melt the beeswax and jojoba oil together in a glass jar using a double boiler. Stir to make a smooth mixture.
Place a piece of parchment paper on a baking sheet. Preheat the oven to 225°F.
Coating the eco wraps
Working with one piece of fabric at a time, place the fabric in a single layer on the baking sheet, on top of the parchment paper.
Using a paintbrush, wipe the beeswax mixture onto the surface of the fabric. (Much as you would with the reusable snack bags, above.)
Place the baking sheet in the oven. Leave it only long enough to melt the beeswax. The beeswax mixture will melt into the fabric and spread. Once the fabric darkens and glistens, showing that the beeswax is fully melted, remove the baking sheet from the oven.
Use the paintbrush to make sure the beeswax mixture fully saturates the cloth. It may pool in some areas and leave other areas drier. Move the wax around the fabric, using the paintbrush as necessary. Blot excess wax using another piece of fabric, laid out over the rst piece.
When the fabric is saturated with the wax mixture, flip the fabric over on the baking sheet, so that the blotting fabric is on the bottom and takes the excess wax.
Using your hands on the warmed fabric, work the excess wax into the less saturated areas of the fabric.
Return the baking sheet to the oven, briefly, just long enough to liquefy the wax. Remove the first fabric from the baking sheet and drape over a clothes rack to dry.
Continue the process
The blotting fabric is now your working fabric. Use a brush to spread more of the beeswax mixture around on the fabric. Try to cover the fabric evenly with a thin layer of the wax mixture. Covering this flat piece of fabric is even more straightforward than coating the reusable snack bags (above).
Place the baking sheet in the oven to melt the wax. As soon as the wax is liquified, remove the baking sheet from the oven. Spread the melted wax around with a paintbrush. Blot the excess wax from the working fabric using a new piece of fabric.
Flip the fabric over so that the blotting fabric is now on the bottom. Return this briefly to the oven to re-liquefy. Remove the working fabric to a rack to dry. Repeat with more squares of fabric, going through the process one at a time, and blotting the excess wax onto the next piece of fabric.
As with the DIY reusable snack bags, allow the beeswax-impregnated fabric squares to dry fully. Once dry, wipe both sides of each piece of fabric with a damp cloth to remove any residual wax or resin before using. Repeat these steps with each of the fabric squares.
When your sandwich wraps are fully dry, sew two wooden buttons onto two diagonal corners of each fabric. Tie a piece of twine around one of the buttons on each piece of fabric and secure the twine on the button with a wreath knot.
Using your eco friendly food wrap
Place your sandwich in the center of your wrap.Take one of the corners that doesn’t have a button and cross it over the sandwich. Tuck the corner in under the bread. Take the opposite, button-less corner and wrap it over the sandwich from the other side. Tuck it under. Now take the two opposing corners that are left. Fold these to the center of your sandwich.
Use the piece of twine to wrap around the two buttons, in a figure eight, to keep the sandwich wrap closed.
Cleaning your sandwich wrap and reusable snack bags
Wash in cool to warm water using mild dish detergent. Hang to dry. Fold and store.


Excellent post and wonderful blog, this sort of interesting posts I really like, keep it up…
I am prepping to do this today and imagining my brush getting stiff with cooling gunk pretty quickly. I will be doing several batches as my energy allows. How do I cope with using the same (now stiff) brush for future batches? can I clean it just a bit? Melt some wax off somehow so it is brushlike for the other food bag projects?
If you put the brush in the oven with the wraps, the bristles will soften.
These snack bags are a great idea. Thanks for the pattern. I am going to make waxed linen bread bags as well, for all the sourdough my husband bakes, using your beeswax recipe for the snack bags. Hoping it will work like a bread box and keep it fresh but still crispy on the outside!
Do you coat the inside of the snack bags?
Yes.
Is there a different oil I can use? I do not have jojoba on hand Burbank have coconut and olive oil.
I’d try it with olive oil. (I guess I need to experiment to suggest an alternative – this is a common question!)
Hi. Can I put the food wraps in the fridge? Was thinking of using one to wrap my sandwich for work
yes, the refrigerator should be fine. (Freezing it isn’t a good idea, though!)
Hi
Can I wash this in the dishwasher?
Planning to do it for the kiddos to take snacks to school
Thanks
No.
Hi Kris, do you think this method would work as a bag or large wrap to keep or freeze homemade bread? My daughter and I used a linen dish towel after we baked bread but we’d like to be able to freeze a loaf but don’t want to compromise the flavor or texture. Thanks.
I’m not sure how the beeswax will hold up in the freezer. I’d start by freezing one without the bread, just to see. (I kind of can’t believe I haven’t done this experiment yet…)
Is the fabric stiff? I’m looking for an alternative to PUL for making reusable menstrual pad holders, i.e., shields that the pads fit into so that they are a moisture resistant barrier. This is for an overseas mission project to help the ladies sew these for themselves. PUL is NOT available and if it were would be completely cost prohibitive.
There is a stiffness to it, though it’s flexible.
Does it leave a weird taste on your food?
No.
Can I get the dimensions for the pattern? It doesn’t want to print right on my computer.
You can use the *shape (you can see it, right?) and make it as big or small as you like. Mine pretty much fits an 8.5″ x 11″ sheet of paper.