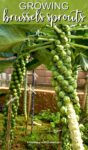
Growing Brussels sprouts adds a delightfully fun plant to your garden, not to mention a delicious crop!
Here’s how to try your hand at growing broccoli, too.
Contributed by Jodi Torpey, author and Master Gardener.
Getting to know & grow Brussels sprouts
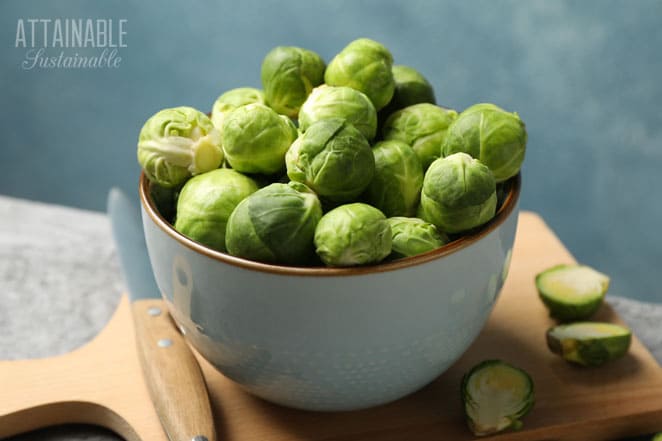
Brussels sprouts look like miniature heads of cabbage and it’s no wonder. This vegetable is a close cabbage relative, descending from the cabbage plants found growing wild in Europe.
Brussels sprouts plants were first cultivated in Brussels, Belgium, starting sometime in the 1500s.
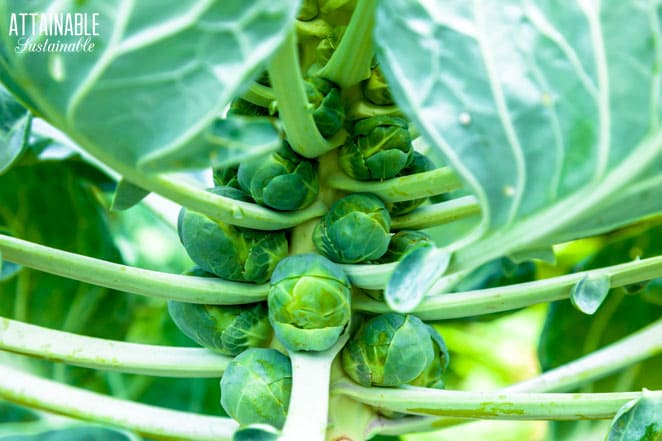
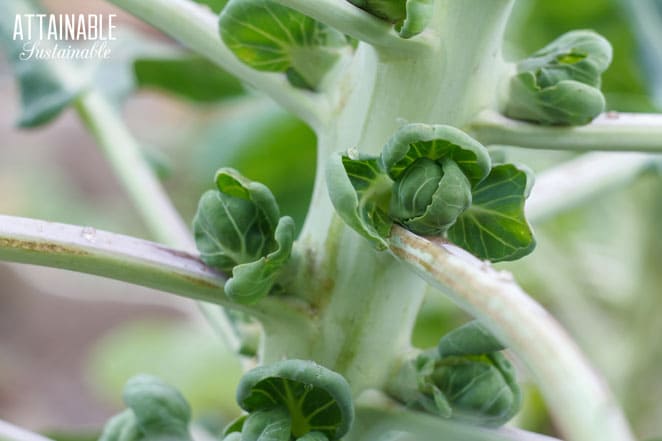
Brussels sprouts (Brassica oleracea) are interesting plants for gardeners to grow. The tall stalks have thick stems, large leaves and many rows of small sprouts. The edible sprouts can be as small as ½ inch in diameter or grow to about 2 inches. The smaller sprouts are typically more tender. [Go here for more brassica vegetables to try!]
Grow Some Greens!
Ready to grow fresh greens, no matter WHERE you live? Sign up for my
FREE quick-start guide and start growing some of your own food!
Gardeners who grow Brussels sprouts need plenty of patience. This vegetable is planted in late spring after many warm season vegetables are already in the ground, but sprouts won’t be ready to harvest until after the first frosts in fall.
Even “fast-growing” varieties can take more than three months to grow into tall plants with edible sprouts.
Keep in mind that Brussels sprouts plants can grow to 3-4 feet tall and up to 2 feet wide. At that size, these plants take up a lot of real estate in the garden. Select a spot you can set aside for a long season of growth or plan to plant another smaller, faster crop in between plants to avoid wasting valuable garden space.
Popular Brussels sprouts varieties
Choose Brussels sprouts by the number of days to maturity from transplanting into the vegetable bed. Check with your county’s extension for the average date for the first frost in your area to help you plan for your Brussels sprouts harvest. The tastiest sprouts are harvested after being exposed to a frost or two.
Here are six Brussels sprouts varieties to help you get started:
Mighty hybrid offers dark green sprouts on plants bred to be resistant to problems like stem mildew; 100 days.
Redarling has purple sprouts and a sweeter taste than other Brussels sprouts varieties; 140-145 days.
Green Gems is a hybrid known to be cold hardy with green exteriors and yellow-gold insides; 85-95 days.
Franklin is one of the early maturing varieties with tall plants and uniform green sprouts; 125 days.
Marte grows lovely blue-green sprouts on heat-tolerant plants; 130 days.
Igor is a variety that can prolong the garden season because these plants are frost-tolerant and winter-hardy; 200 days.

How to Grow Brussels Sprouts
Most gardeners transplant young Brussels sprouts plants into the garden in late spring, once the soil has warmed to about 60 degrees. Direct sowing is not recommended, so you’ll need to start seeds indoors about 4-6 weeks before your anticipated date for transplanting. Another alternative is to buy plants at a garden center.
The garden soil needs to be fertile and well-draining. Amend with well-aged manure and a high-quality compost.
Use a calendar to help with timing your planting by counting back the number of days to maturity from the first expected frost for your area then add some days. Sprouts need to be exposed to frost before they’re ready to harvest.
Space plants at least 18-24 inches apart and space rows at least 18-36 inches apart. These plants can grow wide, so allow enough room to move down the rows for maintaining and harvesting. Plants may need to be staked if they grow too tall and may topple over.
Brussels sprouts grow leaves along the tall stalks. Where each leaf joins the stalk, a small sprout will form starting at the lowest leaves and growing up the stalk.
 The 5-Gallon Garden
New to gardening? Limited on space? The 5-Gallon Garden gives you the skills you need to grow food in the space you have. Get started with your garden today!
Requirements for growing Brussels sprouts
Light requirements
Plant Brussels sprouts in full sun. Be prepared to provide temporary shade for newly planted transplants to protect them during the first few weeks of growth.
Water and fertilizer requirements
Consistent, even watering at the soil level and above average fertilizing are important for harvesting a good crop of Brussels sprouts. Soaker hoses work well to keep plants watered and leaves dry. Without consistent water (about 1 inch a week) and regular applications of nutrients, plants may stop growing and no sprouts will form.
Mulching around plants will help with soil moisture, especially during spells of hot weather.
Fertilize lightly around each plant after transplanting and then every 10-14 days through the growing season. Side dress plants with a balanced fertilizer like 5-10-10 and take care with applications; too much can cause excessive growth with too few sprouts.
To side dress, use a dry fertilizer and scatter it on both sides of the rows of Brussels sprouts about 6-8 inches away from the plants. Rake the fertilizer into the soil and then water.
Brussels sprouts pests and problems
Because Brussels sprouts are a vegetable of the cabbage family, cabbage moths and flea beetles may become a problem. Use row cover cloth sealed at the edges to prevent insect pest damage.
Avoid problems with stem mildew, leaf spot, and Alternaria by choosing Brussels sprouts varieties that have built in resistance.
Watch for caterpillars on developing plants and pick off cabbage loopers. Dispose of them in a bucket of sudsy water.
Prevent soil borne problems by rotating planting sites to avoid planting where other cabbage family crops have grown in the last few seasons.
Growing Brussels sprouts in containers
Unfortunately, Brussels sprouts don’t grow well in containers, but adventurous gardeners may want to experiment anyway. Try growing one or two plants in a very large container to see the results.
How to harvest Brussels sprouts
A few frosts improve the flavor of Brussel sprouts making them sweeter and nuttier than grocery store offerings.
When plants are ready, they’ll signal it’s time to harvest. Watch for the lower leaves to turn color from green to a lighter yellow green. That’s when to check to see if the lower sprouts are firm and around 1-inch in diameter.
Don’t wait for all the leaves to turn yellow. That means you’ve waited too long to harvest and the sprouts have started to toughen.
Start at the bottom of the plant and remove the lowest leaves and the sprouts when the color is right and the sprouts are ready. The sprouts may not all be ready at the same time, and sprouts near the top will continue to mature.
Continue harvesting as the leaves change color and the sprouts are ready. The plant will continue to grow leaves and buds at the top.
An alternative is to remove the buds at the top of the plant to stop the plant from producing more buds. This method speeds up the harvest as buds will mature in a few weeks.
How to use Brussels sprouts in the kitchen
Store Brussels sprouts in the refrigerator in an airtight container. Prepare the sprouts as quickly as possible after harvesting because the longer they’re stored the tougher and less tasty they’ll become. The leaves are edible, too, if chopped into smaller pieces before preparing them.
The sprouts can be eaten raw, steamed, broiled, roasted, sautéed, grilled, and prepared in an air fryer.
Anyone who’s eaten boiled, mushy Brussels sprouts will agree they’re more palatable when roasted with garlic on a sheet pan, then drizzled with olive oil and finished with a squeeze of fresh lemon.
Another tasty way to prepare raw Brussels sprouts is shredding or slicing thin and using them for a slaw-type salad.
Saving Brussels sprouts seeds
To save seeds, wait for plants to flower and produce seed pods. With time, the pods will dry and turn brown.
Right before the mature pods start to open, place a tarp or sheet under plants to catch any falling seeds and cut either individual branches or the entire plant. Open pods, remove seeds and store in an airtight container in a cool, dark and dry place.