

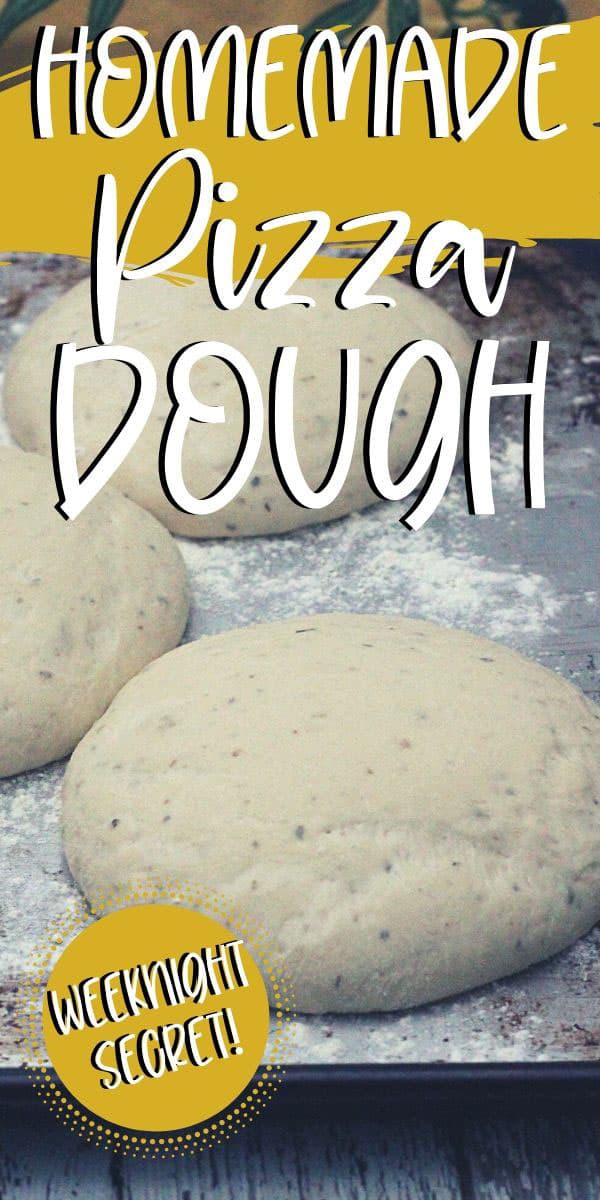
Does handmade pizza dough just seem like too much work? Here’s our favorite rustic pizza crust recipe – and how to turn it into an easy weeknight meal. This has been our go-to homemade pizza dough recipe for years.
Originally published in 2012; this post has been updated.

Homemade Rustic Pizza Crust
I have two teenage boys. Scratch that. Now I have two full-grown adults. Still, in their perfect world, they would eat pizza every single day. Happily, I have perfected a method of making homemade pizza crust – with homemade dough – that eliminates the takeout boxes (and the takeout expense) that’s easy enough for busy weeknights. Sorry, Domino’s!
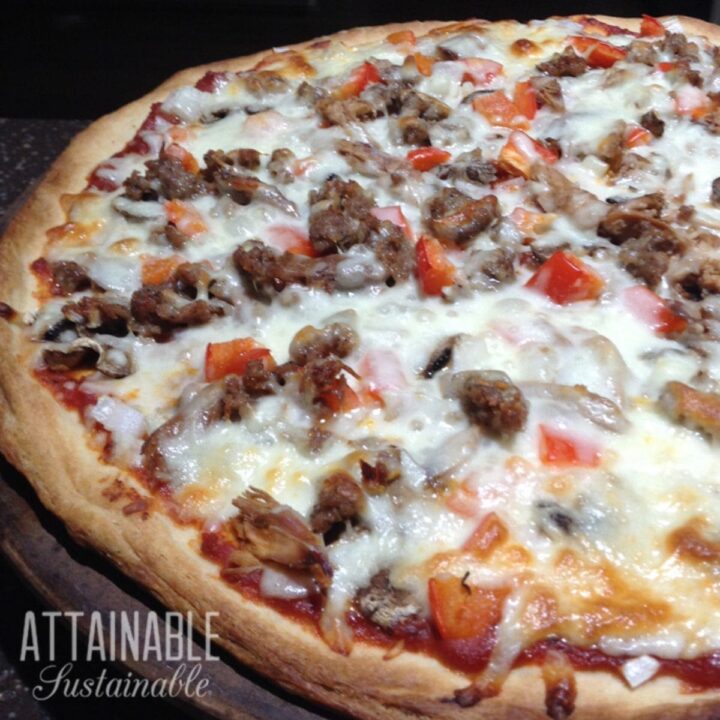
This rustic crust pizza calls for simple ingredients and yields a somewhat chewy crust that’s crispy on the edges. We like to roll the dough out to make a thin crust pizza, but if you prefer a thicker crust, you can adjust that during the rolling process.
This homemade pizza dough recipe makes about a dozen individual sized pizza rounds (8-10″ diameter) when rolled out thinly. I like to stir in a bit of Italian seasoning or dried basil to give the crust a bit more flavor.
Ingredients
Flour — When I bake with all-purpose flour I opt for the unbleached version. Bleached flour is very white, but it’s also treated with bleaching agents that I don’t really need in my food. You can replace up to half of the all purpose flour with whole wheat flour if you prefer.
5 Easy Steps to Transform Your Pantry!
Ready to switch from store bought to homemade? Let me help you make some changes! Grab my FREE five-part guide to getting started.
Sugar — Adding a little bit of sugar helps to create a tender dough. Use your favorite brand of granulated cane sugar. I prefer organic.
Active Dry Yeast — This is the ingredient that gives the this rustic pizza crust a little loft. Those air bubbles in the dough are thanks to yeast. [Read more about using yeast in recipes here.]
Olive oil — Use a good quality extra virgin olive oil. The recipe doesn’t call for much, but the flavor of the oil will shine through.
Making this Pizza Dough
People who have never made a yeast dough tend to think it’s difficult. Please do not be afraid of yeast dough. This is easy stuff. You mix it, you roll it, you bake it. Totally doable.
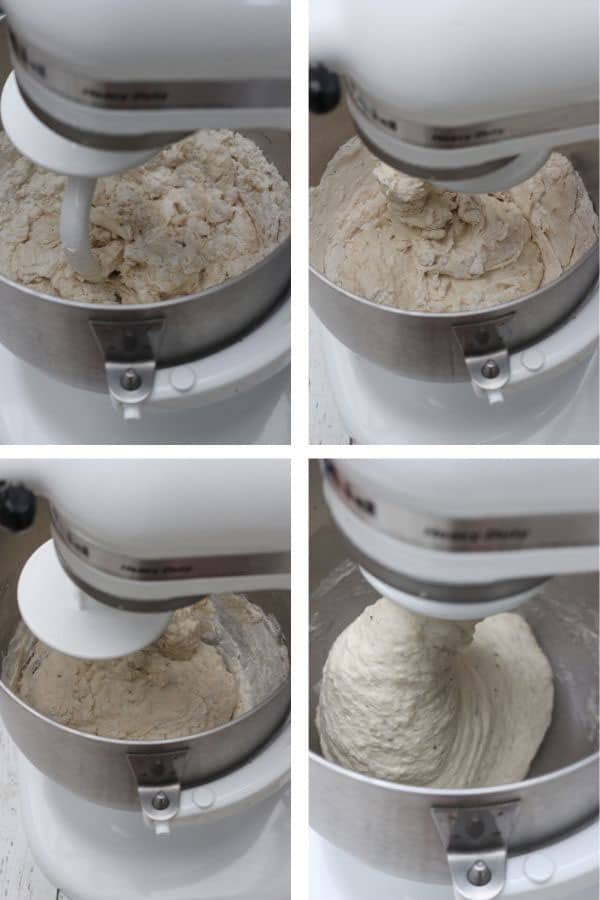
Combine all of the ingredients except the flour in a large bowl (or the bowl for your stand mixer). Let this mixture sit for five minutes or so to let the yeast proof. You’ll see the liquid begin to bubble as the yeast starts to work.
Stir in the flour. You can do this with a sturdy wooden spoon or let your stand mixer do the work with its dough hook.
If you’re making this dough by hand: When the dough starts to get too stiff to stir with the spoon, put the dough on a floured flat surface and use your hands to knead the dough until it’s well combined and smooth on its surface.
In the mixer: Let the dough mix until it begins to form a mass and pulls away from the sides of the bowl. The dough should feel tacky to the touch, but not stick to your fingers. If it’s too sticky, add a little flour at a time.
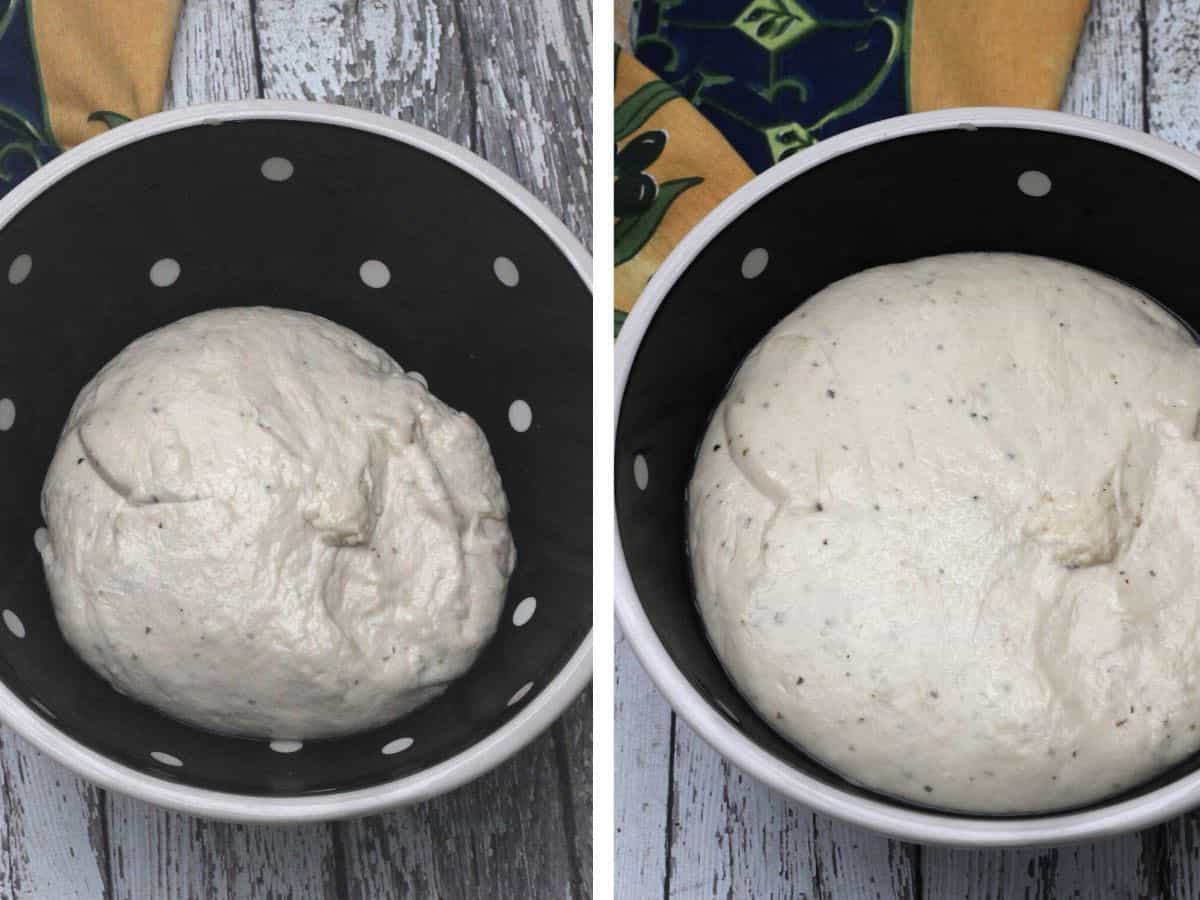
Letting the Pizza Dough Rise
There are (again) two ways you can do this. One, let the entire batch of dough rise at once, or two, divide the dough into balls and allow those to rise individually.
To rise the dough in a bowl, grease a large bowl and transfer the dough ball into it, flipping it over once to coat the dough. This prevents sticking.
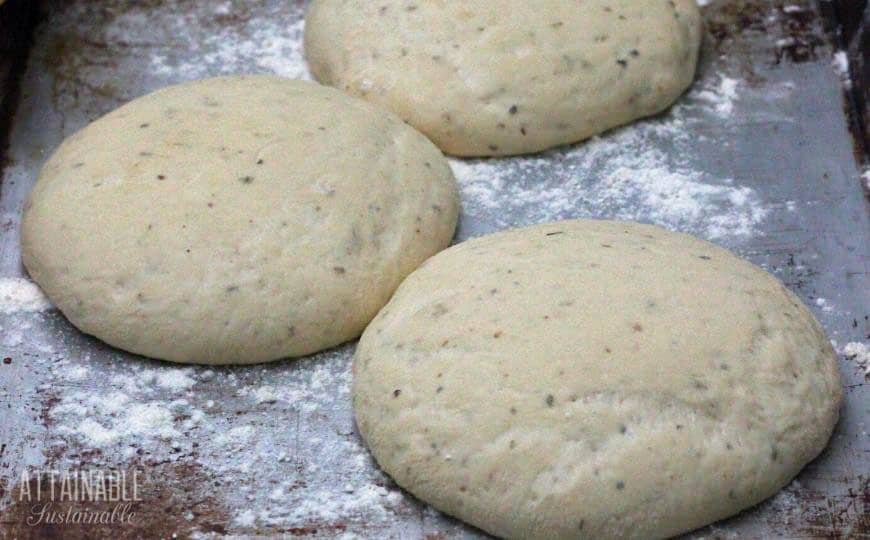
To rise individually, divide the dough and set balls of dough on a lightly floured baking sheet.
Making the Pizza Crust
Decide if you’d like two make two large pizzas or 10-12 smaller individual sized pizzas; divide the dough accordingly.
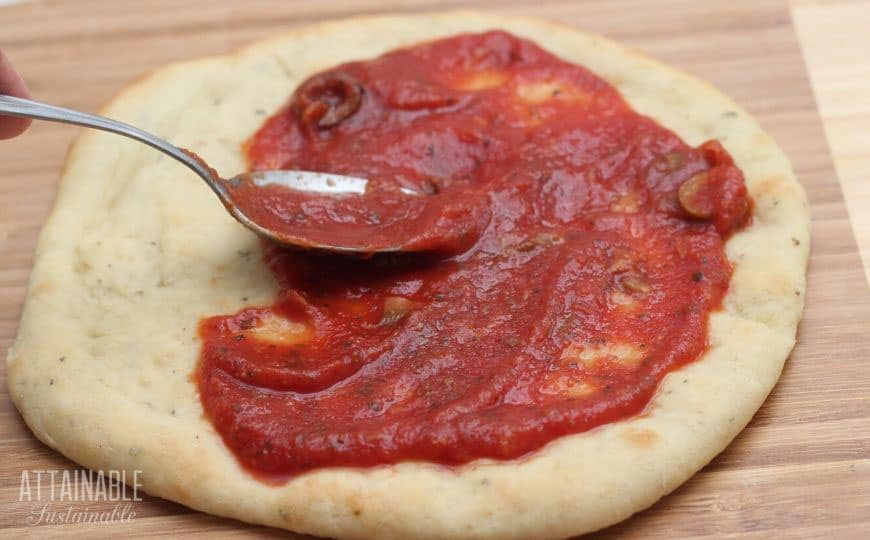
Place the dough on a Silpat baking mat or parchment paper. Press the dough into a flat disc with your hands. Drizzle the dough with a bit of olive oil and continue using your lightly oiled hands to press the dough into a round.
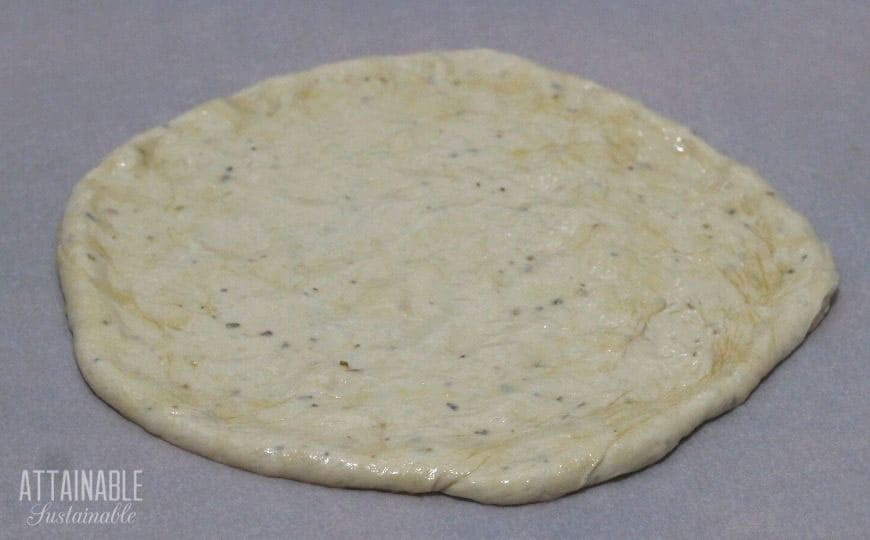
Alternatively, for a thin pizza crust, use a rolling pin. Instead of drizzling with oil, sprinkle the dough with flour to prevent sticking. Use the rolling pin to form the dough into a round 1/8″ thick.
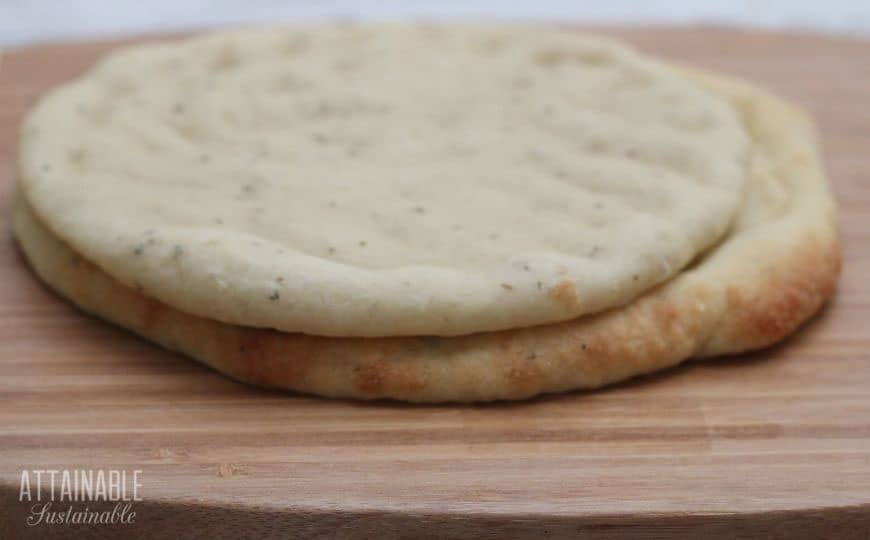
Ready-to-Use Pizza Crusts
By par baking this homemade pizza dough recipe and then freezing the ready-to-assemble rounds, pizza is perfect for the last minute dinner emergencies that seem to happen with regularity around here.
Yep, THIS is my secret to making homemade pizza a possibility on busy weeknights!
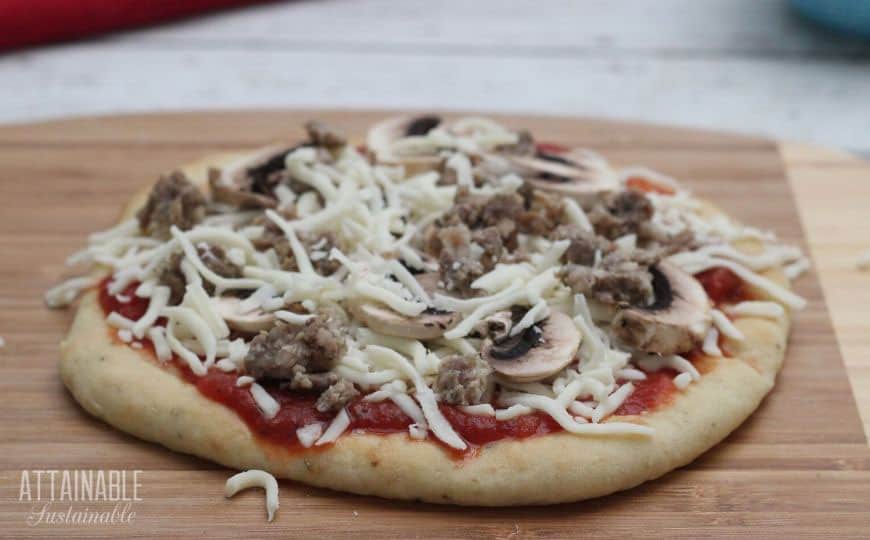
Simply pull a par-baked pizza dough out of the freezer, top it with pizza sauce (or pesto!), crumbled sausage, and cheese, and it’s ready to go in the oven.
How to Par Bake the Dough
There are two ways to par bake the dough. The first, which is actually baked, is to do it in the oven.
If you use a baking stone, put it in the oven and heat it to 400ºF. Slide each dough round onto the hot stone and cook for 5 minutes or so. The edges may begin to turn to a light golden brown. You can also just put the dough on a pizza pan or cookie sheet and transfer it to the oven.
Another way to do it is on the stovetop, on a hot griddle or cast iron frying pan. Again, heat the griddle and transfer the dough to the hot surface. Cook for about three minutes, then flip the dough over.
Top the dough immediately with your favorite pizza sauce and toppings, or transfer par baked dough onto a wire rack to cool.
Store the ready-to-use dough rounds in the freezer.
Homemade weeknight pizza
It takes about 15 minutes to mix the dough in my KitchenAid mixer and just under half an hour to prepare 10-12 rounds.
My family will eat about half of those in one sitting, so I generally do a double batch of dough (see notes below). We usually have pizza the same day I make the rounds, plus put enough dough in the freezer for three more pizza nights.
For roughly an hour’s worth of work, I’m set for four different meals – all I have to do to pull it together is corral my boys in the kitchen to chop toppings.
You can also use this recipe to make up a delicious hummus pizza flatbread!
★ Did you make this homemade pizza dough recipe? Don’t forget to give it a star rating below!
Homemade Pizza Dough Recipe
Par-cooked pizza dough is the secret to easy weeknight pizza, without resorting to frozen or takeout. You'll be enjoying the old world flavor or a rustic Italian pizza in no time!
Ingredients
- 1 1/2 cups warm water, (120-130 degrees)
- 2 tablespoons granulated organic cane sugar
- 2 1/4 teaspoons active dry yeast, (purchased in bulk OR 1 envelope)
- 1 teaspoon sea salt
- 2 tablespoons extra virgin olive oil
- 2 teaspoons Italian seasoning
- 4 cups unbleached organic all-purpose flour, (can substitute up to 2 cups with wheat or spelt flour if you like)
Instructions
Make the pizza dough:
- In a mixer: Mix together all ingredients except the flour in the bowl of your mixer. Let sit for five minutes to let the yeast start to work. Add flour and mix, using the dough hook. The dough will come together to form a ball and pull away from the side of the bowl. It should feel tacky, but not stick to your fingers.
- By hand: Mix all of the ingredients except the flour in a large bowl. Let sit for five minutes to let the yeast start to work. Add flour and mix, using a heavy wooden spoon. When the dough starts to get too stiff to stir with the spoon, put the dough on a floured flat surface and use your hands to work the dough into a nice ball. Add a sprinkling of flour if the dough gets terribly sticky.
- Set the dough aside to rise for 45 minutes or so. To rise the dough in a bowl, grease a large bowl and transfer the dough into it, flipping it over once to coat the dough. This prevents sticking. To rise individually, divide the dough into portions (this recipe will make 10-12 individual rounds) and set balls of dough on a lightly floured baking sheet.
Roll the dough:
- Divide dough in half and transfer dough to a Silpat baking mat or parchment paper. Press the dough into a flat disc with your hands. Drizzle the dough with a bit of olive oil and continue using your hands to press the dough into a round.
- Alternatively, for a really thin pizza crust, sprinkle flour on a smooth rolling surface. Pull off a piece of dough larger than the size of a golf ball, but smaller than the size of a tennis ball. Use a rolling pin to roll the dough out on your floured surface, creating a nice thin round. Turn the dough over frequently as you roll, adding more flour as necessary to prevent sticking. Add about a tablespoon of flour to your surface for each new ball of dough.
Par bake the dough (this is the secret to making it FAST):
- When the dough is rolled to the desired size and thickness, transfer it to a hot griddle or cast iron frying pan (dry, no oil). Cook for a minute or two, until bubbles start to form on the surface. Flip (I use my hands) and cook the second side for another minute. Alternatively, bake in a 400ºF oven for about five minutes, until the dough begins to get a bit puffy and lightly browned.
- Cool on a wire rack.
- At this point, you can either proceed with making pizza or -- here's my hot tip -- stack the precooked dough rounds and freeze for later. Having par-baked pizza dough in the freezer means it's probably just as quick to bake your own as it would be to head out for takeout.
Make the pizza:
- Preheat your oven to 450 degrees. If you have a pizza stone, put it in the oven as it heats. You want them nice and hot, so you'll get a crispy crust.
- Top the precooked pizza dough with pizza sauce (perhaps homemade from your garden?), cheese, and toppings, then slide it onto the hot pizza stone. If you're not using a stone, just make your pizza(s) on a cookie sheet and put them in the hot oven. Bake for 8-10 minutes.
Notes
**To make a double batch, measure the ingredients for a single batch except for the flour into your mixing bowl. At the same time, measure the same ingredients into another bowl. (A mixer won't accommodate a double batch all at once. Probably, your arm and a wooden spoon won't either.) Add the flour to the mixing bowl and mix as directed above. Once the dough is complete, transfer it to an oiled bowl. Pour the extra bowl of measured ingredients into the mixing bowl (and goodness, don't worry about washing the mixing bowl!) and add flour. Mix as directed above.
Nutrition information is for one entire 6-8" pizza crust.
Nutrition Information:
Yield: 12 Serving Size: 1 gramsAmount Per Serving: Calories: 375Total Fat: 6gSaturated Fat: 1gUnsaturated Fat: 0gSodium: 395mgCarbohydrates: 70gFiber: 4gSugar: 4gProtein: 10g


Best dough ever! I’ve been using it for years now!
I’m so glad to hear it!
I made this pizza dough last night and my family and friends loved it! Thanks for such a great recipe. We will definitely make Again!!
Light and refreshing
Thank you so much for this recipe. We started making it a few years ago when you posted. My family loves it. We make them really thin (16 out of a batch) and the kids eat them with everything, pizza, peanut butter and jelly roll ups, and even plain they like them so much. My husband does hummus and veggies on them.
Glad you like it!!
Super yummy and super easy to make!
How about those of us with a yeast infection: got any ideas for a no yeast dough?
Have you ever tried sourdough? It’s a natural leavening agent.
I love this idea! The pre-baking is genius! (Mainly because I can never get the pizza onto the pizza stone without destroying it) I am definitely making this on the weekend.
YES! The par baking makes it SO much easier to slide onto the stone.
Corn meal is the cat’s butt, good on the peel and on the cookie sheet if you want crispy and easy off!
I mix my bread doughs by hand in a large pot or bowl using a dough whisk, also available cheaply on Amazon (click through from one of the above links). No problem.
Also, I often use my cast iron griddle as a baking stone in the oven. Works fine, never breaks.
I’ve definitely used my griddle as a baking stone; it’s dual purpose that way. It’s not enough for me to use just that, though – we make two or three pizzas at once!
I use Pizza Yeast (https://www.pizzacrustyeast.com/) with my family as there is no rise time and I can just mix it, top it, and throw it in the oven. The whole thing takes about ten minutes of prep and ten minutes to cook.
Good morning, Kris. How have you been? Hey, I will be trying your dough recipe here soon, and I also need a thick, tangy homemade pizza sauce recipe. Any recommendations? Thanks, Jo
I don’t have mine written up (must do that)! Here’s my one hint: Add savory. That herb is what (I think) gives pizza sauce that magic pizza flavor. 😉
Thanks, Kris! I will be sure to do that and I look forward to your pizza sauce recipe. Let me know when it is out (if you think to! LOL!)
We started a tradition when our twin boys were 3 of having home-made pizza night on a Friday night. They boys get to choose what they put on their pizzas, and they construct them themselves. It’s the only meal we have where we don’t eat at the dinner table, as we allow them to choose a movie and we do “pizza and movies”. It’s a huge hit. It’s great, because you can experiment with different combinations of flavours – from simple to complex, and you have total control over how much salt, sugar, oil etc ends up on your pizza.
We did Pizza Fridays when my boys were young, too. Such fun. Great combo: kalamata olives, feta cheese, and arugula with just a little garlic and olive oil (no sauce). 😉
I make pizza almost every Friday night, sometimes wheat crust and sometimes not. I have found that adding the salt to the water/sugar/yeast mixture tends to somewhat counteract the yeasts ability to rise. I have found adding it to the flour mixture makes for a more fluffy crust. I also ONLY make pizza on our 4-burner gas grille. I set the stone in place and turn all burners to low and in about 15 minutes its at 600+ degrees, way hotter than any indoor oven. This makes it close to a pizza oven as far as temperature and they only take about 5 minutes. Also be careful about using too much flour on your peel, if there’s too much on the bottom of the dough it tends to burn and be bitter. It’s a fine line between too much and getting stuck. A metal peel works best as it’s thin and doesn’t have to be “tipped” whatsoever to transfer the pizza.
We were just talking about that yesterday. We made homemade pizza : Whole wheat flour, hint of organic maple syrup instead of sugar, organic olive oil and fresh veggies and vegan spinach/basil pesto made with stuff from our own garden. Aged cheddar… and we were thinking, this is pretty healthy! I love making pizza with the kiddos cause they will eat every scrap of it no matter what is on it.
My grandchildren love pizza. I use flour tortillas to make mine and I also put broccoli, onions and peppers on them. The tortillas are better for them than traditional crusts.
My family loves it when i make pizza, because i roll the crust as thin as possible. a lot of my family are worried about the calories and that takes about half of them away. also the cracker crust gives the pizza texture that’s amazing.
I make my pizza in the breadmaker, dough only. Add spices and Parmesan cheese in it! Never tried making individual crust, but this sounds good! have to try!
I can’t believe I didn’t mention that. I used to do that years ago, before I hand a stand mixer. Thanks!
Thank you for sharing your idea for individual par baked pizza crust! I made the dough this morning substituting white whole wheat flour and left it to rise all day. My 3 year old loved helping my roll out the crust! My family of four enjoyed creating their own pizzas with many topping choices. The crust turns out nice and crunchy…loved it! Freezing the crust is a novel idea for me and very helpful to have “go to meals” in the freezer. This will be a staple in our recipe box from now on!
This looks really useful and doable. Definitely going to give this one a try!
Great recipe, except I don’t have a stand mixer… how do I make the dough without it? I’m sure it’s possible… people have been making dough for thousands of years without a stand mixer. But it’s impossible to find instructions with out one.
Allen, no worries. You just need a sturdy wooden spoon and some brawn. Stir the ingredients until you can’t stir them anymore, then get your hands in there and push/pull/knead the dough until in all comes together. For this method, you’ll need to dust a surface with flour and add a bit more flour each time the dough gets too sticky to work.
you can save mess when hand kneeding by using a very large bowl. I mix in it then kneed it until it is elastic and no longer sticky. I always use a bit of milk powder in the water as it makes the crust crispier. The pizza making book my DH got me recommends pre-baking the crust 5 min very hot before putting the toppings on. Pizza stone works great or I have a special oblong cookie sheet for my convection oven. more room on it. works great.
Question, do you have to thaw the crusts first? Or just do them frozen?
They thaw pretty quickly. I take them out of the freezer and set them on a plate (individually) and have my kids start topping them. By the time they’re done, they’re partially thawed; we toss them in the oven at that stage.
GENIUS. Absolute genius. We have homemade pizza night every Friday night (along with the grape juice I canned instead of soda), and I make the dough. My kids love rolling out their dough, doing their toppings, etc. (I have 5 kids 4 and under), and I love watching them experiment with their creations. They are so proud. We started doing calzones so we could bake all of them at once on our stone. There are times when I would love to have an easy button like this. Love it, love it. I’m doing this with the leftover dough I have instead of just freezing the dough. I’m going to have to think about what I want to freeze them in.
As for sliding your pizza off the peel, having enough flour or cornmeal under your dough is CRITICAL. Any moisture at all and it will stick. Also, the longer it sits on the peel, the harder to get it off.
Last thing, I make our dough with 100% whole wheat flour. I use hard white wheat that I grind myself. It has a much lighter flavor and texture than other varieties of wheat. And maybe my recipe has an impact, who knows. Everyone who tries it is surprised that it’s all whole wheat.
I very rarely buy flour. I use whole wheat in just about everything, and I grind it myself, which is far more economical, healthful and sustainable. Things like zucchini bread or banana bread, you would never, ever know. Some things I do half and half like biscuits.
Interesting, about the freshly ground wheat. I’d expect it to be really strong and grainy! I use spelt a lot, but I don’t grind my own. Yet.
Kris, I also use a lot of spelt, and occasionally kamut (I used to use it a lot for pizza dough, actually). I have a killer bread recipe with spelt, if you are interested. Grinding your own is so much more economical than buying those little bags of spelt flour. The grinder pays for itself quickly. The spelt actually has a stronger flavor than the hard white wheat, but spelt does make a silkier flour. I use spelt for things that are already flavorful like zucchini or banana breads, but for something like pizza crust or tortillas, I stick to the white wheat. I also really love the sweetness of spelt for my wheat thins cracker recipe. It also makes a wonderful pasta. We had no wheat for 3 years and baked with spelt and kamut exclusively. That’s actually why I learned to bake, bc it was that or not have bread products.
If you do end up grinding your own, this is an important thing to know: freshly ground flour is much airier than packaged. Meaning, when measuring by volume, you need to increase your flour measurement by about 25% with freshly ground flours. By weight they will be the same, but by volume, the packaged flours are packed down, where your milled stuff is sifted. Your breads and cakes will have a big sink hole in the middle if you don’t up your flour. I spent months trying to figure out what my problem was, and since I was using spelt, I was even more confused since it was different water absorption properties.
truly “Whole Wheat”
I too have a grinder, but have yet to start using it.
but I have tasted true whole wheat bread and it is far better than the “Reconstituted” whole flour you buy
What kind of container(s) do you put the parbaked crusts in when you store them in the freezer?
Ah, the million dollar question! I’m working to eliminate plastic as much as possible, but for the moment, I reuse plastic grocery bags (that still seem to work their way into my home, even though I re-use my own bags at the store!). I’ve tried wrapping dough (not par baked) in waxed paper, and it worked pretty well. Wax paper might be a solution for the par baked crusts, too. We certainly go through them fast enough that freezer burn wouldn’t be an issue. I’ve also wondered about making my rounds smaller so I could stack them in my glass storage container. Kind of like this one: https://amzn.to/fKIZfw Let us know what you come up with!
smaller?
10 inches was an individual size when I was about 5yo… now? I need a 15″ Hahahahaa…. I LOVE pizza
Totally do-able! I love all of your photos, too. We do love our pizza around here.
I have yet to make a good pizza crust that I would happily serve to family and friends. Can never get the bottom crispy enough for my liking. Tips?
Sarah, that’s rich – someone with your kitchen expertise asking me for tips! 😉 I typically use two pizza stones at a time. The bottom stone always turns out a crispier crust than the upper one. If I really wanted to be assured of crisp crusts on both pizzas, I’d switch them out, or only use the bottom stone. My teenagers, though, are more interested in getting to the pizza in a time sensitive manner than a perfectly crisped crust!
I use a cast iron pizza pan on the bottom rack… preheat the oven with the pan in it, and guaranteed, the bottom will be crispy….
you might have to raise it to the middle.
Oh, I had a question regarding freezing. When freezing the crusts, would you suggest putting waxed paper in between them to prevent them from sticking together? I want the kids to be able to pull them out individually to use for snacking.
I don’t. I make sure they’re cooled off before I freeze them, but they kind of just pop apart. The par baking makes the whole pizza process so much easier!
We love homemade pizza at our house, though I admit, I haven’t made it in some time. I love your freezing idea. I’m thinking of making a batch or two of crusts and freezing them for the kids to pull out when they are in need of something to eat between meals (which seems to be constantly!)
home made pizza is great. hope your post will get those who are still thinking about it to give it a try — another benefit is all the creative (and healthy) toppings you can try out.
Might have to try this. Thanks for the idea.
My two guys are big pizza lovers, too, and we’ve made homemade pizza forever — absolutely, positively the best way to go.
Question for you — I adore my pizza stone. The problem is, even with the pizza peel, when I slide the pizza onto the stone, all the toppings go flinging to parts unknown (leaving a partially nekkid pizza). Any tips on technique? I know this is outside the scope of your post, but it’s been bugging me for a while.
I’m also going to give your recipe a try — always in search of that perfect pizza crust!
Kate, we had this problem, too. I know pizza traditionalists will scoff, but par baking the dough makes it WAY more manageable. It’s just cooked enough that it’s super easy to transfer from the peel to the stone, with all of the toppings intact. And the pizza is still plenty crispy on the bottom as long as we use the stone on the bottom rack closest to the heat.
another thing that’d help with this, if you do not already do it this way, is putting toppings on first, then the cheese. learned this years ago from a chef and we’ve made our home made pizza that way ever since.
I have always understood that Italian pizza has the sauce/cheese/topping in that order… one topping only
Greek pizza has the sauce/toppings/cheese in that order and lots of toppings on one pizza.
When a school class went to Italy, they were discouraged when the waiter told them Pizza is crust and sauce, and a deluxe has cheese…. In the part of Italy they were in, NO ONE puts anything else on top.
I could NEVER live there! I like my pizza deep and meat/cheese filled to over flowing.
This is where cornmeal comes in in traditional pizza shops. The peel gets coated with a layer of cornmeal and flour. This allows the dough to slide off with little effort. The cornmeal also creates little pockets for air and gets the bottom more crispy. I’ve worked in a few pizza shops and this was always the way they did it.
You really need to put a ton of cornmeal on your pizza peel, so the dough just slides right off onto your pizza stone. I mean a ton. You basically want it to slide around like it’s on ball bearings. Make sure that you’re keeping it level as well and you shouldn’t have the half naked pizza as you’ve described.