
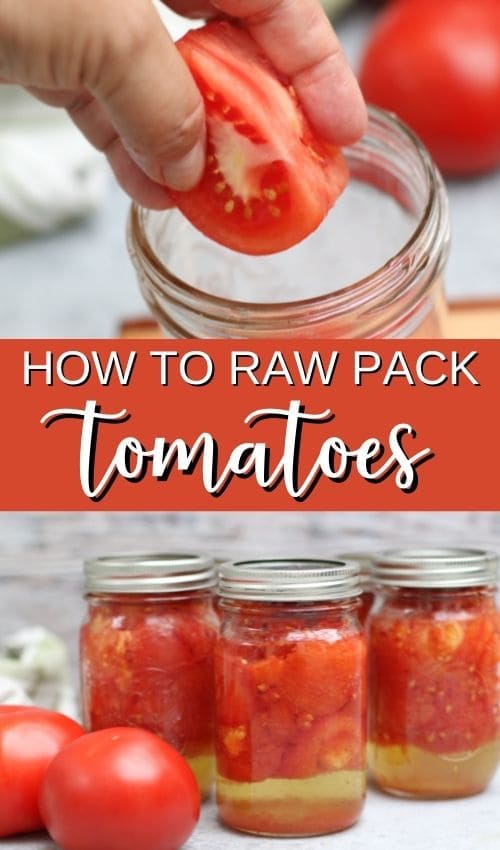
Crushed tomatoes are one of the handiest pantry ingredients to keep on hand for home cooking. Happily, canning tomatoes in a water bath is also one of the easiest ways to preserve them.
If you’re new to home food preservation, start by understanding the basics of safely canning tomatoes.
Canning Crushed Tomatoes
Canning tomatoes in a water bath is a great way to preserve an excess of ripe tomatoes. It’s easy to make shelf-stable crushed tomatoes for home cooking – one of the easiest ways to preserve tomatoes!
You’ll be able to pull a jar of tomatoes from the shelf as you need them to make recipes like chili, lentil soup, or even as a substitute for fresh tomatoes in this cooked salsa recipe.
More of a technique than a recipe, making crushed tomatoes for the pantry is easy. When the crop is abundant, pack jars full of fresh tomatoes and process them in a water bath canner
I’ll walk you through how to do it safely below.
Get a Quick Start Guide to Safe Canning!
Want to learn how to preserve the harvest? Dive in for a look at various canning techniques and methods! Grab my FREE 6-part guide to getting started.
Ingredients
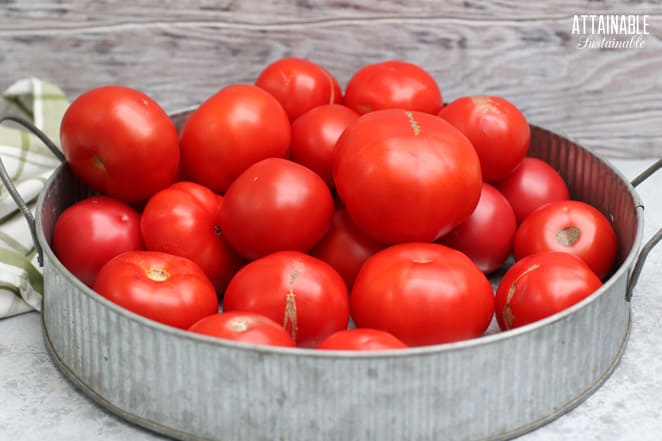
Tomatoes – Choose fresh ripe (not overripe) tomatoes. You can use any tomato variety, or even a combination of many. Juicy tomatoes will net more liquid in the jars; Roma tomatoes will produce less. Cut large tomatoes into quarters so they will fit into the jars.
Lemon juice – USDA preserving recipes all call for using bottled lemon juice. This assures that the acidity level in recipes is safe for canning. Citric acid is a suitable substitute; for every tablespoon of bottled lemon juice, use 1/4 teaspoon citric acid.
Salt – This is an optional ingredient. If you prefer a lower-salt version, simply skip this ingredient. If you do use salt, be sure to opt for sea salt or canning salt. Don’t use salt that is iodized or treated with clumping agents.
 Ready to DIY your pantry with more wholesome ingredients? Check out my new book from National Geographic! Attainable Sustainable Pantry is filled with delicious recipes for some of your favorite condiments, snacks, and toppings, along with an entire section on safe home food preservation. It’s the guide you need to start skipping packaged products and embrace homemade.
Preparing the Tomatoes by Blanching
I don’t always skin tomatoes for cooking or canning, but I do peel them when making raw packed crushed tomatoes, using a blanching method.
Here’s why: I put the tomatoes in the jars as large chunks. The peel on a chunk of tomato like that will roll up into a little “stick” of tomato skin when it cooks. And I don’t like those in my food. If that doesn’t bother you? You can skip the peeling process.
Wash tomatoes before starting to remove garden dust, bugs, or other garden bits that might be on the fresh fruit.
To blanch tomatoes for canning, start by cutting a shallow X in the bottom of each tomato (the end opposite the stem). This step isn’t entirely necessary, but the slits in the skin will give the tomato peels a place to start separating from the fruit.
Place tomatoes into boiling water for 30-60 seconds. The tomato skins will begin to appear a bit wrinkly.
Lift the hot tomatoes from the hot water with a slotted spoon, transferring them to a large bowl filled with ice cold water. After 30 seconds or so, remove each tomato from the water individually and use your hands to slip the skin right off the fruit.
Once peeled, you can use the fruit in any recipe you like.
Go here for more on peeling tomatoes.
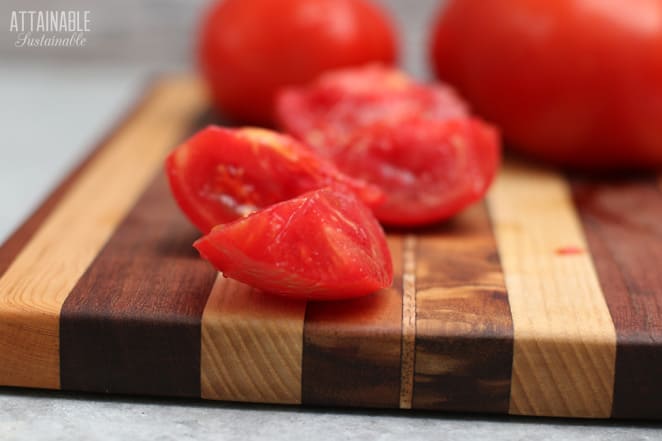
Once peeled, I remove the core and cut the tomatoes into chunks that will fit into the opening of my jars.
Packing the Jars with Raw Tomatoes
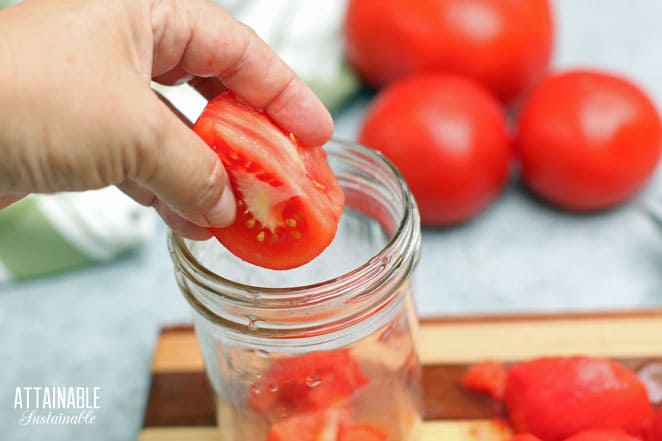
Here’s where the easy part comes in! Measure lemon juice or citric acid into hot jars, then simply drop pieces of prepared tomatoes into the jar until it’s full. You can push whole tomatoes or halves into the jar; the process of smashing them will break them up into smaller pieces perfect for cooking with later.
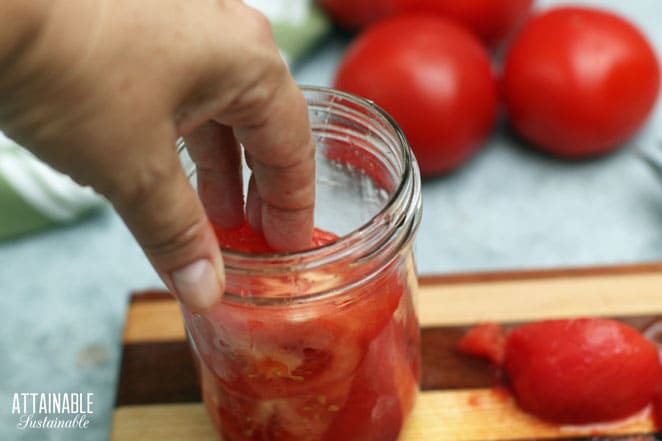
Use your (clean) hands to press the tomatoes into the jar, releasing tomato juice and packing in as many as you can. Leave a one-half inch head space.
It’s unlikely that you’ll need any added liquid, but if you do, you can add a bit of water or tomato juice to meet that headspace requirement.
Fill enough jars to fit into your canning pot. The recipe below is written for seven pint-size jars, but you can make quart jars as well. Just be sure to increase the amount of lemon juice you use.
Canning Tomatoes in a Water Bath
Water bath canning calls for processing jars in a large pot, or canning pot. A pot specifically made for canning typically fits 7 to 9 canning jars. For smaller batches, you can use any large pot in your kitchen, so long as you have a rack to fit the bottom (the jars shouldn’t sit on the bottom on the pan) and there’s enough room for 2″ of water over the top of the jar level.
Use a damp cloth to wipe the rim of each jar; a little bit of food on the jar rim can prevent the lids from sealing properly. Set the lids in place and screw the bands on firmly tight (but not too tight).
Use a jar lifter to transfer jars of tomatoes into the hot water in the canner. The water in the pot should cover the jars by 1 to 2 inches. If necessary add more water to the canner.

Hot tip: Boil some extra water in a saucepan or electric kettle as you’re working. If you need to top off the water in the canner, you won’t cool down the water too much.
Process pints OR quarts of tomatoes in a hot water bath for 85 minutes; adjusting for altitude if necessary. (See below.)
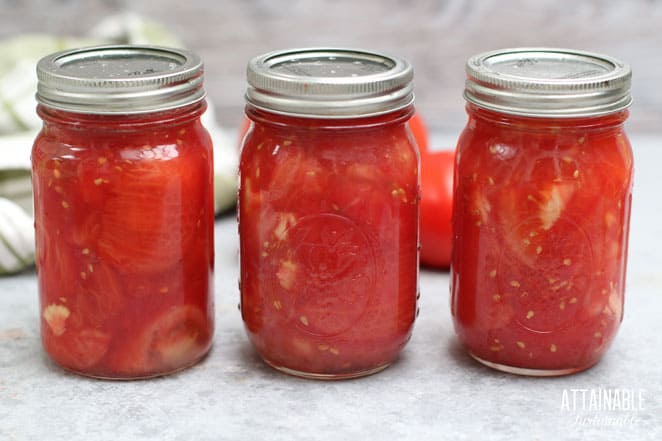
When time is up, use the jar lifter to transfer jars to a flat surface that’s padded with a kitchen towel. Allow jars to cool completely. As they cool, you’ll begin to hear a canner’s favorite sound: That lovely little tink! that indicates a successful seal.
Cool jars undisturbed for 12-24 hours, then check the seal on all of the jars. The lid should be concave and solid. If it flexes at all, it’s not sealed. (Place any jars that didn’t seal in the refrigerator and use them first. They are not shelf stable.)
Remove bands from cooled jars and rinse the jars. Store jars without the bands.
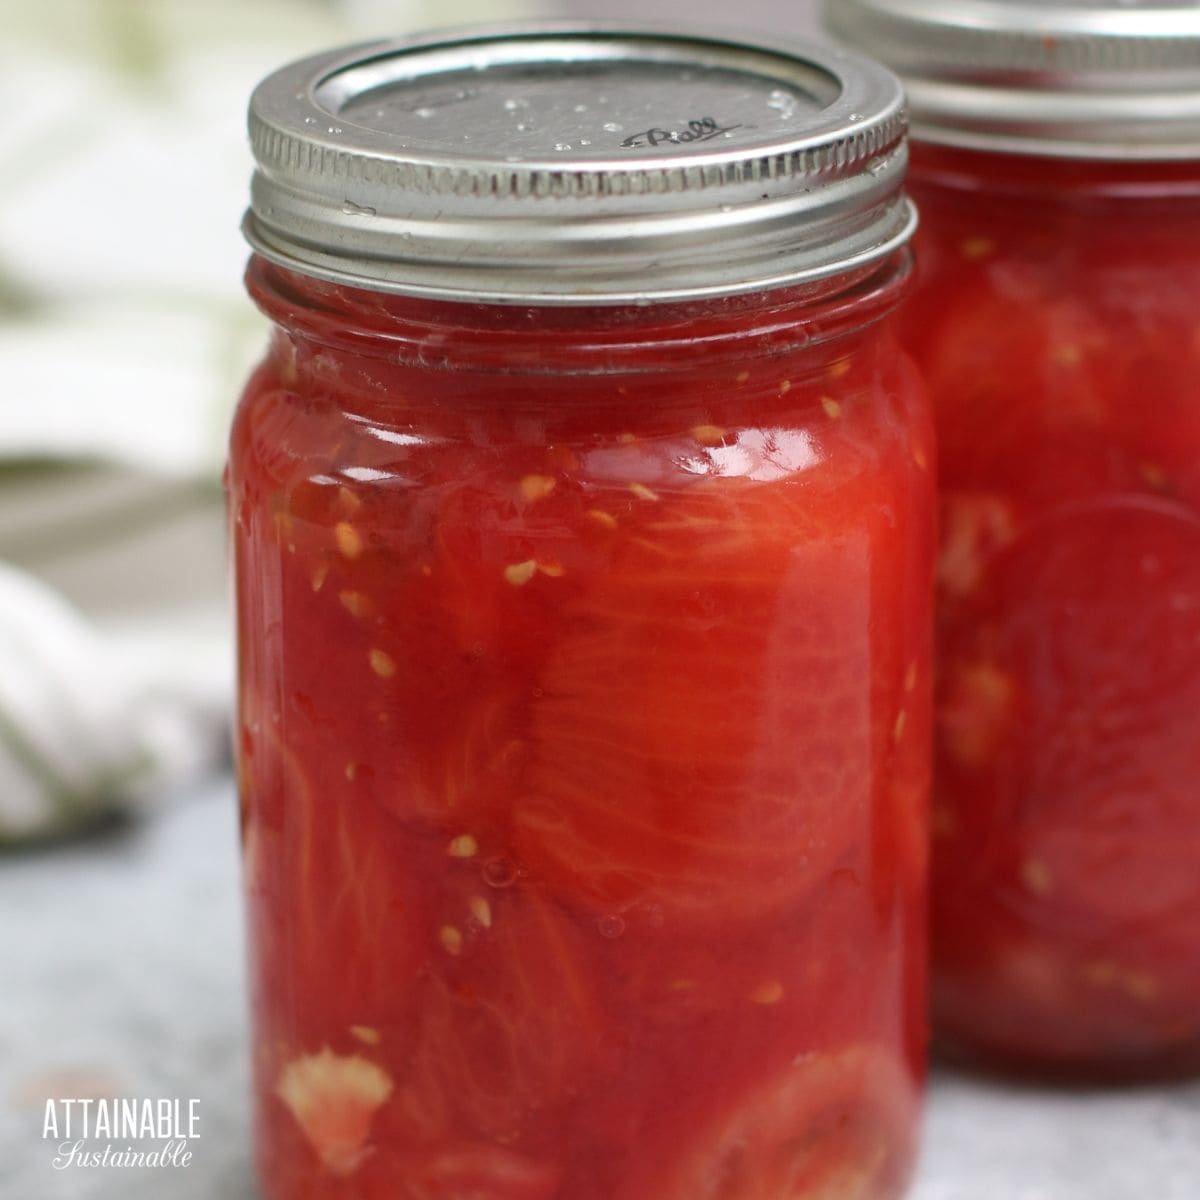
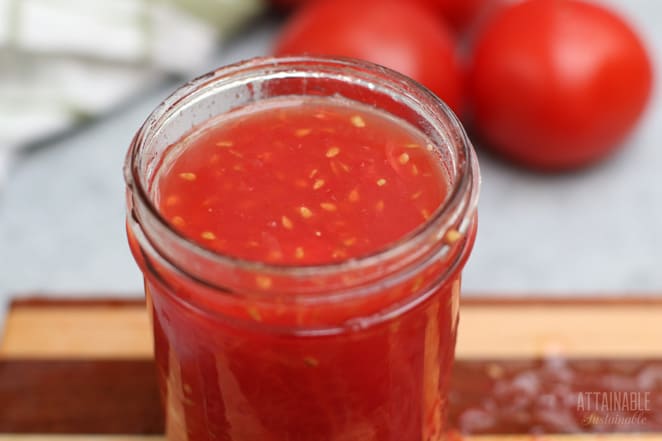
Note: You may notice that the tomato solids float above the liquid once they’ve been processed (as you can see below). This is totally fine.
🍅 Safety First!
Canning is an excellent way to preserve food for the pantry, but there are some important safety considerations to keep in mind. The recipes on this site have been made following safe canning procedures by a certified Master Food Preserver.
- Know the difference between water bath canning and pressure canning. Low acid items must be pressure canned for safety.
- Altering ingredients may change the recipe’s pH, posing a safety issue.
- Use the proper jars and lids. Never reuse lids, with the exception of the Tattler or Harvest Right hard plastic lids that are intended for such a purpose.
- For more on canning equipment, please go here.
- Want to learn more? The National Center for Home Food Preservation is the go-to resource for safe canning information.
Canning Tomatoes in a Pressure Canner
I don’t typically pressure can my tomato products, but if you prefer to use the pressure canning method, you absolutely can. Process pint or quart jars of raw packed tomatoes according to the National Center for Home Food Preservation’s guidelines:
Weighted Gauge Pressure Canner:
- 40 minutes at 5 pounds of pressure
- 25 minutes at 10 pounds of pressure
- 15 minutes at 15 pounds of pressure
Above 1,000 foot elevation:
- 10 minutes at 5 pounds of pressure
- 15 minutes at 10 pounds of pressure
- not recommended at 15 pounds of pressure
Dial Gauge Pressure Canner:
- 40 minutes at 6 pounds of pressure (0-2,000′ elevation)
- 25 minutes at 11 pounds of pressure (0-2,000′ elevation)
- Increase by 1 pound of pressure for every 2,000′ elevation change
Note that a pressure canner is quite different from a pressure cooker. Read why canning in an electric pressure cooker is not safe.
Here are some more canning recipes to try!
This tomato chutney recipe is one of my favorites.
Try canning nectarines or peaches to preserve the sweet flavor of a summertime harvest.
Applesauce is easy to make and preserve with a water bath. Here’s how.
Did you know you can make your own ready-to-use canned beans?? Talk about a time saver.
How to Can Crushed Tomatoes
Equipment
- 7 pint jars
- 7 canning lids and rings
- canning funnel
- water bath canner with lid or deep pot
- jar tongs
- canning bubble popper/measurer optional but handy
Ingredients
- 5 pounds fresh tomatoes
- 7 tablespoons lemon juice bottled
- 3 ½ teaspoons sea salt optional
Instructions
Recipe yields 7 pint jars.
PREPARE FOR CANNING
- Wash the jars you'll use, making sure each is clean and free of nicks in the rim, which could impede sealing.
- Wash the lids and rings in hot soapy water. (If you're using non-Ball brand lids, prepare as suggested by manufacturer.)
- Place empty jars in a canning pot or large stock pot with enough water to cover by an inch or two, cover pot, and set on high heat. It can take awhile for the water to heat, so get it started before you begin making the recipe.
PACKING THE JARS
- Peel tomatoes using the blanching method outlined here.5 pounds fresh tomatoes
- Remove hard core and cut tomatoes into chunks.
- Measure 1 tablespoon lemon juice and 1/2 teaspoon salt into each pint-sized jar. (Use 2 tablespoons lemon juice and 1 teaspoon salt for quarts.)7 tablespoons lemon juice, 3 1/2 teaspoons sea salt
- Drop tomatoes into jars, then press to release liquid and fill empty spaces. Leave a 1/2" head space.
- Wipe jar rims to remove any residue that may have spilled. A clean rim is essential to a good seal.
- Set jar lids in place. Screw bands on firmly tight, without over-tightening.
CANNING RAW PACK CRUSHED TOMATOES:
- Use a jar lifter to gently submerge jars into hot water in canning pot. Water should cover the top of the jars by two inches. The water will cool somewhat in reaction to the addition of the jars. Return the water to a simmer and set the timer.
- Process pints OR quarts of tomatoes in a hot water bath for 85 minutes 0-1,000 feet altitude; 90 minutes 1,001-3,000 feet; 95 minutes 3,001-6,000 feet; 100 minutes over 6,000 feet.
- Allow jars to cool overnight.
- Check for seal: the lids should feel solid and slightly indented. If they flex, that are not shelf stable and should be refrigerated and used first.
- Wash jars, remove rings, and store in a cool, dry place for a year.
Notes
- Recipe yields 7 pint jars.
- Don't use salt that is iodized or treated with clumping agents. Sea salt or canning salt are both good choices.
- USDA preserving recipes all call for using bottled lemon juice. This assures that the acidity level in recipes is safe for canning.
- Boiling lids or heating above 180°F as once recommended can damage the sealing compound.


I almost had a disaster as I freeze my tomato crop as it becomes ripe until I have enough to be worth processing. That means my tomatoes were COLD. If I had put those jars into the boiling water in that state, they would have instantly shattered. I had this happen to me once in the past so I learned this the hard way. I warmed my jars in a sink full of hot tap water for about 10 minutes so they were at least lukewarm before going in the pot. Even with this precaution, the tomatoes separated in the jars during the processing, put air filled solids at the top and water at the bottom. They settled after removing them from the bath but the solids at the top ruined most of my seals. Mind you I was using 250ml small jam jars because I am only making servings for one person. The small size and shoulderless jars might have allowed this problem that might not happen with bigger jars. I’m debating on re-processing them or freezing them now.
I’d definitely thaw them to room temperature before jarring them.
I freeze my tomatoes because I don’t have enough at one time to can. When I remove them from the freezer, I run them under hot tap water and the skins slide off. Easy peasy.
Yep, that is a definite benefit of freezing them!
I can’t wait to try this method!! I have so many tomatoes this year, usually I just make sauce and salsa, but I will definitely be trying this! 🙂 Thanks for the inspo!